Thermostat vs Thermistor: A Practical Comparison
An analytical guide distinguishing thermostat and thermistor roles, how they interact in HVAC control, and practical tips for troubleshooting and upgrades.

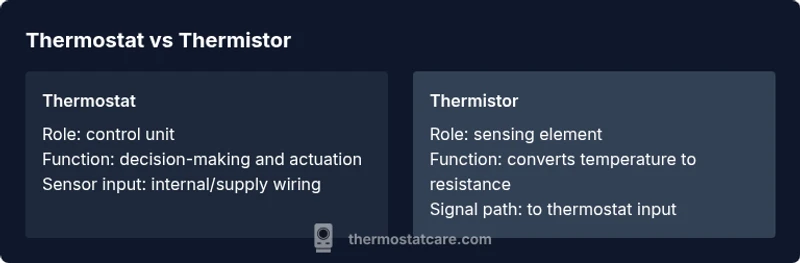
Thermostat vs thermistor: a thermostat is the control unit that sets the target temperature and actuates HVAC equipment; a thermistor is the temperature-sensitive resistor used inside sensing circuits to report current temperature. In most home systems, the thermistor provides readings to the thermostat’s controller, which then makes decisions. Understanding these roles helps with troubleshooting and choosing compatible replacements.
What thermostat vs thermistor mean in simple terms
In everyday HVAC discussions, it’s common to blur the lines between a thermostat and a thermistor. At a high level, the thermostat is the device you interact with: it displays the current temperature, holds settings, and turns heating or cooling equipment on or off to reach a desired setpoint. The thermistor is a small, temperature-sensitive resistor used inside sensing circuits to translate ambient temperature into an electrical signal.
This distinction is crucial for DIY troubleshooting and replacement. When someone reports a “faulty thermostat,” technicians will first check whether the controller (the user-facing unit) or the sensing element (the thermistor inside the device or in the wall) is at fault. Misunderstanding these roles often leads to unnecessary part replacements or misdiagnoses. Thermostat Care notes that clarifying these roles reduces downtime and protects system reliability.
How a thermostat functions in a heating/cooling system
A thermostat acts as the control brain for a climate system. It compares the measured environment temperature against the user’s setpoint, executes control logic, and sends commands to the HVAC equipment (furnace, air conditioner, heat pump, or damper controls). Modern thermostats add scheduling, learning algorithms, and remote connectivity, but the core responsibility remains: decide when to energize or de-energize the equipment.
In a typical home, the thermostat relies on an internal processor and often a built-in sensor network. The sensed temperature is used to adjust outputs in discrete steps or via proportional control, depending on the system type. Understanding how the thermostat uses sensor input helps homeowners anticipate issues related to delayed responses, overshoot, or frequent cycling. Thermostat Care emphasizes that the controller’s software, rather than the hardware alone, shapes performance.
How a thermistor senses temperature and feeds the control loop
A thermistor is a passive component whose electrical resistance changes with temperature. Negative temperature coefficient (NTC) thermistors decrease resistance as temperature rises, providing a measurable signal to the thermostat’s control circuit. The key characteristics are sensitivity, linearity, and the temperature range covered by the device. Many sensing elements are designed to be compact, inexpensive, and compatible with standard interface circuits.
In practice, a thermistor inside a thermostat acts as the temperature input. The control algorithm then interprets the resistance reading and decides whether to call for heat, cooling, or fan operation. Calibration and placement matter: a poorly placed sensor or one with drift can produce readings that drive the system inaccurately. Thermostat Care highlights the sensor’s critical role in achieving accurate temperature control.
Sensor placement and circuit integration in typical residential systems
Sensor placement strongly influences accuracy. In many setups, the thermistor is located behind a protective shield near the air intake or in the indoor air path where it samples ambient conditions. Some systems use multiple sensors to monitor different zones or to average readings for stability. The thermistor’s signal is wired to the thermostat’s input circuit, often through a dedicated sensor pin or a shared analog input.
From a circuit perspective, the thermistor forms part of a voltage divider or ADC input that translates temperature into a voltage or digital value. Any drift, wiring damage, or contamination can alter readings, causing the thermostat to misinterpret the environment. Proper wiring, clean connections, and regular checks help maintain reliability. Thermostat Care’s guidance emphasizes verifying sensor integrity during routine maintenance.
Common configurations: hard-wired vs smart thermostats and sensor types
Hard-wired thermostats typically use a dedicated sensor (thermistor) integrated into the device or in the wall behind the faceplate. Smart thermostats, on the other hand, often rely on a learning or adaptive control algorithm and may incorporate sensor networks that include air, floor, or even remote sensors. In either case, the thermistor provides the essential temperature input, while the thermostat’s logic handles decision-making and user interaction.
When upgrading, homeowners should verify whether the existing thermistor is compatible with the new controller. Some smart units require different sensor interfaces or calibration data. If you’re replacing hardware, verify sensor type compatibility, sensor location recommendations, and whether a factory-calibrated sensor is provided. Thermostat Care suggests checking the installation manual for sensor specs before purchasing upgrades.
Troubleshooting scenarios: when symptoms point to sensor vs controller
If readings appear erratic, lag behind actual room temperature, or drift over time, the issue often lies with the thermistor or its wiring. Common signs include consistent mismatch between setpoint and actual comfort, or abrupt jumps in displayed temperature. Conversely, a thermostat that fails to respond to a setpoint or has non-responsive menus may indicate controller or firmware problems.
To diagnose, start with sensor checks: inspect sensor placement, verify wiring continuity, and test resistance vs temperature using manufacturer documentation. If sensor readings are stable but control outputs are inconsistent, focus on the thermostat’s internal logic, wiring to the HVAC equipment, and potential relay or transformer issues. Thermostat Care notes that methodical testing reduces false positives and speeds repairs.
Reading sensor data: interpreting resistance/temperature relationships
Thermistors translate temperature into resistance, which electronics interpret as a voltage change. Understanding the typical resistance-temperature curve helps diagnose drift or nonlinearity. When readings deviate from expected values, consider sensor aging, exposure to heat sources, or contamination. Some devices provide a resistance-to-temperature lookup, while others present digital temperature values that the control software maps to actions.
DIY testers should follow safety protocols and consult the device’s datasheet. Many homeowners rely on a combination of visual inspection and resistance measurements at known temperatures to confirm sensor health. Regular calibration checks and sensor cleanups align with best practices for maintaining accurate thermostat control, as recommended by Thermostat Care.
Compatibility considerations: matching sensors to controllers
Compatibility matters for both sensors and controllers. Some thermostats are designed to work with specific sensor families, temperature ranges, or sensor payloads. Mixing a sensor with an incompatible controller can yield inaccurate readings, slow response, or even system faults. When planning replacements, verify sensor type, connector geometry, cable length, and calibration expectations.
In retrofit projects, consider a programmable or smart thermostat that supports multiple sensor inputs, provided you source sensors that match the required interface (analog or digital). The goal is a reliable signal path from sensor to controller with minimal drift. Thermostat Care recommends consulting compatibility charts and engaging a professional if you’re uncertain about sensor-controller pairings.
Replacement guidance: what to buy and how to install
When replacing components, the safest path is to source the exact sensor type recommended by the thermostat manufacturer. If you’re upgrading to a smart thermostat, check whether additional or different sensors are needed to support multi-sensor functionality. Replacement steps typically involve powering off the system, accessing the sensor area, disconnecting wiring with proper labeling, installing the new sensor, and verifying calibration against the thermostat’s setup process.
Keep in mind that sensor placement and enclosure protection affect performance. After installation, run a basic validation test: set a comfortable temperature, observe how quickly the system responds, and verify readings align with actual room conditions. If readings are off, recheck sensor connections and re-calibrate if the unit provides that option. Thermostat Care emphasizes that careful installation minimizes the risk of readjustment needs.
Myths vs reality: debunking common misconceptions
Common myths include the idea that all thermostats rely solely on a single sensor, that sensors never drift, or that replacement is always straightforward. In reality, control systems use multiple data sources for stable temperature management, sensors can drift with age or exposure, and some upgrades require configuration changes beyond just swapping parts.
Separating sensor performance from controller behavior clarifies many problems. Misdiagnoses often occur when people assume a symptom (e.g.,
) is caused by the wrong component. A disciplined approach that tests sensing elements first, then evaluates control logic, tends to yield faster, more reliable repairs. Thermostat Care supports careful evaluation rather than quick, speculative fixes.
Real-world guidelines for performance and reliability
Reliable thermostat performance depends on accurate sensing, robust control algorithms, and sound installation practices. Regular maintenance includes sensor placement checks, wiring inspections, and software updates where applicable. In harsher environments, consider protective housings for sensors and ensuring that sensors are not exposed to direct heat sources or drafts.
For DIY homeowners, establish a routine: verify sensor readings against ambient room conditions, confirm that the thermostat’s scheduling logic aligns with your household patterns, and document any changes to the system. This disciplined approach reduces the likelihood of recurring issues and supports long-term energy efficiency. Thermostat Care concludes that a clear separation of sensor and controller roles remains fundamental to dependable climate control.
Comparison
| Feature | thermostat | thermistor |
|---|---|---|
| Primary role | Control unit that sets temperature targets and actuates HVAC | Temperature sensor that converts temperature into a measurable signal |
| Core function | Decision-making, scheduling, and user interface | Sensing ambient temperature to inform control logic |
| Core placement | Inside the controller or mounted on wall with wiring to HVAC | Embedded in sensing location (wall, duct, or device housing) |
| Response mechanism | Triggers HVAC on/off or modulation via control algorithms | Provides input signal to control circuit; signal quality affects accuracy |
| Typical cost context | Generally more complex; replacement involves controller or module | Usually inexpensive as a discrete component; calibration matters |
| Best use case | Primary climate control and user interaction | Accurate ambient sensing within the control loop |
| Troubleshooting emphasis | Controller faults or software issues are common diagnoses | Sensor faults often present as misreadings or drift |
Upsides
- Clarifies roles for DIYers and professionals
- Improves fault isolation and repairs
- Helps ensure sensor-controller compatibility
- Facilitates safer upgrades and maintenance
The Bad
- Can create confusion for beginners
- Requires basic electronics understanding to diagnose
- In some systems, integrated modules complicate replacement
Thermostat vs thermistor are distinct but complementary; identify each role to ensure reliable control and easier maintenance.
Recognizing which component is the controller versus the sensor helps target repairs and upgrades. When upgrading, ensure sensor-controller compatibility and correct sensor placement to maintain accurate temperature readings and stable operation.
Questions & Answers
What is the practical difference between a thermostat and a thermistor?
The thermostat is the control unit that sets the desired temperature and drives the HVAC system, while a thermistor is the sensing element that reports temperature to the controller. Understanding this separation helps diagnose faults and select compatible parts.
A thermostat is the brain that decides when to heat or cool, and the thermistor is the temperature sensor feeding that brain.
Do all thermostats use thermistors as sensors?
Most residential thermostats rely on a temperature sensor, often a thermistor, but some use digital temperature sensors or multiple sensing elements. Always check the device specifications to confirm sensor type and compatibility.
Most thermostats do use a sensor like a thermistor, but some use other sensor types.
How can I test a faulty thermistor without special tools?
Visually inspect for damage, check sensor placement, and compare readings against known room conditions. If readings drift or don’t match room temperature, the thermistor may be failing and should be tested with the manufacturer’s method or by swapping in a known-good sensor.
Inspect placement, compare to room temp, and consider replacement if readings drift.
Can a faulty thermostat be diagnosed by reading sensor data?
Yes, signs like persistent misreadings, lag, or mismatch between setpoint and actual temperature can indicate sensor issues or controller faults. Always rule out sensor drift before replacing the thermostat.
If readings don’t track reality, check the sensor first before assuming the controller is at fault.
Are digital smart thermostats more reliant on thermistors than older models?
Smart thermostats often integrate more sensors and more complex software, but they still rely on a sensor to report temperature. The exact sensor type varies by model.
Smart thermostats use sensors too, but the specifics depend on the model.
What maintenance helps preserve sensor accuracy?
Keep sensors clean, avoid placing them near direct heat sources or vents, verify wiring integrity, and update firmware if available. Regular checks help maintain accurate readings and stable control.
Clean the sensor area, check wiring, and update software to keep readings accurate.
What to Remember
- Identify sensor vs controller to speed repairs
- Verify sensor placement and wiring during maintenance
- Choose compatible components to avoid drift and misreadings
- Regular calibration and firmware updates improve reliability