Water Heater Thermostat Test: Step-by-Step Guide for Homeowners
Learn how to safely test your water heater thermostat, interpret readings, and decide when to recalibrate or replace components. A practical, step-by-step guide for homeowners.

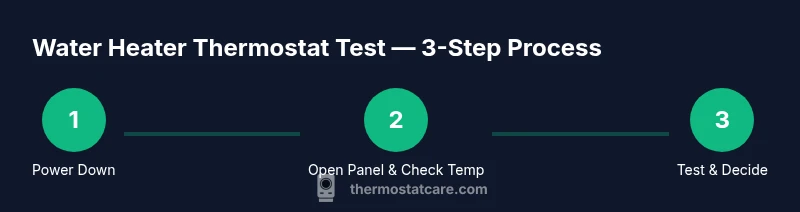
Performing a water heater thermostat test confirms whether your heater maintains the correct hot water temperature and cycles properly. Start by safely cutting power, then access the thermostat and compare the setpoint to the actual outlet water temperature using a thermometer. If readings deviate by more than a few degrees or the heater won’t cycle, plan recalibration or replacement.
What is a water heater thermostat test and why it matters
A water heater thermostat test is a practical way to verify that your hot water system maintains a safe and stable temperature. When done correctly, it helps prevent scalding, reduces energy waste, and minimizes the risk of mineral buildup from overheating. For most homes, the test involves comparing the thermostat setpoint to the actual outlet water temperature, confirming that the thermostat cycles on and off as intended, and identifying any drift over time. Regular testing is part of responsible thermostat maintenance and aligns with Thermostat Care practices for safe, efficient operation. In this guide, we’ll walk through the best practice steps, safety precautions, and interpretation tips for a do-it-yourself test that homeowners can perform with common tools.
Safety first: Before you begin testing
Safety should come first when dealing with electrical appliances and hot water. Always power off the circuit at the breaker before touching any electrical connections, and verify there is no voltage with a non-contact tester. Wait for the tank to cool if you’ve just used hot water. Wear protective gloves and eye protection, and keep a basin or towels ready for any spills. If you’re ever uncertain about wiring, or if your unit is a gas-powered system with an electronic thermostat, consider pausing and consulting a professional. The goal is to avoid electric shock, burns, or damaging the unit.
Thermostat testing is safer when you follow a clear plan and use the right tools. Keep children and pets away from the work area, and have a helper nearby in case you need a second pair of hands to stabilise panels or hold tools.
How temperature control works and what affects accuracy
Most electric water heaters use a bi-metal or electronic thermostat to regulate heating elements. The thermostat maintains the water at the setpoint by turning the element on or off as needed. Several factors can affect accuracy, including aging components, mineral buildup on sensors, thermostat calibration drift, and improper insulation around the tank. Environmental temperature in the basement and the distance to the faucet also influence the measured hot water temperature. Understanding these factors helps you interpret test results. If readings consistently deviate by more than a few degrees, you have a strong case for recalibration or replacement of the thermostat or control board.
How to perform a hands-on test using common tools
To perform a practical test without specialized equipment, you’ll compare the thermostat setpoint to the actual water temperature at the faucet. Start by turning off power, removing insulation to access the thermostat, and noting the current setpoint. Then, restore power briefly to observe if water heats to the target temperature, using a thermometer to measure outlet water. Record the temperatures and compare them to the setpoint. If the water temperature matches within ±5°F (±3°C) of the setpoint, the thermostat is likely functioning correctly. If not, you’ll need to calibrate or replace the thermostat. Always reassemble the panel and verify no leaks after testing.
Interpreting results and next steps
From the readings, determine whether you are dealing with a calibration drift, a failing sensor, or a faulty control switch. A close match (within a few degrees) generally means the thermostat is in good shape, while persistent deviation suggests recalibration or replacement. If your unit is old, consider replacing the thermostat as a cost-effective upgrade, especially if you notice frequent fluctuations. For a broader fix, inspect the heating elements and the temperature-pressure relief valve for wear. In some cases, you may be able to recalibrate the thermostat by following the manufacturer’s instructions, but many older models require a replacement module.
Maintenance, best practices, and the takeaway
Keeping your hot water at a safe and reliable temperature is a seasonal task. Regular maintenance includes flushing mineral deposits, inspecting the thermostat and sensors, and ensuring the thermostat is properly calibrated. For most households, setting the thermostat to 120°F (49°C) balances safety and energy efficiency. Schedule a yearly water heater inspection to catch drift early, and note any changes in hot water delivery. If anything seems off—unusual noises, inconsistent temperatures, or unusually hot water—pause and re-check before continuing.
Tools & Materials
- Safety glasses and gloves(Protect eyes and hands from heated surfaces and sharp edges)
- Non-contact voltage tester(Verify power is off before touching wires)
- Digital thermometer or infrared thermometer(Compare setpoint to actual water temperature)
- Multimeter(Test continuity if you have an exposed thermostat switch)
- Screwdriver set (Phillips and flathead)(Remove access panels safely)
- Nut driver or pliers(Optional for wiring connections)
- Towels, bucket, or rags(Contain spills and keep work area clean)
- Replacement thermostat (optional)(Only if testing indicates a failed component)
Steps
Estimated time: 60-90 minutes
- 1
Power down and perform a safety check
Switch off the circuit breaker dedicated to the water heater. Use the non-contact tester to confirm there is no live voltage on accessible wires. If you smell burning or see signs of damage, stop and consult a professional. Safety first is essential to prevent shock or fire.
Tip: Double-check the breaker and wait a few minutes for any residual heat to dissipate. - 2
Remove access panel and insulation
Remove the front panel and pull back insulation to expose the thermostat and wiring terminals. Note wire positions or take a photo before disconnecting anything. Keep the area dry and organized to avoid mis-wiring later.
Tip: Label wires if you detach them; it makes reassembly precise. - 3
Locate thermostat and document the current setpoint
Identify the thermostat or temperature sensor on the tank or on the control board. Write down the current setpoint and inspect for any obvious signs of wear or corrosion. If you have a user-adjustable dial, note its position relative to the markings.
Tip: If you’re unsure which component is the thermostat, consult the heater’s manual or manufacturer website. - 4
Test temperature consistency
Power the unit briefly to observe heating behavior. Use the thermometer at the hot outlet or faucet to measure the actual water temperature when you expect it to hit the setpoint. Compare against the dial setting and record any deviation. If the water is significantly hotter or cooler than expected, the thermostat may be out of calibration.
Tip: Run a controlled test by allowing the system to stabilize before taking a reading. - 5
Check thermostat function with a multimeter (where safe)
With power off, disconnect the thermostat wires and use a multimeter to test continuity across the thermostat terminals. Warm up and cool the sensor to see if the circuit opens and closes at the expected temperatures. If there is no continuity when the setpoint is reached, the thermostat may be faulty.
Tip: Only perform continuity tests if you’re comfortable with electrical work; if in doubt, skip this step. - 6
Decide on recalibration or replacement
If readings are consistently off by a few degrees, recalibration may fix the issue. If the thermostat shows poor responsiveness or damaged components, replacement is often the safer, longer-lasting option. Consider the heater’s age and energy efficiency when deciding.
Tip: Refer to the manufacturer’s calibration procedure if available. - 7
Reassemble and run a final test
Secure all panels, reconnect any wires, and restore power. Run a final hot water test to confirm the temperatures stay within the target range after reassembly. Check for leaks and ensure the area is dry before finishing.
Tip: Document the final readings and settings for future reference.
Questions & Answers
What is a safe water heater thermostat test?
A safe test starts with powering down the unit, verifying there’s no voltage, and comparing the thermostat setpoint with the actual water temperature. If readings are off or the system won’t cycle, recalibration or replacement may be required. Always follow manufacturer guidelines.
Start by turning off the power and confirming there’s no voltage, then compare the setpoint to actual water temperature. If readings don’t align, recalibration or replacement may be necessary.
Can I test without a multimeter?
Yes, you can perform a basic test by observing whether the water heats to the expected temperature at the faucet after setting the thermostat. This won’t verify electrical continuity but can confirm functional operation. For precise diagnostics, a multimeter is helpful.
You can test by watching the water heat to the expected temperature after setting the thermostat; a multimeter helps with electrical checks if you’re comfortable.
What temperature should my water heater be set to?
A common recommended setting is 120°F (49°C) for a balance of safety and energy efficiency. Some households prefer slightly higher temps for faster hot water recovery, but 120°F is a good baseline.
A typical safe setting is 120 degrees Fahrenheit, offering good comfort with energy efficiency.
Why is there a discrepancy between thermostat readings and outlet temperature?
Discrepancies can be caused by sensor drift, mineral buildup, insulation losses, or placement distance to taps. It’s important to measure right at the outlet and consider environmental factors when interpreting results.
Differences can come from sensor drift, deposits, or insulation and distance to the faucet. Measure at the outlet and factor in the setup.
Is it safer to call a professional if I’m unsure?
If you’re uncomfortable handling electrical components or you suspect a gas water heater, it’s safer to call a licensed technician. They can diagnose electrical safety, replacement parts, and proper venting without risking injury.
If you’re unsure about wiring or gas safety, contact a licensed professional for a thorough diagnosis.
Should I test my thermostat after major repairs or replacements?
Yes. After any major repair or part replacement, re-test to confirm the thermostat is calibrated and the system heats consistently. Document readings for future maintenance.
Always re-test after repairs to verify proper operation and keep a log for future reference.
Watch Video
What to Remember
- Power off before any inspection.
- Record setpoints and actual temps for accuracy.
- Small temperature drift can indicate calibration drift.
- Replace or recalibrate as needed to preserve safety and efficiency.