Replace Thermostat on a Water Heater: Step-by-Step Guide
Learn to safely replace the thermostat on your water heater with our practical DIY guide. Safety checks, the right tools, clear steps, and troubleshooting tips to help homeowners restore proper hot-water performance.

You can replace the thermostat on a water heater to restore proper hot-water temperature control. This guide covers safety checks, required tools, and a step-by-step process for both electric and gas models. By following the instructions, homeowners can perform a DIY thermostat replacement with care, starting with shutting off power or gas and draining as needed.
Why replacing the thermostat on a water heater matters
A malfunctioning thermostat is a common cause of inconsistent hot water, sediment buildup, and higher energy bills. When the thermostat sticks or drifts, the tank may heat too hot or not heat enough, risking scalding or cold showers. According to Thermostat Care analysis, a faulty thermostat is one of the top reasons water heaters waste energy each year. Replacing the thermostat can restore steady temperatures, improve efficiency, and extend the unit’s life. This guide focuses on safe, practical steps you can take as a homeowner while keeping Thermostat Care’s recommendations in mind.
Safety first: risks and precautions
Working on a water heater involves electricity or gas and water, both of which carry real risks. Always shut off power at the breaker for electric heaters, or close the gas valve and set the unit to pilot-off if you have a gas water heater. Wear safety glasses and insulated gloves, and keep a dry, organized workspace. If anything feels uncertain, pause and seek professional help. The goal is a safe replacement that reduces the risk of shocks, leaks, or gas exposure.
Understand your water heater types (electric vs gas)
Electric water heaters use electric thermostats mounted on the tank panels, often behind an access cover. Gas units use a thermostat connected to the control valve near the burner compartment. The replacement process differs slightly between models, particularly how you access the thermostat and how you test the connection. Determine your heater type by inspecting the control panel. This decision influences which thermostat you buy and the exact wiring steps you’ll follow.
Gather the right tools and replacement thermostat
Before you start, assemble the essential tools and a compatible replacement thermostat. A mismatched thermostat can fail to regulate temperature properly. Have a screwdriver (Phillips and flat-head), a nut driver or socket set, a multimeter, wire stripping/cutting pliers, electrical tape, and a container or towels to manage any water. Confirm the thermostat model number on the old part or in the user manual to ensure compatibility. This preparation aligns with Thermostat Care recommendations for safe DIY swaps.
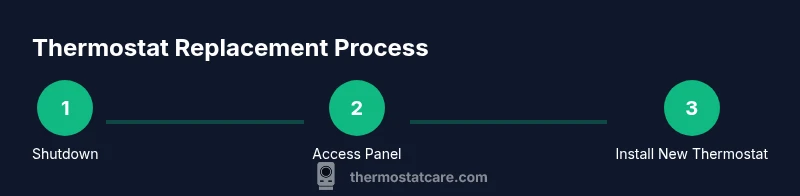
Step-by-step overview of the replacement process
With the right parts and protection, you’ll follow a structured process: shutdown, panel access, wire documentation, remove old thermostat, install new thermostat, reassemble, and test. Throughout, keep notes or photos of wire connections to ensure accurate reassembly. Expect a completed project in the 45–90 minute range for a straightforward electric or gas thermostat swap, plus time for testing the system after reassembly.
Step 1: Safety shutdown and initial checks
Turn off power to the water heater at the breaker panel (and switch off the gas valve on gas models if needed). Verify there is no voltage on the terminal screws with a multimeter. This step prevents electric shock during panel removal and wiring work. Keep tools unplugged and dry until you’re ready to work again. Safety first reduces risk and sets the stage for a successful replacement.
Step 2: Access the thermostat and inspect components
Remove the access panel and insulation to reveal the thermostat and wiring. Take a clear photo or draw a quick diagram of the wire connections before you disconnect anything. If the thermostat or its wires show signs of wear, corrosion, or scorching, replace them with a compatible part. This visual record helps you reconnect accurately and avoid miswiring.
Step 3: Disconnect and remove the old thermostat
Carefully detach wires one at a time, using the photos/diagrams as reference. Unscrew the thermostat mounting screws and lift the unit away from the body of the heater. Handle components gently to avoid damaging nearby insulation or the tank. Label wires if necessary to ensure correct reattachment.
Step 4: Install the new thermostat and reconnect wiring
Mount the new thermostat in the same orientation as the old one and reconnect wires exactly as documented. Use electrical tape to secure exposed conductors and prevent shorts. Replace any gaskets or seals that came with the new thermostat. This step is critical for reliable operation and preventing leaks or arcing.
Step 5: Reassemble, restore power/gas, and test
Reinstall the access panel and insulation, then restore power at the breaker (or gas supply). Allow the water heater to recover and stabilize temperature, which can take time. Start with a safe target temperature around 120°F (49°C) and adjust as needed. Use a thermometer or your faucet’s hot water to verify the setting.
Step 6: calibration, safety checks, and ongoing maintenance
Once the system stabilizes, verify the temperature at a faucet after several minutes of hot water flow. If the water is too hot or too cold, fine-tune the thermostat setting and re-test. Periodically inspect the thermostat area for signs of moisture, corrosion, or loose connections and address them promptly. Regular maintenance helps prevent future thermostat failures and preserves efficiency.
Tools & Materials
- Replacement thermostat compatible with your water heater model(Confirm model number before purchase)
- Screwdriver set (Phillips and flat-head)(Small sizes for thermostat screws)
- Nut driver or socket set(Secures mounting screws)
- Multimeter or thermostat tester(Verify electrical connections and continuity)
- Wire stripper/pliers(Trim and manage conductors as needed)
- Electrical tape or wire nuts(Insulate and secure wiring)
- Gloves and safety glasses(Personal protection during work)
- Drain pan or towels(Control water spills during access)
- Marker or label tape(Label wires for accurate reassembly)
- Owner’s manual or model number reference(Ensure compatibility and steps specific to your unit)
- Gasket or seal kit (if provided)(Replace if the kit includes one)
Steps
Estimated time: 45-90 minutes
- 1
Shut off power and gas, and prep the workspace
Power down at the breaker for electrical heaters or close the gas valve and set to pilot-off for gas units. Clear the area, place a drain pan if needed, and gather your tools. This ensures safety before touching live components.
Tip: Double-check the power with a multimeter before touching any wiring. - 2
Access the thermostat area
Remove the outer access panel and insulation to expose the thermostat housing. Inspect wires and assess how the thermostat is mounted. Document or photograph connections for accurate reassembly.
Tip: Keep track of which screw goes where; losing a small screw is a common DIY hurdle. - 3
Disconnect the old thermostat
Carefully loosen terminal screws and detach wires one by one. Use the photos you took as reference. Remove the mounting screws and lift the thermostat away.
Tip: Label wires with tape if you’re unsure about wire color conventions. - 4
Install the new thermostat
Position the new thermostat, align mounting holes, and secure with screws. Reattach wires per the reference, ensuring tight connections without over-tightening.
Tip: Make sure no wires are pinched by the panel or insulation. - 5
Reassemble the unit and restore services
Replace insulation and access panel. Restore power or gas and set the water heater to pilot if applicable. Allow the system to commence heating.
Tip: Start at a conservative temperature like 120°F and adjust after testing. - 6
Test temperatures and final checks
Run hot water from a faucet to verify steady temperature within 5–10 minutes. Recheck for leaks around the thermostat housing and panel.
Tip: If water is inconsistent, verify wiring and reseat connections.
Questions & Answers
Can I replace the thermostat on a water heater myself?
Yes, many electric water heaters are DIY-friendly when you follow proper safety steps and use the correct replacement part. Gas heaters add complexity and may require a licensed professional.
Yes, you can usually replace a water heater thermostat yourself if you follow safety steps and use the right part; gas units may need a pro.
Do I need to drain the tank before replacing the thermostat?
Sometimes draining a portion of the tank helps access the thermostat and prevents spills. Check your model’s manual; only drain as much as needed to reach the panel.
Often you’ll drain a bit to access the thermostat, but follow your model’s guidance.
How do I know if the thermostat is defective?
If the water doesn’t heat, heats too hot, or temperature is inconsistent, the thermostat is a likely culprit. Use a multimeter to verify continuity and compare to manufacturer specs.
Unstable or incorrect water temperatures usually point to a faulty thermostat; testing with a meter confirms it.
Can I reuse the old thermostat if it looks fine?
Even if it looks okay, reuse isn’t recommended if there are signs of wear, corrosion, or heat damage. A fresh, compatible thermostat ensures reliability.
If there’s wear or damage, use a new thermostat rather than reusing the old one.
What temperature should I set the water heater to?
A common recommended setting is around 120°F (49°C) for safety and energy savings. Adjust to your household needs, but avoid excessively high temperatures.
Most households do well around 120 degrees, but you can adjust within a safe range.
What are key safety concerns during replacement?
Shocks, gas leaks, and scalding are the primary risks. Always turn off power (and gas when applicable) and wear protective gear. If unsure, hire a pro.
Safety is the priority: power off, gas off, and proceed with care.
Watch Video
What to Remember
- Identify the correct thermostat model before purchasing.
- Follow safety shutdowns to avoid shocks or leaks.
- Document wiring connections to ensure accurate reassembly.
- Test and calibrate temperature gradually after replacement.