Replace Thermostat Electric Water Heater: DIY Guide
Step-by-step instructions to replace the thermostat on an electric water heater, including safety checks, compatibility tips, wiring guidance, and testing. Learn practical, homeowner-friendly methods from Thermostat Care for a reliable fix.

To replace a thermostat on an electric water heater, first confirm compatibility, shut off power at the breaker, drain the tank if needed, install the new thermostat, rewire, restore power, and test the system. You'll need a compatible replacement thermostat kit, basic hand tools, a multimeter, and a bucket for any draining. This guide walks you through each step.
Understanding Electric Water Heaters and Why the Thermostat Matters
Electric water heaters rely on two thermostats (upper and lower) to regulate heating elements, maintaining consistent water temperature. When a thermostat fails, you may notice overshoot temperatures, cold water bottlenecks, or uneven heating. According to Thermostat Care, replacing a faulty thermostat with a compatible unit restores precise temperature control, improves energy efficiency, and reduces the risk of overheating. In practice, understanding which thermostat controls which element helps you diagnose failures: the upper thermostat typically governs the upper element, while the lower thermostat handles the bottom element. If only one thermostat fails, you might experience fluctuating temperatures or insufficient hot water. By recognizing the common failure modes and compatibility concerns, you can plan the replacement with confidence and a safety-first mindset.
Safety First: Tools, Precautions, and Preparation
Safety is the foundation of any thermostat replacement. Begin by turning off power at the circuit breaker labeled for the water heater, then verify there is no voltage with a non-contact tester. Wear insulated gloves and eye protection, and ensure your work area is dry. If you choose to drain some water to ease access, have towels and a bucket ready, and close the cold-water supply to minimize water in the tank. Label wires before disconnecting and take a photo of the wiring layout. These precautions help prevent electric shock, burns, or water damage. Remember, if you’re unsure about any step, pause and seek guidance from Thermostat Care or a licensed professional.
Choosing the Right Replacement Thermostat
Not all thermostats fit every electric water heater. Start by checking your unit’s model number and the thermostat’s compatibility, including the number of wires (2-wire vs 4-wire), temperature range, and mounting style. If your system uses two thermostats, consider installing a matched pair or a dual-kit designed for your model. Using an incompatible thermostat can cause inaccurate temperatures, reduced heater life, or tripping breakers. When in doubt, consult the heater’s manual or Thermostat Care guidance for compatibility notes. A properly matched thermostat ensures reliable operation and preserves any existing warranty.
Understanding the Replacement Process (Overview)
The replacement process translates electrical compatibility into physical installation. You’ll access the thermostat housing, document the wiring, remove the old unit, install the replacement, reconnect wires, reassemble insulation and the access panel, and finally restore power for testing. If your unit uses separate upper and lower thermostats, ensure you’re replacing the correct one or replacing both as needed. Some models require calibration after installation to achieve the desired temperature range. This overview helps you plan your workflow so you can work cleanly and safely with minimal downtime.
What Can Go Wrong and How to Troubleshoot
After replacement, verify the heater powers up and begins heating according to the setpoint. If there’s no heat, recheck all wire connections for loose or crossed wires; incorrect connections are a frequent cause of failure. If the water runs too hot, lower the setpoint and confirm thermostat calibration. Leaks around fittings indicate seal wear or an improper valve position rather than a thermostat fault. If the breaker trips again, inspect for shorts or damaged insulation. In persistent cases, consult a licensed electrician or plumber to diagnose electrical or plumbing issues beyond a thermostat replacement.
Maintenance Tips and When to Call a Pro
Regular inspection extends thermostat life. Periodically check the wiring for signs of wear, ensure mounting screws remain snug, and keep the thermostat area free of dust. Clean components gently and avoid moisture intrusion, which can affect sensors. If you notice frequent temperature swings or recurring breaker trips, it’s time to seek professional help. The Thermostat Care team recommends using only compatible parts, adhering to manufacturer guidelines, and scheduling professional maintenance to protect your warranty and ensure safety over the long term.
Tools & Materials
- Replacement thermostat kit compatible with your water heater model(Check model number and temperature range; include upper and lower units if applicable)
- Screwdrivers (flathead and Phillips)(Varied screw sizes; have both types ready)
- Needle-nose pliers(For gripping wires and small components)
- Wire stripper/cutter(Trim or prep wires as needed)
- Multimeter(Testing continuity and voltage across terminals)
- Non-contact voltage tester(Quick voltage verification before touching wires)
- Electrical tape(Secure wire connections and insulate exposed conductors)
- Bucket and towels(Contain any water if you drain the tank)
- Gloves and safety glasses(Personal protection against shocks and debris)
- Marker or label tape(Label wires for accurate reconnection)
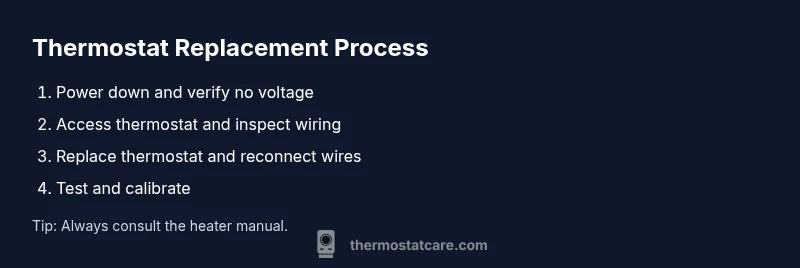
Steps
Estimated time: 30-60 minutes
- 1
Power down and verify no voltage
Turn off the circuit breaker that feeds the water heater. Use a non-contact voltage tester to confirm there is no live voltage present before touching any wiring. This step prevents electric shock during interior component work.
Tip: Double-check the correct breaker label; if you’re unsure, power down the main panel and test again. - 2
Access thermostat housing
Remove the outer access panel and any insulation to expose the thermostat unit. Keep track of screws and avoid bending or tearing insulation. This access is necessary to reach the thermostat without damaging other components.
Tip: Keep a magnetic tray handy to prevent screws from dropping inside the tank area. - 3
Document wiring layout
Take clear photos or make a diagram of how wires connect to the thermostat terminals. Label wires with tape if needed. Accurate reference prevents miswiring during reassembly.
Tip: Label color-coded wires consistently and verify terminal order before disconnection. - 4
Disconnect old thermostat
Loosen and remove wires from the thermostat terminals, then remove the thermostat from its mounting. Keep wires organized to simplify the final reconnection.
Tip: Do not bend or stretch wires excessively; if wires are long, coil them neatly out of the way. - 5
Install replacement thermostat and reconnect wires
Attach the new thermostat, aligning wires to the same terminals as documented. Tighten screws firmly without over-torquing. Ensure all connections are clean and dry before resetting.
Tip: If the new thermostat includes two units, replace both if the original setup used upper and lower thermostats. - 6
Reassemble, restore power, and test
Reattach insulation and the access panel, then restore power at the breaker. Set the thermostat to a mid-range temperature and observe the heating behavior. If temperature seems off, recalibrate per the manual and re-test.
Tip: Keep a thermometer handy to monitor actual water temperature during test runs. - 7
Calibrate and finalize
Fine-tune the setpoint to your household preference (commonly around 120°F). Confirm consistent heating across cycles and monitor for any unexpected behavior over the next 24–72 hours.
Tip: Document your final settings for future reference and warranty records.
Questions & Answers
How do I know if the thermostat is bad on an electric water heater?
Common signs include water that’s too hot or not hot enough, temperature swings, or no heating. Use a multimeter to check continuity and verify connections, and consult a professional if uncertain.
Look for erratic temperatures and use a meter to check continuity; if unsure, get professional help.
Do I need to drain the tank before replacing the thermostat?
Draining is optional but can help prevent spills and provide access. If you drain, do so gradually and catch water in a bucket; otherwise you may replace while the tank holds some water.
Draining isn’t always required, but it can make the job cleaner.
DIY or hire a pro for thermostat replacement?
If you’re comfortable with basic electrical work and wiring diagrams, you can DIY. If you encounter gas water heaters, leaks, or uncertain wiring, hire a licensed electrician or plumber.
DIY can work for confident homeowners, but know when to call a pro.
What temperature should I set the water heater to?
Many households use 120°F (49°C) as a safe standard. If you have small children, you might adjust slightly, but avoid settings that pose a scalding risk.
A safe starting point is around 120°F.
What tools are required for replacement?
Typically, you’ll need a replacement thermostat kit, screwdrivers, pliers, a multimeter, and electrical tape. Have towels and a bucket on hand for spills.
Have the right tools ready before you start.
Will replacing the thermostat fix leaks or tank problems?
No. Thermostat replacement addresses temperature control, not tank integrity or leaks. If you see rust, leaks, or signs of wear, inspect the tank or call a professional.
Thermostat fixes temperature issues, not leaks.
Can dual thermostats be replaced separately?
If your unit uses two thermostats (upper and lower), replacing both typically yields the best results in temperature stability. Check your manual before proceeding.
Often both thermostats should be replaced together for best results.
Watch Video
What to Remember
- Power down first and verify no voltage
- Use compatible thermostat parts to avoid issues
- Document wiring and follow diagrams carefully
- Test heating and calibrate settings after install
- Seek professional help if you encounter uncertainty