How to Check Thermostat on Water Heater
Learn how to safely check and adjust your water heater thermostat to ensure reliable hot water and lower energy bills. This Thermostat Care guide covers safety, location, testing, adjustment, and maintenance.

This guide shows how to check the thermostat on your water heater to ensure it delivers safe, efficient hot water. You'll verify thermostat settings, locate the control, test temperature with a thermometer, and adjust if needed. Basic safety steps included; consult a pro for gas units. This quick answer outlines the process.
Why checking the thermostat on a water heater matters
If you're asking how to check thermostat on water heater, this guide helps you understand why the thermostat matters. The thermostat on your water heater is a simple, crucial control for safety, comfort, and energy efficiency. If the setting is too high, you risk scalding and higher energy bills; if it’s too low, you may run out of hot water or let bacteria thrive. According to Thermostat Care, proper thermostat settings on your water heater can improve safety and energy efficiency, especially in homes with children or seniors. A common pitfall is leaving the thermostat at a higher temperature than needed to compensate for perceived cold. Thermostat Care analysis, 2026 notes that many households keep water heaters hotter than necessary, which wastes energy and increases costs. By learning to check the thermostat, you gain a quick, practical way to protect your family and trim energy use without costly upgrades.
Safety considerations before you begin
Safety should drive every thermostat check. Electric water heaters require cutting power at the breaker; gas units require turning off the gas supply and ensuring adequate ventilation. Do not work around a wet area or while the tank is hot. Wear gloves and use insulated tools as needed. If you smell gas or hear unusual noises, stop and call a licensed technician. The goal is to confirm settings and establish a safe baseline, not to diagnose a complex electrical fault. In practice, take a quick moment to locate the shutoff, verify you have identified the correct circuit, and confirm you have a non-contact voltage tester on hand.
Where the thermostat sits on different water heater types
Electric water heaters typically place thermostats behind a removable access panel near the top or middle of the tank. Gas units usually hide the thermostat behind a front access plate and are often paired with a separate gas control valve. Before you touch anything, consult the manual for your model. Use a screwdriver to remove panel screws if needed, and avoid touching heating elements directly. Remember: the thermostat does not resemble a fuse box, but it is still a sensitive control that can be damaged by moisture or rough handling.
How to check the thermostat setting and temperature
Begin by turning off power or gas supply to the water heater. Remove the access panel to expose the thermostat dial and any labeling. Read the current set temperature and compare it with the recommended safe target of around 120°F (49°C). If your unit lacks a labeled target, use the manufacturer's guidelines. If the dial is hard to read, take a photo and zoom in to confirm the mark. After confirming the set temperature, reassemble the panel carefully if you need to make an adjustment.
Testing the water temperature with a thermometer
To verify that the thermostat is delivering the right temperature, run hot water from a nearby faucet for 2–3 minutes. Use a digital thermometer to measure the water temperature at the tap. Compare the reading to the target (approximately 120°F / 49°C). If readings are consistently lower or higher than target by more than a few degrees, you likely need to adjust the thermostat and retest after the tank re-heats. Record the result for future reference.
Adjusting the thermostat safely
If you need to raise or lower the setting, use the appropriate screwdriver and gently rotate the thermostat dial. Make small adjustments (5–10 degrees) and wait 30–60 minutes for the water to reheat before testing again. If the dial is hard to turn or the numbers are worn, replace the thermostat or consult a professional. After adjusting, reassemble the panel, restore power, and monitor temperatures at several taps to ensure stability. Pro tip: label the current setting so you know the baseline next time.
When to replace the thermostat or call a professional
If the thermostat dial is unresponsive, the water never heats to the target, or the test shows temperatures outside a safe range, a faulty thermostat is likely. For gas water heaters, if you smell gas, hear a hiss, or notice pilot light issues, stop and contact a licensed technician immediately. Electric units with frequent cycling, unusual noises, or tripped breakers also warrant professional evaluation. The goal is safe, reliable hot water—not DIY risk.
Common myths and quick troubleshooting
Myth: High water temperature always means more comfortable showers. Truth: Extremely hot water increases scald risk and energy waste. Myth: A thermostat cannot fail. Truth: Thermostats can drift over time and may require replacement. Quick troubleshooting tips include verifying power, checking the panel labels, and retesting with a thermometer at multiple fixtures to confirm consistent results.
Maintenance tips to keep the thermostat accurate
Schedule a semiannual check as part of your home maintenance plan. Keep a small log of thermostat settings and water temperatures, so you notice drift over time. Clean any dust from the panel and ensure vents or openings remain unobstructed. If you have a heat pump or electric water heater, consider coordinating with your HVAC maintenance to ensure the thermostat control aligns with your overall system settings. Regular checks reduce the chance of cold showers and energy waste.
Tools & Materials
- Non-contact voltage tester(Essential for electrical safety; do not rely on touch.)
- Screwdriver set (Phillips and flathead)(Needed to remove access panels and dial covers.)
- Digital thermometer(For accurate water temperature readings at taps.)
- Gloves (insulated)(Protect hands when handling panels and hot water.)
- Flashlight(Good illumination inside panel areas.)
- Bucket or container(Catch drips when testing hot water.)
- Notebook and pen(Record temperatures and settings for future checks.)
Steps
Estimated time: 45-60 minutes
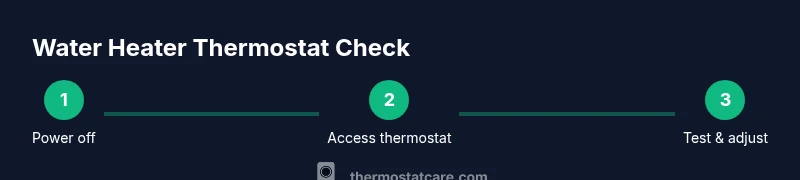
- 1
Power off and verify safety
Turn off the power to the water heater at the main breaker, or shut off the gas supply for a gas unit. Use the non-contact tester to confirm no live voltage where you will work. Wait a few minutes for any residual heat to dissipate.
Tip: Always confirm there is no electricity or gas flowing before touching any components. - 2
Access the thermostat
Remove the outer access panel with a screwdriver to expose the thermostat dial and labeling. For gas units, open the front panel to reveal the gas control and thermostat behind it. Do not touch heating elements or exposed wires.
Tip: Keep track of screws and parts so you can reassemble easily. - 3
Read the current setting
Look at the thermostat dial and note the current set temperature. If a target temperature is printed on the label, use that as a reference; otherwise use the guideline of about 120°F (49°C).
Tip: A photo can help you verify the exact position of the dial marks. - 4
Test water temperature at a faucet
Before adjusting, run hot water from a nearby faucet for 2–3 minutes to clear any stagnant water. Use a digital thermometer to measure the water temperature at the tap.
Tip: Test at multiple fixtures to check consistency across the home. - 5
Adjust the thermostat if needed
If the reading is far from target, gently rotate the dial to raise or lower the set point in small increments (5–10 degrees). Re-check after the tank reheats.
Tip: Small changes prevent overshooting the desired temperature. - 6
Reassemble and power back on
Replace the thermostat cover and access panel. Restore power or gas supply and allow the tank to reheat for at least 1 hour before testing again.
Tip: Ensure all screws are tight and panels are sealed. - 7
Retest for consistency
Run hot water again at the faucet and measure temperature. If readings are inconsistent, repeat steps 4–6 or consider thermostat replacement.
Tip: Keep a log of readings for trend tracking. - 8
Document and schedule maintenance
Record the final setting and any observed drift. Schedule semiannual checks to maintain safe, efficient operation.
Tip: Set a calendar reminder so you don’t skip future checks. - 9
Know when to call a pro
If you encounter stubborn drift, corrosion, or unsafe gas behavior, contact a licensed technician. Do not override safety features.
Tip: Professional help is the safest option for complex issues.
Questions & Answers
Is it safe to check my water heater thermostat myself?
Yes, with the power off and proper precautions. Gas units require extra care due to flame and venting; if uncertain, hire a pro.
Yes, you can check it safely if you power off first and follow steps; for gas units, be cautious.
What temperature should a water heater thermostat be set to?
The commonly recommended safe setting is around 120°F (49°C).
Aim for 120 degrees Fahrenheit for safety and efficiency.
How can I tell if my thermostat is faulty?
If water is too hot or not hot enough consistently after adjustments, or the dial is unresponsive, the thermostat may be faulty.
If temps vary a lot or the dial won’t respond, the thermostat could be the issue.
Do I need to drain the tank to check the thermostat?
Draining is usually unnecessary just to check; follow panel instructions. Drain only for maintenance.
Usually you don’t need to drain the tank to check the thermostat.
What should I do if I smell gas near a gas water heater?
Evacuate the area, call emergency services, and contact a licensed technician immediately.
If you smell gas, leave the area and call for help right away.
Is there a difference between electric and gas water heaters in thermostat checks?
Yes; electric units have electrical panels and heating elements; gas units have a gas control and venting considerations.
Yes, they differ in access and safety considerations.
What to Remember
- Power off before inspection.
- Set around 120°F for safety.
- Test at multiple taps to confirm consistency.
- Reattach panels securely after work.
- Schedule semiannual thermostat checks.