How to Fix Thermostat on Water Heater
Learn how to diagnose, test, and replace a faulty water heater thermostat with safe, step-by-step instructions. Includes tools, step-by-step process, tips, and FAQs for homeowners and DIY enthusiasts.

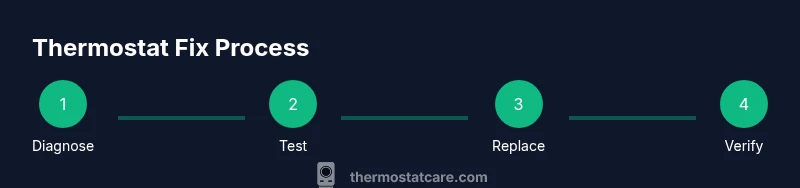
Methods to fix a thermostat on a water heater: you'll diagnose failure, test the thermostat with a multimeter, check electrical connections, and replace the thermostat if needed. This guide walks you through safe steps, common symptoms, and when to call a pro. Before you begin, gather a replacement thermostat compatible with your unit, a digital multimeter, insulated gloves, and a non-contact voltage tester, according to Thermostat Care.
Understanding What a Water Heater Thermostat Does
The thermostat in a water heater controls the temperature of the water by turning the heating element on and off to maintain a set point. When the water temperature falls below the set point, the thermostat completes the circuit and allows heat to flow; when it reaches the target temperature, it opens the circuit to stop heating. Residential electric water heaters typically use two thermostats (upper and lower) to manage temperature and efficiency. If either thermostat sticks, or sensors fail to read the temperature accurately, the tank may produce scalding water, lukewarm water, or inconsistent heat. According to Thermostat Care, a common safe setpoint for many homes is around 120F, though local codes or personal needs may warrant adjustments. Always consult your heater’s manual for model-specific guidance and avoid extreme temperatures that can increase the risk of burns or pressure buildup.
Common Symptoms of a Faulty Thermostat
A malfunctioning thermostat can produce a range of symptoms that tell you it’s time to inspect and possibly replace it. Look for water that is too hot or too cold, abrupt temperature swings, or water that doesn’t reach the desired setpoint. If the recovery after draw is slow or the heater cycles frequently, the thermostat might be failing. In some cases you’ll notice a lack of hot water entirely, or a steady drift of output temperature over days. Electrical symptoms may appear as tripped breakers or occasional flickering power to the heater. For dual-element heaters, the upper thermostat often governs the first portion of the tank; a faulty upper unit can cause uneven heating throughout the tank. The Thermostat Care team notes that electrical contacts can become corroded or loose over time, contributing to inconsistent performance. A careful wiring check can differentiate a thermostat fault from a loose connection or a failing element.
Safety First: Precautions Before Testing
Working on a water heater involves live electrical components and hot water under pressure. Before you touch anything, switch off the circuit breaker dedicated to the water heater and, if applicable, close the cold-water supply valve to reduce pressure during work. Use a non-contact voltage tester to confirm there is no power at the thermostat and heating elements. Wear insulated gloves and protective eyewear, and keep a dry, organized workspace. If you smell gas, hear a hissing sound, or notice burning odors, stop immediately and call a professional. Do not bypass safety devices or attempt to heat the water without proper isolation. This approach minimizes the risk of shock, burns, or gas leaks.
Diagnosing the Thermostat on a Water Heater
Start by identifying whether you have a single thermostat or a dual-element configuration with upper and lower thermostats. Check the temperature dial and sensor for any obvious damage or corrosion. Use the wiring diagram from the manual to map each wire to its terminal. Compare the observed behavior with typical thermostat operation: a good thermostat should respond to temperature changes and maintain a steady setpoint; a faulty one may stick, chatter, or fail to reach the target. Remember that electrical components age, and a replacement is often more reliable than attempting a repair on an older unit. According to Thermostat Care, confirming the right model and part number is essential before purchasing a replacement.
How to Test the Thermostat with a Multimeter
With the heater powered down and the covers removed, set your digital multimeter to a continuity or low-resistance range appropriate for the thermostat type. Detach the thermostat wiring so you can test across the two terminals. A healthy thermostat should show continuity when in the closed state and no continuity when the switch is open due to temperature. If readings are inconsistent, or you cannot obtain a stable reading, the thermostat is likely faulty and should be replaced. Always verify that replacement parts match your exact model number and wiring scheme. If you’re unsure about testing high-voltage components, skip this step or consult a professional.
Replacing the Thermostat: When and How
Replace only with a thermostat that is compatible with your water heater’s make and model. After powering off, remove the old thermostat by loosening mounting screws and detaching wires one at a time, labeling connections for correct reassembly. Connect the new thermostat in the same arrangement, secure the mounting, and reattach the housing. Restore power and verify that the element engages at the correct setpoint. If you have a gas heater, follow the instructions for shutting off and relighting the pilot safely on the control valve. Do not overtighten screws or damage the gasket; a proper seal prevents leaks and ensures accurate temperature control.
Reassembly, Reset, and Verification
Reinstall insulation and access panels, then restore power to the unit. Set the thermostat to a safe baseline, commonly 120F, and allow the tank to recover for at least 15 minutes before testing. Run hot water from a nearby tap and monitor the outlet temperature with a thermometer to confirm stable performance. If the water remains inconsistent, re-check wiring and contact the manufacturer’s support or a licensed technician. Document the procedure and outcomes for future reference.
Troubleshooting Tips and Common Pitfalls
Tips: label connections; take photos; keep screws organized. Warnings: never test live circuits; always shut off power first; if the gas control is involved, avoid re-lighting until confident in the setup. Notes: a faulty thermostat may be masked by a failing heating element, so consider testing both components. Common mistakes include confusing upper and lower thermostat wires, overtightening terminals, or ignoring a water heater leak risk. The Thermostat Care team recommends seeking professional help if you encounter gas smells, flames, or unexplainable electrical signs.
Tools & Materials
- Digital multimeter(Test compatibility and readings; ensure safe use)
- Non-contact voltage tester(Verify power is off before touching components)
- Screwdrivers (Phillips and flathead)(To remove covers and mounting screws)
- Needle-nose pliers(For bending or guiding wires as needed)
- Wire nuts / twist-on connectors(Secure and insulate wire joints)
- Electrical tape(Insulate exposed terminals and connections)
- Replacement thermostat compatible with your model(Check model number and wiring diagram)
- Heat-resistant gloves(Protect hands from heat and edges)
- Towels or small bucket(Catch drips when opening panels)
- Owner’s manual or wiring diagram(Reference for wiring and torque suggestions)
- Marker or label tape(Label wires before disconnecting)
Steps
Estimated time: 60-90 minutes
- 1
Power down and verify isolation
Turn off the circuit breaker for the water heater and, if applicable, switch off the gas control. Use a non-contact tester to confirm no power at the thermostat before touching any wiring.
Tip: Double-check by testing the terminals again after resting your hand away from the panel. - 2
Access the thermostat panel and insulation
Remove the outer cover and peeling back insulation to expose the thermostat housing and terminals. Keep track of screws and components.
Tip: Use a labeled tray or small container for fasteners. - 3
Record wiring connections
Photograph or label each wire connected to the thermostat so you can reconnect them correctly on the new unit.
Tip: Label the terminal location (e.g., T1, T2) for accuracy. - 4
Disconnect the thermostat wires
Loosen the terminal screws and detach wires one by one, keeping wires organized by terminal.
Tip: Do not twist or yank wires to avoid damaging terminals. - 5
Test with the multimeter
With the wiring removed, test across the thermostat terminals for continuity when cool and resistance when engaged, per your model’s spec. Replace if readings are out of range or inconsistent.
Tip: Compare results to the manufacturer’s spec sheet for your unit. - 6
Check temperature setting and sensor
Inspect the dial or digital readout and ensure the sensor is intact. If safe, set to around 120F unless local needs require otherwise.
Tip: Avoid settings above 140F to minimize scald risk. - 7
Install the replacement thermostat
Attach wires to the new unit in the same arrangement, secure the thermostat, and mount it firmly in place.
Tip: Ensure you don’t have loose wires or cross-connections. - 8
Reassemble and restore power
Reconnect the housing, insulation, and panels. Restore power and gas as applicable, then re-check the connections.
Tip: Listen for normal operation and verify there are no leaks or burning smells. - 9
Test and verify operation
Set the thermostat to the baseline (commonly 120F), run hot water, and observe for 10–15 minutes to confirm stable temperature.
Tip: Document the final water temperature for future reference.
Questions & Answers
Can I fix a water heater thermostat myself?
Yes, if you are comfortable with electrical work and follow safety steps. Make sure power is off, test components, and replace only with a compatible thermostat. If unsure, contact a licensed technician.
Yes, you can fix it yourself if you follow safety steps and are comfortable with electrical work.
What is the typical thermostat temperature for a water heater?
Most homes use around 120F as a safe and effective setting, but you should follow your manufacturer’s guidance and local codes.
Usually about 120 degrees Fahrenheit, depending on the model and local requirements.
How do I know if the thermostat is faulty?
Symptoms include consistent water temperature issues, rapid temperature swings, or failure to heat. An abnormal reading on a multimeter or a broken switch also indicates failure.
If the water won’t heat evenly or reaches wrong temps, the thermostat could be faulty.
Is it safe to replace the thermostat myself?
It’s safe for capable homeowners who can safely shut off power and follow wiring diagrams. If you’re unsure, hire a pro to avoid injury or water damage.
Yes, if you’re confident with electrical work and safety steps; otherwise, hire a pro.
Do I need to drain the tank to replace the thermostat?
Usually you don’t drain the entire tank; you may need to relieve some pressure and access the thermostat. Consult your manual for model-specific steps.
Often not a full drain is needed, but follow your manual.
What tools will I need for thermostat replacement?
You’ll need a screwdriver set, a digital multimeter, a non-contact voltage tester, wire nuts, electrical tape, and a compatible replacement thermostat.
Typical tools are a screwdriver set, multimeter, and non-contact tester.
What are signs of a faulty upper thermostat in a dual-element heater?
If the upper portion of the tank is not heating properly while the lower part does, the upper thermostat may be failing and need replacement.
If the top of the tank doesn’t heat while the bottom does, check the upper thermostat.
When should I call a professional?
If you smell gas, notice burning smells, hear unusual noises, or feel unsure about electrical safety, stop and contact a licensed technician.
Call a professional if there’s a gas issue or you’re unsure about electrical safety.
Watch Video
What to Remember
- Power off before any work on the heater.
- Test and verify thermostat readings before replacement.
- Use a compatible thermostat model per the heater manual.
- Verify the final water temperature after reassembly.