How to Check If Your Water Heater Thermostat Is Bad
Diagnose and fix a faulty water heater thermostat with a practical step-by-step guide from Thermostat Care Team. Quick checks, safety tips, and troubleshooting flow for homeowners.

According to Thermostat Care, a failing water heater thermostat is the most common reason for inconsistent hot water. Quick fix: first verify power to the unit, then reset the control and confirm the set temperature. If temperatures remain unpredictable or the heater won’t heat at all, follow the diagnostic flow to confirm whether the thermostat is bad.
Understanding what your water heater thermostat does
Your water heater thermostat is the control that sets and maintains the tank temperature, signaling the heating element or burner when heat is needed. On electric models there are often two thermostats, upper and lower, each with its own sensor and safety switches. Gas units rely on the thermostat to instruct the burner. A healthy thermostat keeps water at a consistent, safe temperature and prevents wasted energy. According to Thermostat Care, a failing thermostat shows up as uneven temperatures, delays in heating, or a tank that cycles more than normal. Knowing how the thermostat interacts with the heating system helps homeowners spot problems early and avoid unnecessary part swaps. If you notice water that is too hot or too cold, or if the temperature seems to jump around, a thermostat fault is a likely suspect. This guide keeps you on a safe, proven path to verify the thermostat and decide what to do next. Thermostat Care emphasizes a calm, methodical approach to testing before replacing parts.
Safety first: quick checks you can perform safely
Safety is non-negotiable when you work near a hot water tank. Start by cutting power to the water heater at the breaker panel and ensuring the area around the unit is dry. The Thermostat Care team warns against touching live terminals or working when there is standing water nearby. Use a non-contact voltage tester to confirm the circuit is de-energized. If you must open the access panel, work with dry hands and keep the area clear of tools near the tank. Look for obvious issues: loose screws, damaged insulation, burnt smells, or signs of water leakage. If you detect scorching, melted plastic, or buzzing sounds, stop and call a professional right away. After confirming power is off and the area is safe, recheck that you’re following the manufacturer guidelines for any procedures. These steps reduce the risk while you diagnose potential thermostat problems.
Common signs that the thermostat may be failing
Uneven or fluctuating hot water is the primary sign of a thermostat issue. Other indicators include water that never reaches the desired temperature, rapid changes in heat, or a thermostat display that is blank or flickering. If your heater trips breakers or overheats frequently, the thermostat could be at fault or there could be an electrical issue elsewhere in the system. Thermostat Care notes that some signs overlap with sensor or element problems, so a careful, methodical test is essential. Document symptoms and compare with your water’s actual temperature, rather than relying solely on the thermostat dial. This helps you distinguish between calibration drift and an outright failure. By tracking patterns (time of day, water usage, and temperature swings), you’ll have solid clues for whether to attempt a repair or call a pro.
Diagnostic flow: symptom to diagnosis
The diagnostic flow guides you from symptom to probable cause with safe, incremental checks. Start with the symptom: heat is inconsistent or absent. Next, consider high-probability causes like thermostat failure, loose wiring, or a tripped breaker (likelihoods: high, medium, low). For each cause, apply simple fixes first (e.g., reset power, tighten connections) before moving to more involved actions like testing continuity. If basic steps do not restore consistent heat, you should replace the thermostat or have a licensed technician inspect the wiring and the tank. Thermostat Care encourages documenting each step and confirming that the tank is not leaking before proceeding with hardware changes. If you encounter unresolved heat issues after attempting the flow, professional help is advised to avoid safety risks.
Step-by-step: how to test the thermostat with basic tools
This section provides a practical, safe repair path for the most common thermostat problem. Each step builds on the previous one, with a clear path to replacement if needed. Start with power-down, then inspect the thermostat housing, and finally test wiring and sensor continuity. After any replacement, reassemble, restore power, and verify the water heats normally again. If you’re uncomfortable with any electrical testing, skip to professional service. Throughout, keep the area dry and organized, and label wires if you disconnect anything. Thermostat Care recommends taking photos before removing wires, so reassembly is straightforward. Thorough testing helps you decide whether the thermostat is truly bad or if the issue lies elsewhere in the system.
Prevention and maintenance to extend thermostat life
Prevention is better than repair. Regular inspections of the thermostat housing, wiring insulation, and mounting hardware can prevent common faults. Keep the access panel closed and intact to protect the thermostat from dust and moisture. When you notice signs of wear or corrosion on terminals, address them promptly. Gentle calibration checks when seasons change can prevent drift, and keeping the area around the heater clean reduces overheating risks. Thermostat Care suggests scheduling a yearly quick check, especially if you have hard water or frequent hot water usage. By staying proactive, you minimize surprises and extend the life of your thermostat and heater system.
Steps
Estimated time: 60-90 minutes
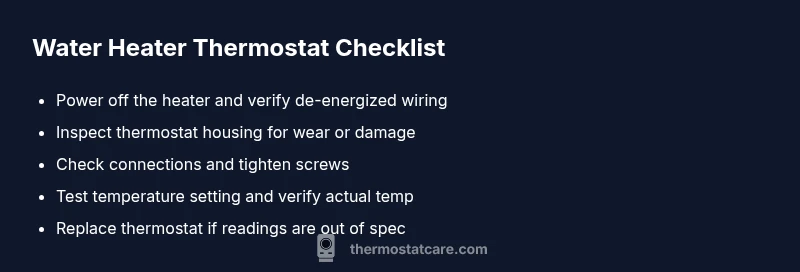
- 1
Power down for safety
Shut off power to the water heater at the main breaker panel and verify with a tester that the circuit is dead before touching any components.
Tip: Double-check that the breaker feeding the heater is the correct one to avoid accidental power on. - 2
Access the thermostat area
Remove the outer panel and the thermostat cover carefully. Note the location of each wire and keep track of screws and terminals.
Tip: Label wires or snap a photo before disconnecting anything to simplify reassembly. - 3
Inspect for visible problems
Look for loose screws, burnt insulation, corrosion, or damaged wires. Any sign of heat damage means you should stop and consider replacement or professional inspection.
Tip: Do not force wires or torque screws—damaged insulation can be a sign of deeper issues. - 4
Check thermostat settings and calibration
Verify the thermostat setting is appropriate for your household needs and check if the actual water temperature aligns with the setting.
Tip: If you don’t have a reliable temperature gauge, use a cooking or kitchen thermometer to estimate water temperature. - 5
Test electrical continuity
With power off, disconnect the thermostat and test between its terminals using a multimeter to confirm proper resistance as per the model’s spec.
Tip: Only perform this if you’re comfortable with meters and electrical testing. - 6
Replace if faulty and reassemble
Install a compatible thermostat, connect wires in the correct order, reattach the cover, and secure the panel.
Tip: Take a final photo of wiring before you remove anything so you can reproduce it accurately.
Diagnosis: Water heater not heating properly or inconsistent temperatures
Possible Causes
- highThermostat failed or out of calibration
- mediumLoose or damaged wiring to the thermostat
- lowElectrical supply issue (breaker, outlet, or short)
Fixes
- easyTest power at the breaker and reset if tripped
- mediumTighten connections and replace damaged wiring to the thermostat
- hardReplace the thermostat or call a licensed professional for wiring and safety checks
Questions & Answers
What are the most common signs that my water heater thermostat is failing?
Look for inconsistent water temperature, water that’s too hot or too cold, or frequent temperature fluctuations. A blank or flickering thermostat display can also indicate a fault. If symptoms persist after safe checks, the thermostat is a likely culprit.
Common signs include uneven hot water and a flickering thermostat display. If issues persist after basic checks, the thermostat is likely faulty.
Can I test the thermostat without draining the tank?
You can perform some tests with the tank full, but for accurate temperature readings or resistance tests you may need to power down and access the thermostat. Never attempt electrical testing if you’re unsure about safety.
Some tests can be done with the tank full, but for accurate checks you may need to power down and access the thermostat.
Is replacing the thermostat expensive?
Thermostat replacement costs vary by model and whether you do it yourself or hire a pro. In general, parts are affordable, but labor and potential re-wiring can add to the total.
Costs depend on the model and labor; parts are usually affordable, but professional installation can add to the total.
When should I call a professional for a water heater thermostat issue?
If you’re uncomfortable with electrical work, hear buzzing or smell burning, see water leaks, or the heater trips breakers, stop and contact a licensed technician. Safety is the priority.
Call a professional if you’re unsure about electrical testing or see signs of damage or leaks.
What safety precautions should I take before testing?
Always cut power at the breaker, keep the area dry, and use proper protective gear. If you notice any signs of damage, stop and seek professional help.
Turn off the power at the breaker and stay safe; wear protective gear and check for damage before testing.
Watch Video
What to Remember
- Verify power and reset first to rule out simple issues
- Inspect wiring for signs of wear or damage
- Test thermostat function or replace if calibration is off
- Call a professional if you’re uncomfortable with electrical testing