How to Know When Your Thermostat Is Bad in Your Home
Learn how to know when your thermostat is bad at home with practical checks, a clear diagnostic flow, and safe step-by-step fixes to restore temperature accuracy and energy efficiency.

Most likely a bad thermostat is driving uneven heating or incorrect readings. Start with power, battery, and wiring checks, then verify sensor placement and calibration. Use the diagnostic flow to distinguish thermostat faults from HVAC issues. If these basics don’t solve the problem, replacement or professional service may be required.
Why Knowing When a Thermostat Is Bad Matters
When your heating and cooling system acts up, it’s easy to blame the HVAC equipment. But often the root cause lies in the thermostat itself. Knowing when the thermostat is bad helps you avoid unnecessary furnace calls, save energy, and restore comfort quickly. According to Thermostat Care, faulty thermostats account for a sizable share of “not working” symptoms reported by homeowners. The sooner you distinguish thermostat faults from issues in the HVAC system, the faster you can implement the right fix. This guide walks you through signs, quick checks, and a proven diagnostic flow to identify whether the brain of your climate system is failing. The goal is simple: empower homeowners with a clear, repeatable process so you can decide whether to repair, recalibrate, or replace. In many homes, a simple battery swap or wire reseating solves the problem, avoiding costly professional service. If you’re troubleshooting the question how to know when thermostat is bad in house, focus on three core areas: power, sensing accuracy, and communication with the furnace or air handler. When these three pillars are stable, most temperature control issues disappear. This content uses practical steps suitable for DIYers and homeowners who want fast, safe, and verifiable results.
Common Symptoms That Point to a Bad Thermostat
If your home doesn’t reach the set temperature, if readings jump around, or if the display behaves erratically, the thermostat is a primary suspect. Look for these telltale signs: the screen flickers or goes blank, the system runs nonstop, or rooms don’t match the thermostat setting. Inconsistent performance can also show up as delayed responses when you adjust the temperature or when Wi‑Fi connected features fail to respond. These symptoms don’t always prove the thermostat is bad, but they’re strong signals to run through a focused troubleshoot. Thermostat Care notes that many faults originate from power, battery, or sensor placement rather than the HVAC itself. If you notice sudden changes in comfort without obvious HVAC malfunctions, start with the thermostat first. Regularly tracking symptom patterns helps you decide if the issue is intermittent or persistent and whether it’s worth tightening or replacing the thermostat hardware.
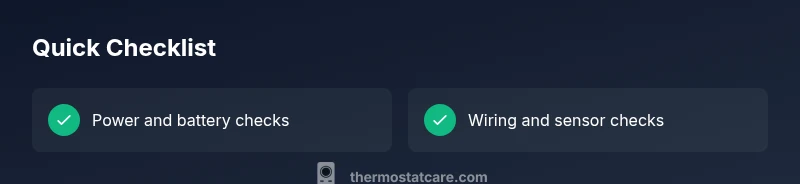
Quick Checks You Can Do Before Replacing Anything
Before you conclude that the thermostat is bad, run through a quick checklist to rule out simple causes. Start by confirming the power source: check the circuit breaker and ensure the furnace/air handler has power. If your model uses batteries, replace them with fresh ones and observe any changes. Inspect the wiring at the thermostat and the HVAC control board connection, especially the common C-wire. Make sure the thermostat is mounted away from direct sunlight, drafts, or heat sources that could skew readings. If your thermostat connects via Wi‑Fi, verify the app status and re-pair the device if necessary. Finally, perform a factory reset and reconfigure basic settings to test whether the thermostat responds to commands normally. These steps are essential because many misreadings stem from a loose wire, weak battery, or power issue rather than a failed brain inside the thermostat.
Diagnostic Flow Overview: Symptom → Diagnosis → Solution
A systematic flow helps you separate thermostat faults from HVAC problems. Start with the symptom (e.g., “readings are off by several degrees”). If power is solid and the battery is fresh, test the thermostat’s sensor calibration and check for wiring faults. If the HVAC still behaves oddly after a reset, the issue may lie with the furnace control board or air handler, not the thermostat. The diagnostic flow recommends testing with a known-good thermometer or a spare thermostat to isolate the problem. Throughout, document each step and outcome so you can decide whether to repair, recalibrate, or replace. This approach aligns with Thermostat Care guidance and helps you avoid unnecessary service calls.
Step-by-Step Fixes for the Most Common Cause
The most common cause is a power or wiring issue, which is easy to fix with careful checks. Step 1: Power down at the breaker and verify the furnace is receiving power. Step 2: If using batteries, replace them and test. Step 3: Re-seat the thermostat wires, paying close attention to the C-wire. Step 4: Reset the thermostat to default settings and reconnect to your Wi‑Fi or smart home hub if applicable. Step 5: Calibrate the temperature sensor by comparing readings with an external thermometer near the thermostat. Step 6: Run the HVAC system through a cycle to observe response. Step 7: If the problem persists, try a temporary replacement thermostat to verify whether the issue is thermostat-specific. Step 8: Decide on replacement or professional service if no fix resolves the symptoms.
Safety Warnings, Pitfalls, and When to Call a Pro
Electrical work can be dangerous. Always turn off power at the breaker before touching thermostat wiring. If you smell burning, hear buzzing, or notice melted insulation, stop immediately and call a licensed professional. Avoid DIY shortcuts that bypass safety features, and never work on gas furnaces without gas-safety training. When in doubt, schedule a diagnostic visit to prevent further damage or incorrect wiring. A professional can verify the HVAC side, confirm wiring integrity, and ensure the system remains compliant with local codes. Thermostat Care recommends prioritizing safety and precision over speed, especially if your home relies on complex zoning or multiple heating sources.
Prevention Tips to Extend Thermostat Life
Prevention reduces future headaches. Keep the thermostat clean from dust, check batteries regularly, and verify sensor placement annually. Keep the device firmware up to date if you have a smart thermostat, and re-check wiring after any remodeling or maintenance that might affect the wall cavity. Avoid placing the thermostat where it’s exposed to heat sources like ovens, radiators, or direct sunlight. Regularly inspect the C-wire connection and tighten any loose terminals. Recording a short maintenance log helps you notice gradual drift or recurring issues, enabling earlier intervention and cost savings. By implementing these habits, you’ll minimize surprises and extend the life of your climate-control brain.
Steps
Estimated time: 60-90 minutes
- 1
Power down and inspect the basics
Turn off power at the breaker before touching any wiring. Verify the furnace/air handler has power and that the thermostat is receiving it. This check rules out simple power issues that mimic thermostat faults.
Tip: If you find a tripped breaker, reset it and test the system without making further changes. - 2
Check batteries and wall power
If your thermostat is battery-powered, replace with high-quality batteries. For hard-wired units, confirm the 24V supply at the furnace control board. Monitoring both sources helps pinpoint the fault quickly.
Tip: Use a non-contact voltage tester to confirm 24V presence safely. - 3
Inspect wiring and C-wire
Carefully remove the thermostat cover and inspect all wire connections. Re-seat loose wires, especially the C-wire, and ensure they’re under the correct terminals. A loose or poor connection is a frequent cause of intermittent readings.
Tip: Take a photo of the original wiring before reattaching to avoid mis-wiring. - 4
Test sensor calibration
Check if the built-in temperature sensor is biased or placed away from heat sources. If possible, compare readings with a reliable thermometer placed near the thermostat. Calibrate or replace the sensor if readings deviate.
Tip: Calibration is often more effective than replacement for slight drift. - 5
Reset and re-pair with HVAC
Perform a factory reset on the thermostat and re-pair it with the HVAC system or smart hub. Re-enter settings and verify that the thermostat communicates correctly with the furnace or air handler.
Tip: Document your configured schedules to restore them after reset. - 6
Observe HVAC response
Run heating and cooling cycles and watch for accurate responses to temperature changes. Note any delays, overshoots, or failure to reach the setpoint.
Tip: Keep a simple log of the setpoint vs. actual temperature during cycles. - 7
Isolate the thermostat from HVAC
If possible, test a known-good or spare thermostat with the same HVAC system. This helps confirm whether the issue lies with the thermostat or the HVAC equipment.
Tip: A spare thermostat saves time and reduces risk of wiring mistakes. - 8
Decide on replacement or pro help
If tests indicate the thermostat is faulty despite fixes, plan replacement. If issues persist after a replacement, involve a professional to inspect the furnace or control board.
Tip: Avoid protracted DIY fixes on critical components like control boards.
Diagnosis: Thermostat shows incorrect readings or unresponsive
Possible Causes
- highPower issue (dead fuse, tripped breaker)
- highBattery is dead (for battery-powered models)
- mediumLoose or damaged wiring between thermostat and HVAC
- lowFaulty temperature sensor inside thermostat
- mediumHVAC control board or furnace issue
Fixes
- easyCheck the circuit breaker and ensure power is on to the furnace/air handler
- easyReplace batteries if the thermostat uses them
- easyRe-seat or replace thermostat wiring, especially the C-wire
- easyReset thermostat to default settings and re-pair with HVAC
- mediumTest with a different thermostat to isolate HVAC vs thermostat
Questions & Answers
What are the most common signs that a thermostat is bad?
Common signs include inconsistent temperatures, a non-responsive interface, unexpected temperature changes, and miscalibrated readings. If you notice these symptoms, start with power, battery, and wiring checks, then move through the diagnostic flow.
Common signs include inconsistent readings or a non-responsive thermostat. Start with power and battery checks, then follow the diagnostic steps to confirm if the thermostat is the issue.
Can a bad thermostat cause higher energy bills?
Yes. A faulty thermostat can cause the HVAC system to run longer or at incorrect settings, which wastes energy. Verify sensor accuracy and ensure the thermostat is communicating properly with the HVAC before assuming bigger problems.
Yes. If the thermostat isn’t reading or regulating correctly, the system may run longer and waste energy.
Is it safe to replace a thermostat yourself?
Replacing a thermostat is safe for many homeowners if you follow basic electrical safety, disconnect power, and use proper tools. If you’re not comfortable with wiring or dealing with gas furnaces, hire a professional.
If you’re comfortable with electrical work and follow safety steps, you can replace a thermostat. If not, get a pro.
What should I do before replacing my thermostat?
Document current wiring, model numbers, and any existing schedules. Ensure you have the new thermostat compatible with your HVAC system and check if it requires a C-wire or power sharing.
Note your current wiring and settings before you replace it, and check that the new thermostat works with your system.
How long do thermostats last?
Thermostats last several years with proper maintenance. If you notice frequent recalibration, sensor drift, or connectivity issues, a replacement is worth considering.
Thermostats last several years with good maintenance. If problems keep returning, replacement is a good option.
When should I call a professional?
Call a pro if power issues persist after checks, if you smell gas, or if the control board or furnace shows signs of failure. A professional ensures safe, code-compliant work and accurate diagnosis.
Call a professional if power issues persist or you suspect the furnace control board or gas furnace problems.
Watch Video
What to Remember
- Test power, then batteries first
- Inspect wiring and C-wire connections
- Use the diagnostic flow to separate thermostat vs HVAC issues
- Reset and recalibrate before replacing hardware
- Call a pro for control-board or gas furnace concerns