What Happens When a Thermostat Goes Bad? A Practical Troubleshooting Guide
Urgent, practical guide to diagnose and fix a failing thermostat, with safety tips, diagnostic flow, step-by-step fixes, and when to call a pro.

Most thermostat failures start with a power issue or a faulty sensor. Quick fix: verify power at the device (breaker/fuse), ensure the C-wire is secure, replace batteries if applicable, and perform a reset. If readings stay incorrect or the display is blank, contact a licensed HVAC pro.
Why thermostats go bad
Thermostats fail for a variety of reasons: aging components, power problems, sensor drift, or installation issues. When a thermostat malfunctions, you may notice temperature readings that don’t match actual room temperature, display errors, or the HVAC system cycling on/off unpredictably. Understanding what happens when thermostat goes bad helps you diagnose quickly. Many issues trace back to either energy supply problems (power, fuses, breakers) or sensor/wiring faults. If left unchecked, a bad thermostat can cause uncomfortable conditions, higher energy bills, and extra wear on your equipment. According to Thermostat Care, the most common root causes are power supply problems and faulty sensors. This guide offers a practical, safety-first checklist to identify the exact cause and restore reliable control. Think of this as a structured problem-solving process you can perform with basic tools and, when needed, professional help.
Common symptoms you might notice
Typical signs a thermostat is failing include readings that don’t match room temperature, a thermostat that won’t turn the HVAC system on or off, a blank or unresponsive screen, strange jumps in temperature, or the unit repeatedly cycling. If your thermostat has a blinking LED, random resistance in touch controls, or frequent resets, treat it as a potential fault. These symptoms don’t always mean a replacement is needed—calibration drift, battery depletion, or wiring looseness can mimic more serious problems. Keeping a log of readings over several days helps distinguish a sensor issue from a wiring or power fault. As you evaluate symptoms, remember: the goal is to regain accurate control and prevent energy waste.
How a bad thermostat can affect comfort and energy use
A malfunctioning thermostat can cause rooms to become too hot or cold, or it may run your system when it isn’t needed, driving up energy consumption. If the thermostat misreads ambient temperature, your HVAC may overwork, leading to reduced equipment life and higher utility bills. A faulty sensor or calibration error can create hot-cold swings that confuse occupants and make indoor air feel uncomfortable. In some cases, the thermostat itself may be the bottleneck preventing the system from following a set schedule, negating any smart-home efficiency gains. This section helps you connect symptoms to likely root causes so you can choose the right fix.
Safety concerns and immediate steps you should take
Working with electrical components can be risky. Always power down the thermostat at the breaker before touching wiring, and avoid opening live circuits. If you smell burnt insulation, notice scorch marks, or hear buzzing, evacuate and call a licensed professional immediately. Never bypass safety protections or attempt to wire-nip up a C-wire without understanding the correct terminals. If you’re using a battery-powered thermostat, replace batteries with the correct type and ensure battery contacts are clean and secure. When in doubt, prioritize safety and seek professional assistance.
Quick checks you can perform now (power, wiring, sensors)
Begin with the simplest checks: ensure the thermostat has power by inspecting the breaker or fuse and confirm the display is on. If your model uses batteries, replace them. Verify the C-wire is securely connected at both the thermostat and the furnace control board. Check for obvious loose wires, damaged insulation, or corrosion on terminals. If the problem persists, inspect the HVAC system’s power supply, including any fuses and the main disconnect. Calibrate the thermostat if your model supports manual calibration and compare readings against a separate thermometer in the room to verify accuracy.
Diagnostic flow overview (high level)
The diagnostic approach for a bad thermostat follows a logical sequence: power and power supply checks, wire integrity and sensor status, calibration and software/firmware health, and finally environmental factors and installation considerations. Each step narrows down the root cause and guides you toward the safest, most effective solution. This overview connects symptoms to likely causes and suggests concrete fixes you can try in order, while noting when to call a pro for safety or expertise beyond DIY.
Replacement vs repair: making the right call
Not every malfunction is worth repairing. If the unit is old, shows multiple component failures, or your billable repair costs approach a new thermostat’s price, replacement may be more cost-effective. If the problem stems from sensors, wiring, or control board issues, replacement with a modern thermostat can restore reliability and efficiency. Consider compatibility with your HVAC system, Wi-Fi features, and energy-saving modes when deciding. A professional assessment can help quantify the expected lifespan and total cost of ownership.
Preventive maintenance and long-term care
Preventing thermostat problems starts with regular maintenance: keep the thermostat and surrounding area clean, verify wiring connections annually, keep firmware up to date on smart models, and periodically test temperature accuracy. Check for drafts near the thermostat and verify it isn’t exposed to direct sunlight, heat sources, or moisture. Protect power supply connections from corrosion and ensure the furnace/air handler is clean and operating normally. A proactive maintenance routine can extend device life and improve home comfort.
Steps
Estimated time: 45-60 minutes
- 1
Power down and test the breaker
Turn off the breaker powering the thermostat and HVAC system to ensure safety. Inspect the breaker, reset any tripped switches, and wait a few minutes before turning power back on. This addresses simple power faults that masquerade as thermostat problems.
Tip: Always verify the screen lights up after power restoration before continuing. - 2
Check batteries (if battery-powered)
If your thermostat uses batteries, replace them with fresh, high-quality cells. Clean the battery contacts and reseat them. Low or corroded batteries can cause intermittent behavior or non-response.
Tip: Use the recommended battery type and avoid mixing old and new batteries. - 3
Inspect C-wire and terminals
Power down and remove the thermostat cover. Check that the C-wire is securely attached at both the thermostat and the furnace control board. Look for loose screws, frayed insulation, or signs of corrosion.
Tip: Take a photo of wire connections before unplugging anything to aid reassembly. - 4
Reset and recalibrate
Perform a soft reset or factory reset if the model allows. Reconfigure basic settings and calibrate the sensor if your unit supports it. Run a brief test after reconfiguration to confirm that the readings align with room temperature.
Tip: Note down your preferred temperature settings to restore them after reset. - 5
Test the HVAC response
Set a couple of target temperatures and observe whether the HVAC turns on at the expected times. Listen for short cycling or failure to start, which can indicate a sensor or control board issue rather than a simple wiring problem.
Tip: If you hear unusual noises or see the system cycle abnormally, stop troubleshooting and call a pro. - 6
Consult a professional if unresolved
If the problem persists after these steps, the device or control circuitry may be faulty and require replacement or professional diagnosis. A licensed technician can safely assess electrical components and ensure code compliance.
Tip: Document symptoms, dates, and any changes you made to aid the technician.
Diagnosis: Thermostat either won’t turn on HVAC, shows incorrect temperature, or is unresponsive.
Possible Causes
- highPower issue (tripped breaker, blown fuse, dead outlet)
- highLoose or damaged wiring, especially C-wire
- mediumSensor drift or faulty calibration
- mediumSoftware/firmware glitch or stale settings
Fixes
- easyReset power at the breaker, replace any blown fuse, and restore a known-good outlet
- easyInspect and reseat wires, particularly the C-wire; tighten terminals and look for corrosion
- mediumCalibrate the temperature reading or replace the sensor/module if drift is evident
- easyUpdate firmware, reset the thermostat to factory settings if supported, and re-enter preferences
Questions & Answers
What happens when a thermostat goes bad?
A bad thermostat can misread temperature, fail to regulate the HVAC, or cause erratic cycling. Identifying whether the issue is power, wiring, or sensor-related helps you choose the correct fix and prevent energy waste.
A faulty thermostat may misread temperature or cause the HVAC to run unexpectedly. Check power, wiring, and sensor status to fix it.
Can a bad thermostat cause high energy bills?
Yes. If the thermostat misreads temperature or over-controls the HVAC, it can run longer than needed, increasing energy use. Correcting calibration or replacing a faulty unit typically reduces waste.
Yes, a faulty thermostat can waste energy by running the system longer than needed.
Should I reset or replace my thermostat?
If the device is old or shows multiple symptoms across components, replacement may be more cost-effective. Resetting can fix glitches, but persistent issues after reset usually require a new unit or professional diagnosis.
Reset first to see if it clears the issue; if problems persist, replacement might be best.
Is DIY thermostat repair safe?
DIY repairs can be safe for simple power and wiring checks if you follow instructions and shut off power. However, electrical work and control board problems may require a licensed professional for safety and code compliance.
DIY can be safe for basic checks, but call a pro for wiring or control board issues.
How long do thermostats last?
Thermostats vary by model and usage. With proper maintenance, many continue functioning well for several years, but older units may become unreliable due to sensor drift or component wear.
Most thermostats last several years with good maintenance, though reliability declines with age.
What’s the first sign of a thermostat problem?
The most common early sign is a mismatch between what you set and actual room temperature, followed by unresponsive controls or unexpected HVAC cycling.
Look for temperature drift and unresponsive controls as early signs.
Watch Video
What to Remember
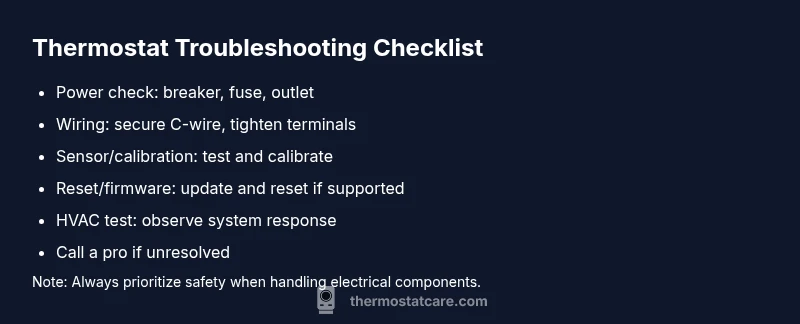
- Prioritize power checks first to diagnose many issues.
- Secure wiring, especially the C-wire, before deeper testing.
- Calibrate or replace sensors if readings drift.
- Use a step-by-step approach and know when to call a pro.
- Maintain regular checks to prevent future thermostat failures.