How to Tell If a Thermostat Is Bad: Quick Troubleshooting
Diagnose a faulty thermostat quickly with practical checks, power and wiring tests, and safe steps. Learn when to replace batteries, reset, or call a pro.

Common signs your thermostat is bad include unresponsive controls, temperature drift, or a blank display. Quick fixes: replace batteries if needed, verify power (breakers and HVAC fuse), check the C-wire connection, and perform a safe reset. If issues persist, consult a professional. These steps address the majority of user reports and are safe on most residential systems. If you notice burning odors, buzzing, or heat that won’t respond to a change in settings, stop and seek help immediately.
How to tell if your thermostat is bad
When you’re trying to troubleshoot a climate issue, the first question is often: how to tell if thermostat is bad? The thermostat is the bridge between sensing temperature and triggering your HVAC system, so even small faults can cause large temperature inconsistencies. According to Thermostat Care, start with simple symptoms and safe checks before assuming the thermostat is the root cause. Common signals include an unresponsive or intermittently responsive display, readings that drift several degrees from the actual room temperature, or a heating/cooling cycle that runs at odd times. If the screen is blank or the unit reboots on its own, power or wiring issues are likely involved. Before you open the wall or touch wiring, turn off power to the thermostat and furnace to avoid shocks. Note whether the issue happens in one mode (heat or cool) or in all modes; this helps narrow the diagnosis.
Signs that deserve attention
- Unresponsive or flickering display
- Temperature readings that don’t match the room
- System runs when it shouldn’t or ignores setpoints
- Frequent resets or blank screens
- Odd odors or buzzing near the thermostat
These symptoms don’t always mean a bad thermostat; they can indicate wiring, power, or HVAC system issues. Use a stepwise approach to isolate the fault, starting with the simplest checks and saving more invasive tests for when necessary.
Common causes of thermostat misbehavior
Thermostats can misbehave for several reasons, and identifying the root cause is essential for choosing the right fix. Batteries are a frequent, easy fix for many models that rely on disposable power. Loose or damaged wiring is a major contributor to intermittent performance; even a single loose conductor can cause erratic readings. Power supply problems—tripped breakers, blown fuses, or a faulty 24V transformer—can mimic thermostat faults and make symptoms look worse than they are. For smart thermostats, software glitches or outdated firmware may cause incorrect readings or connectivity drops. Finally, older or incompatible thermostats may be out of sync with newer HVAC equipment. Address each cause in sequence to avoid unnecessary replacements.
Temperature readings vs. actual temps: what to validate
A core test when diagnosing is comparing what the thermostat reports with the room’s real temperature. Use a reliable thermometer placed away from drafts, direct sunlight, or heat sources. If you notice persistent warm or cool spots, the thermostat may be reading a temperature that doesn’t reflect the room. Calibrate if available; some models offer a calibration option in installer settings. If your display shows a mismatch, log the setpoint versus the reading over several hours to detect drift. Consistent offsets of two degrees or more suggest sensor or wiring issues and may require sensor replacement or a new thermostat.
Wiring and power considerations
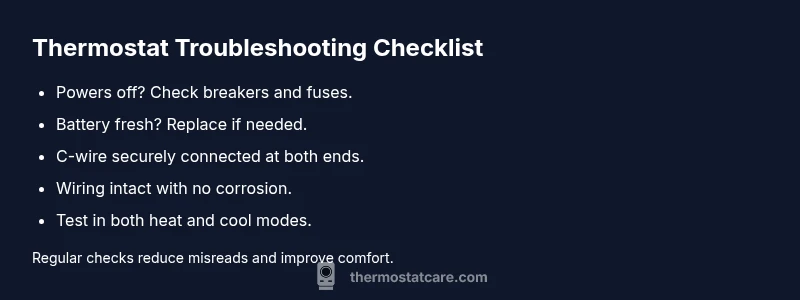
Wiring quality is non-negotiable for reliable performance. Start by powering down the system at the breaker. At the thermostat, inspect the wire terminals for corrosion, looseness, or frayed insulation. Ensure the C-wire is securely connected if your model requires common power; a missing or loose C-wire is a frequent source of instability for modern digital thermostats. Then check the furnace or air handler control board connections for burnt marks or discolored connectors. After reseating any loose wires, restore power and test the thermostat in both heating and cooling modes. If issues persist, you may have a faulty relay on the furnace board or an incompatible 24V supply.
Battery vs. power issues: when to replace batteries or check transformer
If your thermostat runs on batteries, replace them with fresh high-quality cells and re-test. Use the manufacturer’s recommended type and ensure the door seals properly. For hardwired models, a power problem is less likely battery-related; confirm the 24-volt supply from the transformer reaches the thermostat. A weak transformer or blown fuse can cause intermittent power, leading to resets or a blank screen. If voltage is out of spec, that’s a sign to call a pro. Both scenarios warrant deeper checks if you experience rapid on-off cycling or persistent failure to hold settings.
Diagnostics you can run safely at home
At-home diagnostics empower you to isolate the problem without risky steps. Start with a safe reset: power off, hold the reset button (if present) for 5–10 seconds, then reapply power. Check for error codes or indicator lights and consult the manual; some models show codes like sensor fault or communication error. Confirm the thermostat can adjust the setpoint and respond when switching between heat and cool. If your model has a test mode, run each function sequentially. Document patterns—time of day, mode, observed temperatures—to help a pro reproduce the issue. If you’re uncomfortable with wiring or your system is integrated with a water heater, stop and call a professional.
When to call a pro
Not every thermostat issue is a DIY fix. If you’ve tried the safe steps and the unit still misbehaves, if you suspect a faulty transformer, burnt wiring, or if the device is under warranty requiring professional service, it’s time to bring in a pro. A licensed HVAC technician can measure voltages, inspect the furnace/air handler, verify compatibility, and replace components safely. Thermostat Care recommends contacting a technician when readings vary significantly across multiple checks or error codes persist after a reset.
Prevention steps to extend thermostat life
Proactive care helps you avoid future failures. Keep the thermostat free from dust and debris, and mount it away from direct sun, appliances, or air vents. Regularly update firmware on smart thermostats and replace batteries on schedule. Ensure proper mounting and wiring, and protect the unit from power surges with a quality surge protector. Clean inside the front cover occasionally to prevent sensor and display issues. By following these practices, you’ll reduce false alarms and maintain accurate temperature control.
Steps
Estimated time: 30-60 minutes
- 1
Power off the system safely
Turn off power at the breaker to avoid shocks. Remove the thermostat cover and take a quick inventory of wires. Check for any signs of damage or overheating on the control board wires.
Tip: Label wires before removing them to simplify reassembly. - 2
Check batteries (if applicable)
If your thermostat uses batteries, replace them with fresh, high-quality cells. Reinsert and test the unit to see if the display powers up and responds correctly.
Tip: Use the exact battery type recommended by the manufacturer. - 3
Inspect thermostat wiring
Carefully inspect terminal screws; tighten any loose connections. Look for frayed insulation or discoloration around wires. Re-seat any loose wires firmly.
Tip: Do not force wires—gentle pressure is enough to seat them properly. - 4
Check the C-wire and common power
Ensure the C-wire is connected at both the thermostat and the furnace control board. If there is no C-wire or it’s loose, consider adding a common wire adaptor or professional installation.
Tip: A proper C-wire is crucial for stable smart thermostats. - 5
Reset and reconfigure settings
With power restored, perform a soft reset or factory reset if recommended by the model. Reconfigure temperature sensor settings and hold/auto preferences.
Tip: Document your settings after reset for easier future tweaks. - 6
Test heat and cool modes
Switch between heat and cool, verify the HVAC responds to setpoints, and listen for proper cycling. Check if the system stops at the requested temperature.
Tip: If one mode ignores the setpoint, the issue may be HVAC-side rather than thermostat-side. - 7
Look for error codes
If the display shows an error code, consult the manual or Thermostat Care resources for meaning and recommended fixes. Note when the code appears.
Tip: Error codes often tell you exactly what part to inspect next. - 8
Decide next steps
If the problem persists after the above steps, determine whether to replace the thermostat or call a pro. Keep a log of tests and dates.
Tip: Document tested steps to facilitate a pro visit. - 9
Call a professional when needed
If you’re uncomfortable with live wiring, or the issue involves the furnace, a licensed HVAC technician is the safest option.
Tip: A pro can verify voltages, sensors, and compatibility quickly.
Diagnosis: Thermostat not accurately controlling room temperature
Possible Causes
- highPower issue (tripped breaker, blown fuse, faulty transformer)
- mediumDead or weak battery (if battery-powered)
- highLoose or damaged wiring at thermostat or furnace
- mediumC-wire problems (not connected or damaged)
- lowOutdated or incompatible thermostat with current HVAC system
Fixes
- easyVerify power: reset breakers/fuses and ensure 24V supply.
- easyReplace thermostat batteries and reseat connections.
- mediumInspect and reseat all wires at thermostat and furnace, look for corrosion.
- mediumConfirm C-wire connections or install a C-wire adapter if needed.
- hardUpgrade or replace with a compatible thermostat if hardware is old or incompatible.
Questions & Answers
What are common signs that a thermostat is bad?
Common signs include unresponsive controls, incorrect temperature readings, a blank display, or frequent resets. Treat each symptom as a potential indicator of wiring, power, or compatibility issues and proceed with safe checks before replacement.
Common signs of a bad thermostat include unresponsive controls and wrong temperatures. Start with power and battery checks, then wiring, and call a pro if the problem persists.
Can a thermostat be bad even if the HVAC system still works?
Yes. The system can operate, but the thermostat may misread or misreport temps, causing uneven comfort or wasted energy. Isolate thermostat issues first, then check system components if problems continue.
Yes, you can have a working HVAC even if the thermostat is faulty. Check the thermostat first, then inspect the furnace or compressor if needed.
Is a blinking or blank display always a thermostat problem?
Not always. A blinking or blank display often points to power or battery issues, but it can also indicate wiring or transformer problems. Begin with a safe power check and battery replacement if applicable.
A blinking or blank display usually signals power or battery issues, but wiring problems can cause the same. Start with power checks and battery replacement.
Should I replace batteries or call a pro for a suspected bad thermostat?
Start with fresh batteries if your model uses them, then re-test. If issues persist, or if you’re hardwired and unsure about wiring, call a licensed HVAC technician for a safe, thorough check.
Start by replacing the batteries, then call a pro if the problem remains or if you’re unsure about wiring.
How can I prevent thermostat issues in the future?
Keep the unit clean and free from dust, update firmware on smart models, replace batteries on schedule, and ensure proper mounting and wiring. Regular maintenance reduces false alarms and improves accuracy.
Keep it clean, update firmware, and replace batteries regularly to prevent future problems.
Watch Video
What to Remember
- Test power and battery first, then wiring.
- Calibrate readings to confirm sensor accuracy.
- Use safe steps—call a pro if unsure.
- Prevent future problems with routine maintenance.