How to Know When Your Thermostat Is Going Bad
Learn how to tell if your thermostat is failing and what to fix first. This guide covers common symptoms, troubleshooting steps, and when to call a professional for thermostat repairs.

According to Thermostat Care, a failing thermostat often shows inconsistent readings, short cycling, or a nonresponsive display. Start with the basics: ensure the unit is powered, replace batteries if needed, and inspect wiring for loose terminals. If you see blinking lights or the screen won’t respond after these checks, plan for replacement and consider professional help if necessary.
What happens when a thermostat goes bad?
When a thermostat starts to fail, you may notice that your heating or cooling runs too long or not at all, temperatures on the wall don’t match your setpoint, or the display becomes intermittently unresponsive. Thermostat failures often stem from power issues, sensor drift, or aging electronics. In many homes, simple fixes like replacing batteries or tightening wires can restore function, but persistent symptoms usually indicate deeper problems that affect comfort and energy use. According to Thermostat Care, addressing the issue early helps prevent escalating costs and ensures you stay comfortable during extreme weather. Treat every symptom as a hint that a failing thermostat may be involved, especially if your HVAC system behaves strangely on both heating and cooling.
Signs that the thermostat is heading toward failure
Common signals include erratic temperature readings, short cycling (frequent on/off cycling), a nonresponsive or dim display, or a thermostat that loses memory of your programmed settings. You might also notice a delay between changing the thermostat and your HVAC system responding, or your system running and still not reaching the target temperature. While some symptoms are harmless quirks, multiple signs together strongly suggest the device is aging or malfunctioning. Thermostat Care analysis shows that power issues and sensor drift are among the leading contributors to these symptoms, so start checks with power and sensors before replacing components.
Safety-first checks you can perform safely
Before touching any wiring, power down the circuit at the breaker to prevent shocks. Remove the thermostat cover and visually inspect for loose wires, corrosion, or damaged insulation. If your model uses batteries, replace them with new ones from the same type (alkaline or lithium) and re-test. Clean the terminals gently if you see grime, and ensure grounding connections (if present) are intact. Do not force connections that look bent or damaged. If you notice burning smells or melted insulation, stop and call a professional immediately.
How sensor drift and power issues cause symptoms
Sensors inside thermostats can drift over time, causing the device to misread ambient temperature and send incorrect signals to the HVAC system. Power issues—such as a failing 24V transformer, blown fuses, or a weak battery—can mimic sensor problems by causing intermittent communication with the furnace or air conditioner. Inaccurate readings often lead to unnecessary cycling, which wastes energy and shortens the system’s lifespan. Understanding these core causes helps you target the right fix rather than replacing the entire thermostat prematurely.
Diagnostic flow you can follow (simple, actionable path)
Start with the easiest checks: power, battery, and display. If the display is dead or blinking, replace the batteries or restore power. If readings seem off, test by setting a known temperature and observe HVAC response. If the system still doesn’t reach target temps, inspect wiring for looseness, verify the 24V supply to the stat, and consider sensor recalibration if your model supports it. When in doubt, proceed to STEP-BY-STEP guidance and consult a pro if you encounter dangerous wiring or signs of component damage. Thermostat Care emphasizes safety and gradual progression through checks to prevent accidental damage.
Step-by-step fixes for the most common cause
The most frequent issue is a power or battery problem. Start by turning off power at the breaker, then remove and inspect the thermostat. Replace batteries if present, reseat all wiring connections and ensure terminals are clean and tight. Reassemble the faceplate, restore power, and test. If readings still drift, verify the 24V supply with a multimeter if you’re comfortable, or contact a licensed technician. Many households resolve the issue simply by replacing aging batteries or reconnecting a loose wire.
Preventing future thermostat problems
Schedule regular checks for your thermostat and HVAC connections, especially before peak heating or cooling seasons. Keep the thermostat free from dust, maintain clean sensor openings, and ensure the wall plate stays secure. Update firmware if your model supports it, and replace batteries as recommended by the manufacturer. Log any recurring issues to help technicians diagnose faster in the future. A proactive maintenance routine reduces the likelihood of sudden breakdowns and keeps your home comfortable year-round.
Steps
Estimated time: 60-90 minutes
- 1
Power down and access the thermostat
Turn off the power at the circuit breaker to avoid shocks. Remove the thermostat cover carefully to expose wiring and terminals. Take a quick photo of current wiring before touching anything so you can reference it later.
Tip: Label wires if you’re disconnecting multiple cables to reassemble correctly. - 2
Check power and batteries
If your thermostat runs on batteries, replace them with fresh ones of the same type. For hard-wired models, verify the wall outlet or fuse box is supplying power and confirm the 24V transformer is active.
Tip: Use high-quality batteries to minimize premature failures. - 3
Inspect wiring connections
Look for loose, corroded, or frayed wires at the terminal screws. Reseat any loose connections firmly and ensure no bare copper is exposed beyond the terminals.
Tip: Power off before touching conductors; avoid over-tightening screws. - 4
Evaluate the temperature sensor
If your model supports calibration, follow the manufacturer’s steps to recalibrate the internal sensor. Compare the thermostat’s reading to an accurate thermometer in the room.
Tip: If gradual drift continues, sensor replacement may be needed. - 5
Test system response
Set a clear target temperature and observe HVAC response. If the system cycles correctly and reaches the target, the issue may be resolved. If not, proceed to replacement considerations.
Tip: Document time to reach target temps for future reference. - 6
Decide on replacement vs repair
If symptoms persist after checks, weigh the cost of repair against a full thermostat replacement, especially for older units with diminishing performance.
Tip: Check warranty coverage before purchasing a new unit.
Diagnosis: Thermostat readings inconsistent or HVAC not responding to setpoint
Possible Causes
- highPower issue or dead battery
- mediumSensor drift or calibration error
- lowLoose or damaged wiring
Fixes
- easyCheck power at the breaker and replace batteries if applicable
- easyInspect and reseat all wires; tighten loose terminals
- mediumTest and recalibrate or replace the thermostat if sensor drift is confirmed
- hardCall a licensed HVAC pro if you detect damaged wiring or can't access the transformer
Questions & Answers
What are the most common signs my thermostat is failing?
Erratic temperature readings, short cycling, nonresponsive display, or temperature settings not being honored are common signs of thermostat failure. If you notice multiple symptoms, perform the basic checks described above before deciding on replacement.
Common signs include erratic readings, short cycling, and a nonresponsive display. Check power and wiring before deciding on replacement.
Can a bad thermostat cause higher energy bills?
Yes. When a thermostat can’t regulate heating or cooling properly, your HVAC system may run longer or cycle inefficiently, leading to higher energy usage. Addressing the thermostat issue can restore efficiency.
A faulty thermostat can cause your system to run longer and waste energy until fixed.
Should I replace batteries or the entire thermostat?
If your model uses batteries, replace them first and recheck. For hard-wired units, confirm power supply and connections. If inconsistent performance persists, replacement may be the better long-term option.
Change the batteries if yours use them; if not, check power and consider a replacement if issues persist.
Is DIY thermostat troubleshooting safe?
Basic checks like battery replacement and wiring inspection can be done safely if you follow proper shut-off procedures. For wiring concerns or gas furnaces, contact a licensed technician.
You can do simple checks safely, but avoid complex wiring work or gas-furnace connections yourself.
When should I call a pro?
Call a professional if you detect burning smells, damaged wires, or the thermostat still misbehaves after basic checks. A pro can diagnose transformer or sensor issues and ensure safe repairs.
If you smell burning or see damaged wiring, or if problems persist after checks, call a pro.
How long do thermostats typically last?
Thermostats vary by model and usage. If yours is older or frequently failing, it’s often more reliable to replace with a newer unit that includes updated sensors and compatibility with modern systems.
Lifespan varies; if your unit is aging and failing often, a replacement with a newer model is sensible.
Watch Video
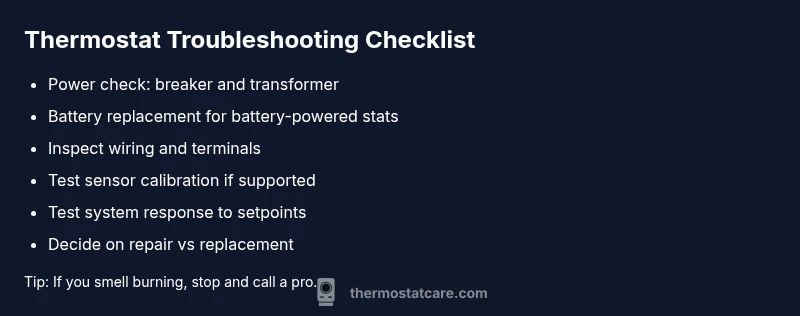
What to Remember
- Power and battery checks first
- Watch for sensor drift and calibration issues
- Loose wiring often mimics other faults
- Use the diagnostic flow before replacing the unit
- When in doubt, call a pro to avoid hazards