What Does a Bad Thermostat Look Like? A Troubleshooting Guide
Identify signs of a failing thermostat, diagnose common causes, and follow safe fixes to restore comfort. Practical, urgent guidance from Thermostat Care.

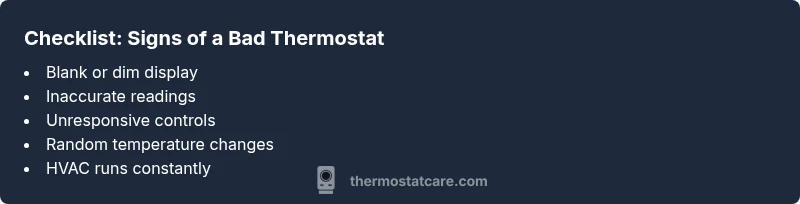
A bad thermostat often shows a blank or frozen display, unresponsive controls, and erratic temperature readings. It may fail to power on, misread room temperature, or cause your HVAC to run constantly. If you notice these symptoms, start with simple power and battery checks before calling a pro. what does bad thermostat look like? This guide helps you diagnose quickly and safely.
What does bad thermostat look like? A practical baseline
According to Thermostat Care, recognizing what a bad thermostat looks like helps homeowners act quickly. In plain terms, what does bad thermostat look like can include a display that stays blank, temperature readings that jump unpredictably, or a unit that simply won’t respond to settings. This article walks you through the most common symptoms, why they happen, and safe steps you can take to verify faults before contacting a professional. If you notice these signs, you’re not alone—failing thermostats are a homeowner pain point, but they’re usually fixable with methodical troubleshooting.
Common signs of a failing thermostat
Signs of a bad thermostat aren’t always dramatic. Look for:
- Inaccurate temperature readings or slow reaction to changes
- The display fading, dim, or completely blank
- The thermostat cycling the HVAC on and off too frequently
- Unreliable holds or schedules that don’t match room temperature
- Unexplained energy use spikes or HVAC running nonstop
- Odd or burning smells near the device (safety warning)
Thermostat Care notes that many issues originate from power or battery failures rather than the thermostat itself, so start with those basics before deeper checks.
Digital vs. non-digital indicators
Digital thermostats tend to show more obvious signs of failure (blank screens, error codes, or unresponsive menus) compared to mechanical models, which may simply drift in readings. For digital units, a flashing power light or a frozen digital readout typically points to power or wiring problems. Non-digital or traditional dial thermostats might drift slowly or require recalibration. Understanding the type you own helps you tailor your checks and avoids unnecessary replacements.
Quick safety and power checks you can perform
Always start with safety. Before touching any wiring, switch off the thermostat at the circuit breaker if accessible. Check for a tripped breaker or blown fuse in the main panel. If your thermostat uses batteries, replace them with fresh, high-quality cells and see if readings stabilize. Inspect the thermostat’s wiring for loose terminals or obvious damage, and ensure the mounting screws aren’t loose. If you detect burning smells, melted insulation, or overheating, shut off power and call a licensed technician immediately. These checks are low-risk, high-reward first steps.
Diagnostic flow: from symptom to diagnosis to solution
A structured approach reduces guesswork. Note the symptom, map it to likely causes, and apply targeted fixes. For example, if the symptom is "no display," suspect power, battery, or wiring issues. If readings are wildly inconsistent, focus on sensor alignment, thermostat location, or wiring integrity. Use a simple cause-and-effect mindset: address the easiest, most common faults first (power and batteries), then move to wiring and sensor concerns. This flow minimizes wasted time and helps you decide when a pro is needed.
Step-by-step fixes for the most common causes (overview)
This section outlines the practical fixes most homeowners tackle first. You’ll find actionable, escalating steps that start easy and escalate only if needed. For each fix, consider whether you’re comfortable with the task—and if not, proceed to the professional route. Remember: safety comes first, especially with electrical components. If you see signs of overheating, arcing, or sizzling sounds, stop and call a pro.
Safety notes and common mistakes to avoid
Never bypass safety measures or force a device to work. Always disconnect power before inspecting wiring. Avoid attempting to rewire terminals yourself if you’re unsure of the wiring schematic. Never use counterfeit or damaged batteries. Incorrect handling can damage your HVAC system or cause fire hazards. If you’re unsure about any step, stop and consult a licensed technician.
Prevention: keeping your thermostat healthy and accurate
Regular maintenance pays off. Keep the thermostat area clear of dust, check batteries annually if applicable, and ensure the unit isn’t in direct sunlight or behind a heat source. Periodically verify that the HVAC system responds properly to both manual and programmed adjustments. Reinsertion of wires, exposure to moisture, or frequent voltage fluctuations are common culprits for degraded performance. Proactive checks help you avoid sudden failures and maintain comfort.
Next steps: deciding between repair or replacement
If multiple symptoms persist after basic fixes, replacement may be the more cost-effective route. Aging thermostats lose accuracy and can waste energy. Consider your comfort needs, the cost of parts, and the compatibility with your HVAC system. The Thermostat Care team recommends evaluating warranty status and compatibility with your current setup to make a smart choice.
Steps
Estimated time: 30-60 minutes
- 1
Power check and reset
Turn off the thermostat’s circuit breaker for 30 seconds, then restore power and observe if the display lights up and responds. This reset often clears minor firmware glitches.
Tip: If the display stays dark, confirm the breaker is actually supplying the circuit and check for another nearby switch that may control the HVAC panel. - 2
Battery replacement (if applicable)
Replace old batteries with fresh, high-quality alkaline or lithium cells, ensuring correct polarity. Reboot the thermostat and test basic functions like temperature adjustment and hold mode.
Tip: Keep a spare set of batteries on hand and note the model so you don’t mix incompatible types. - 3
Inspect wiring and terminals
Carefully remove the cover and check each terminal for looseness, corrosion, or discoloration. Tighten screws to snug, not over-tight, and re-seat any loose wires.
Tip: Only touch with dry hands and avoid bending conductors; take a photo before adjusting to document the original wiring. - 4
Reset to factory settings
If the unit still misbehaves, perform a factory reset per the user manual. This clears personalized settings that could cause conflicts with the HVAC.
Tip: Backup any programmed schedules first if you want to preserve them after reset. - 5
Test the HVAC response
Set a simple target temperature and observe the HVAC response. If it cycles normally and maintains the setpoint, the issue may be resolved.
Tip: If the system continues to cycle or ignore the setpoint, the problem may lie with the HVAC control board. - 6
Know when to call a pro
If you notice burning smells, melted insulation, or you’re uncomfortable handling wiring, stop and contact a licensed technician.
Tip: Professional help is especially important if your thermostat controls a gas furnace or is integrated with a smart home hub.
Diagnosis: Thermostat won’t respond or shows inaccurate readings
Possible Causes
- highPower issue (tripped breaker, blown fuse, or outlet problem)
- highDead or weak batteries (if model uses batteries)
- mediumLoose, damaged, or corroded wiring at the thermostat
- lowOutdated or failing sensor/thermostat
Fixes
- easyCheck the circuit breaker and test the outlet supplying the thermostat; reset or replace as needed
- easyReplace batteries in battery-powered models and re-test responsiveness
- mediumInspect and reseat thermostat wires at both ends; tighten terminals and reassemble
- hardIf symptoms persist after power and wiring checks, consider professional replacement or sensor calibration
Questions & Answers
What are the most common signs that a thermostat is bad?
Common signs include a blank or dim display, inaccurate readings, unresponsive controls, and frequent cycling of the HVAC system. These indicators often point to power, battery, or wiring issues rather than a complete failure of the HVAC.
Common signs are a blank display, wrong readings, and odd HVAC cycling. Start with power and battery checks before moving to wiring.
Can simply changing the batteries fix a bad thermostat?
Battery replacement can fix many issues on battery-powered thermostats, especially if the display is dim or unresponsive. If the thermostat still behaves poorly after replacing batteries, proceed to power and wiring checks.
Replacing the batteries often fixes non-responsive displays. If problems continue, look at power and wiring next.
Is a blinking display always a sign of failure?
A blinking display can indicate a firmware error, low battery, or an intermittent power problem. Try power reset and battery replacement first; if it persists, consult a technician.
A blinking display isn’t always a final failure—start with resets and batteries, then check power.
When should I call a professional?
Call a professional if you smell burning, notice arcing, or can’t safely access the wiring. Also, if the problem persists after basic checks, a pro can diagnose control board or sensor faults.
Call a pro if you smell burning or can’t safely check wires. Persistent issues mean professional help.
How long do thermostats typically last?
Thermostats last several years, depending on usage and model. If you repeatedly experience faults after fixes, replacement may be more cost-effective than continued repairs.
Thermostats last several years; frequent faults suggest replacement may be the practical choice.
What to Remember
- Check power and batteries first
- Inspect wiring for loose terminals
- Use a structured symptom-to-diagnosis approach
- Don't skip safety—pull the plug if you smell burning
- Consider replacement if signs persist after fixes