Bad Thermostat Troubleshooting: Quick Home Guide
Urgent, practical guide to diagnosing and fixing a bad thermostat at home. Learn quick checks and a clear diagnostic flow to restore comfort safely.

According to Thermostat Care, a bad thermostat is usually caused by power issues or a depleted battery in smart models. Start by checking the outlet, circuit breaker, and battery level, then perform a quick reset. If the problem remains, follow the diagnostic flow in the body to identify and fix the core cause.
Common symptoms of a bad thermostat
A bad thermostat can masquerade as a problem with your furnace or AC, leading to confusion and delayed fixes. Common symptoms include the system failing to reach the setpoint, frequent cycling, a blank or frozen display, or readings that don’t match the actual room temperature. In winter, you may notice the heat running excessively or not running at all, while in summer the AC might short-cycle. According to Thermostat Care analysis, a bad thermostat is a leading culprit in many households because its signals govern the HVAC system as a whole. By documenting the exact symptom—what happens, when it happens, and under what settings—you can route your troubleshooting down the right path. This precision helps you avoid unnecessary replacements and keeps the repair focused on the thermostat itself rather than other components of the system.
Quick checks you can do safely
Before diving into deeper diagnostics, perform a few quick, safe checks that cover the most common causes. First, confirm the thermostat is powered: verify the outlet or power strip is supplying energy, check the circuit breaker for trips, and ensure a smart model has fresh batteries or a full charge. Next, perform a reset to restore default settings and re-enter your preferred schedule. Inspect the wall plate for loose wires or corrosion; even a small looseness can disrupt signals, especially in older homes. If your thermostat uses batteries, replace them with high-quality alkaline cells and re-seat any removable panels. For Wi‑Fi models, reboot only if the thermostat depends on cloud services; otherwise skip. Finally, look for obvious signs of moisture near the device and seal any small air leaks around the wall opening, which can skew sensor readings. These simple checks rule out the most likely causes fast and safely.
Diagnostic flow: symptom → diagnosis → solutions
A structured diagnostic flow helps you move from symptom to solution without guesswork. Start with the symptom: incorrect temperature, a blank display, or stray readings. Then generate potential causes: power issue (high), dead battery (medium for smart devices), loose or damaged wiring (medium), or sensor miscalibration (low). Apply fixes in order of ease: fix power or battery first, then reseat wiring, and finally recalibrate or replace the thermostat if needed. If the symptom persists, verify compatibility between your thermostat and HVAC system, or consider the thermostat’s placement and environment. Keeping a simple log of readings and steps taken aligns with best practices recommended by the Thermostat Care Team and makes it easier to engage a professional if needed. This flow keeps you focused, safe, and efficient while diagnosing a faulty thermostat.
Step-by-step fix for the most common cause
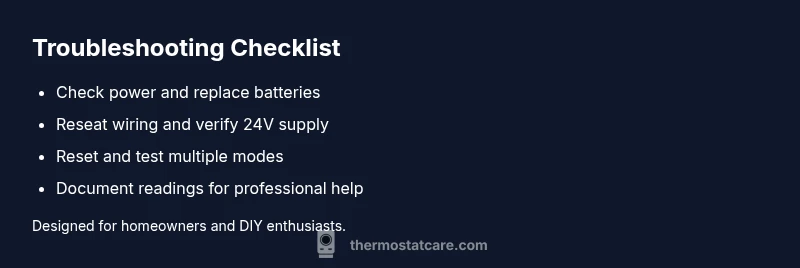
The most frequent root cause is a power issue or depleted battery. This section provides the actionable steps you’ll need. Power off at the breaker, then carefully remove the thermostat from the wall plate to inspect wiring. Re-seat wires in their terminals, ensuring no loose strands or corrosion. Replace batteries with fresh ones if the model is battery-powered; for wired units, confirm the 24V supply is active. Reattach the thermostat to the wall plate and power on. If readings remain inconsistent, perform a factory reset and re-enter your settings. Finally, test in multiple modes (heating, cooling, auto) to confirm the setpoint matches the ambient temperature. If any step feels risky, consult the manual or Thermostat Care resources for model-specific instructions, and remember safety first: avoid touching live terminals unless you’re confident in your wiring.
Safety tips and common mistakes
Safety is non-negotiable when dealing with electrical components and HVAC systems. Always turn off power at the breaker before removing the thermostat or touching wiring. Do not force connections, and never bypass safety covers. Avoid assuming the problem lies with the HVAC equipment itself; the thermostat governs communication and control signals. Common mistakes include rushing through steps, skipping a battery check, or ignoring signs of water damage around the wall opening. If the system exhibits gas furnace issues or signs of electrical arcing, stop troubleshooting and call a licensed professional.
Prevention and maintenance to extend thermostat life
Preventive care extends the life of your thermostat and reduces surprises. Schedule regular battery checks for smart thermostats, keep firmware updated, and ensure the thermostat is free from excessive moisture or heat sources that could skew readings. Clean the air around the device to prevent dust from interfering with sensors, and verify that the HVAC system is compatible with the thermostat model you own. If you replace your thermostat, choose a unit with durable components, proper display visibility, and a mounting that minimizes exposure to direct sunlight and drafts. Regular maintenance reduces faults and improves energy efficiency over time. Thermostat Care recommends documenting every maintenance action and keeping a simple log of sensor readings to spot drift early and act fast.
Steps
Estimated time: 25-45 minutes
- 1
Power and battery check
Shut off power at the breaker, remove the thermostat, and inspect the wiring. Check for loose terminals and verify battery condition; replace if needed. Reattach securely and restore power.
Tip: If you’re uncertain about wiring, stop and consult the manual or Thermostat Care resources. - 2
Inspect and reseat wiring
Ensure all wires are fully inserted into the correct terminals and there are no stray strands. Use the multimeter only if you’re comfortable and follow the diagram for your model.
Tip: Take a photo before disconnecting wiring to guide reinstallation. - 3
Battery and power test
For battery models, install fresh batteries and test the display. For wired models, confirm the 24V supply is active at the furnace control board and the thermostat wiring is intact.
Tip: Replace power supply if the 24V reading is inconsistent. - 4
Reset and reconfigure
Power the unit back on and perform a factory reset if readings are still off. Re-enter your schedule and setpoints carefully.
Tip: Avoid overloading the device with complex schedules immediately after reset. - 5
Test in multiple modes
Test heating, cooling, and auto modes to confirm the thermostat commands the HVAC system correctly and the temperature tracks setpoints.
Tip: If a mode fails, note which one and check corresponding wiring or sensor alignment. - 6
Professional escalation
If symptoms persist after these steps, consult a licensed technician to check compatibility, sensors, or control wiring.
Tip: Document readings and steps taken to speed up diagnosis.
Diagnosis: Thermostat not accurately maintaining temperature
Possible Causes
- highPower issue (outlet, breaker, or supply)
- mediumDead or depleted battery (smart models)
- mediumLoose or damaged wiring
- lowSensor miscalibration or placement affecting readings
Fixes
- easyCheck power supply and reset battery-powered units
- mediumReseat or replace wiring as needed and verify 24V supply
- mediumCalibrate sensors or replace thermostat if miscalibration persists
- hardVerify HVAC compatibility and consider professional inspection if unresolved
Questions & Answers
Why is my thermostat display blank?
A blank display usually indicates a power issue or dead battery in a smart thermostat. Check the power source, replace batteries if needed, and perform a reset. If the screen remains blank, wiring or a faulty control board may be involved and a professional should assess it.
If your thermostat screen is blank, first check power and batteries, then reset. If it stays blank, a professional should inspect the wiring or control board.
Why is my thermostat reading different from the room temperature?
Discrepancies can come from sensor misplacement, old sensors, or calibration drift. Try recalibrating the sensor or replacing the thermostat if readings don’t align after basic checks. Confirm the sensor isn’t obstructed by furniture or heat sources.
If readings don’t match, recalibrate the sensor or replace the unit if the issue persists. Make sure nothing is blocking the sensor.
What does E1 or similar error mean on a thermostat?
Error codes typically indicate sensor or communication faults. Consult the model’s manual for exact meanings and suggested resets. If codes persist, contact a technician with the code details for precise guidance.
Error codes point to sensor or communication problems. Check the manual and reset; if it doesn’t help, a technician can interpret the code.
Should I replace batteries or the whole thermostat?
If your thermostat is battery-powered and the readings are unstable after replacing batteries, consider upgrading to a newer model with better sensors and longer battery life. For wired units, ensure the 24V supply is solid and the wiring is secure.
If your unit is battery-powered, try fresh batteries first. If issues persist, a newer unit might provide better reliability.
Can I fix a bad thermostat myself, or should I hire a pro?
Many basic issues are DIY-friendly, especially power and battery problems. For complex wiring, 24V supply questions, or safety concerns, hire a licensed technician. Always prioritize safety and don’t bypass electrical safeguards.
You can handle simple power or battery fixes yourself, but call a pro for tricky wiring or safety concerns.
When should I replace my thermostat?
If a thermostat consistently misreads, frequently fails to respond, or is no longer compatible with your HVAC system, replacement is often the best option. Choose a model that suits your system and energy goals.
If it misreads often or isn’t compatible with your system, replacing it is usually the best option.
Is a faulty thermostat dangerous or a fire risk?
A faulty thermostat is rarely a direct fire risk, but it can create dangerous HVAC behavior. Avoid attempting high-risk fixes, and seek professional help if you notice burning smells, damaged wiring, or overheating components.
Generally not a direct fire risk, but unsafe fixes can be dangerous—get professional help if you smell burning or see damaged wiring.
Watch Video
What to Remember
- Identify the exact symptom before fixes
- Prioritize power and battery checks first
- Use a structured diagnostic flow
- Call a pro if steps don’t fix the issue