Problems with Thermostat: Quick Troubleshooting Guide
Urgent, practical guide to diagnose and fix problems with thermostat. Learn common causes, safe DIY checks, and when to contact a pro with Thermostat Care.

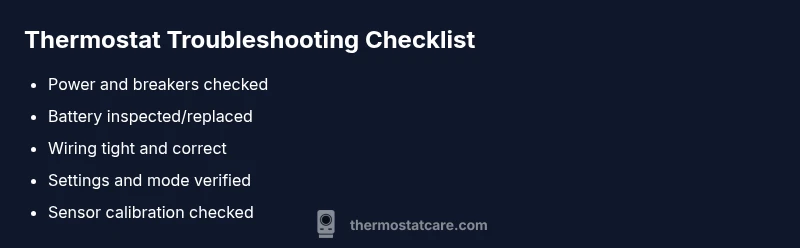
Most thermostat problems stem from simple issues: power supply, dead or weak batteries, loose wiring, or incorrect settings. Start by confirming the device is powered, replacing batteries if needed, then checking wiring and the display. If the problem persists, follow the diagnostic flow for deeper checks and safety precautions.
Understanding the scope of problems with thermostat
When a thermostat acts up, it can impact comfort, energy bills, and HVAC performance. Problems with thermostat vary: some show up as a blank display, others as an unresponsive interface, or as mismatched temperatures. According to Thermostat Care, many issues are not the device itself but the way it's powered, wired, or configured. The Thermostat Care team found that homeowners who start with the simplest checks—power, batteries, and basic settings—tave the most immediate wins and avoid unnecessary service calls. In this section, we map the most common scenarios you may encounter, explain why they occur, and outline safe, practical steps you can take to verify if the problem is DIY-fixable or requires professional help. We’ll also discuss how aging or incompatible components can trigger stubborn symptoms, such as the thermostat cycling frequently, responding slowly to changes, or losing connection to the Wi‑Fi (for smart thermostats). By understanding these patterns, you’ll be better prepared to triage issues quickly and restore comfort without unnecessary delays.
Common causes: power, batteries, and wiring
Most problems with thermostat begin with simple, everyday issues. The most frequent culprits are power issues (outlets, switches, or breakers), battery health in non-hardwired models, and wiring connections at the thermostat base. A loose or damaged wire can cause intermittent readings or a complete failure to respond. Before calling a pro, verify the furnace and thermostat share power via a working circuit, replace worn batteries, and reseat any loose terminals. For smart thermostats, ensure the device has stable Wi‑Fi and is linked to the app correctly. Remember: even small wiring mistakes can create voltage irregularities that trigger odd behavior.
Another common factor is environmental and sensor-related drift. If the thermostat is located in a drafty spot or near a heat source, readings may be skewed. Relocate if possible or shield the thermostat from direct sun, doors, or drafts. If you notice frequent cycling, a dead battery, or a non-responsive screen, start with these checks, as they address ~80% of household complaints.
Sensor issues and calibration
Thermostats rely on accurate sensing of ambient temperature. Over time sensors can drift, especially if a thermostat operates near a heat source, in a corner with poor air circulation, or in a model with multiple remote sensors. Inaccurate readings lead to rooms that feel too warm or too cold even when the other parts of the system are functioning. Cleaning dust from the sensor on older units can improve accuracy, and recalibrating (or temporarily swapping a remote sensor in multi-zone setups) can restore proper readings. For smart thermostats, sensor alignment across zones matters, so check calibration in the companion app and compare readings with an independent thermometer in the same room.
If your home’s layout is changing (new additions, different insulation, or changes to ductwork), recalibration may be needed after HVAC upgrades.
Incorrect settings and compatibility
A surprising number of issues trace back to misconfigured settings. Verify that the thermostat’s mode matches the season (heat in winter, cool in summer), that the fan setting is correct, and that hold/auto schedules are not overriding expectations. Hold settings can cause delayed responses, while eco or adaptive features may limit heating or cooling cycles in ways that feel off. Compatibility is another frequent problem—some thermostats aren’t compatible with older HVAC systems or with certain control boards. Check the system type in the thermostat’s manual and confirm compatibility with your furnace or heat pump. If an update or app change altered settings, re-check the schedule, display language, and units (Celsius vs Fahrenheit).
Incompatible pairing with other smart home devices can also cause unexpected behavior. Disable or reconfigure integrations one by one to isolate the culprit.
Safe DIY checks you can perform today
Before you call for help, try a few non-invasive steps: power cycle the thermostat by turning off the power at the breaker for 30 seconds, then back on; replace or reseat batteries if applicable. Ensure the thermostat is firmly mounted and all wires are properly connected at the backplate. For smart thermostats, confirm the Wi‑Fi connection and app status. If you have a non-responsive display, try a soft reset if the model supports it (consult the manual). Do not touch HVAC control boards or high-voltage components unless you have explicit training. If you smell burning, hear buzzing, or see scorch marks, stop and contact a professional immediately.
When to call a professional
Some problems are best left to licensed technicians. If power checks fail, if the system won’t energize, if wiring appears damaged or corroded, or if a control board or sensor within the HVAC system seems faulty, schedule a professional visit. A pro can safely verify wiring continuity, confirm the C-wire configuration, and diagnose control-board issues or faulty sensors. For smart thermostats, a pro can also verify network integration and ensure firmware compatibility with your HVAC system. If your home has older wiring or complex zoning, professional assessment reduces risk and improves long-term reliability.
Prevention tips to avoid future thermostat problems
Establish a simple maintenance routine: replace batteries annually or as soon as the low-battery indicator appears, dust the sensor annually, and inspect wiring connections during seasonal HVAC checks. Keep the thermostat firmware up to date if you use a smart model, and verify compatibility whenever you replace your HVAC components. Place the thermostat away from direct sun, drafts, or heat sources, and ensure it has adequate airflow around it. Finally, document any changes you make so you can reference them later if symptoms recur.
Steps
Estimated time: 45-60 minutes
- 1
Check power and battery
Turn off the power to the thermostat at the breaker, then restore it. If your unit uses batteries, replace them with fresh ones and clean the battery contacts. Confirm the display lights up and responds after power restoration.
Tip: Always test power at the source first; avoid probing live terminals. - 2
Verify settings and schedule
Review the mode (heat, cool, auto) and the set temperature. Ensure there isn’t an active hold or schedule that overrides your changes. Disable any eco modes if you’re troubleshooting for comfort.
Tip: Note the current schedule in case you need to restore it later. - 3
Inspect wiring and backplate
With the power off, remove the thermostat from the wall and inspect all wires for looseness, damage, or copper exposure. Reseat wires firmly in their terminals and reattach the plate securely.
Tip: Take a photo of the wiring before disconnecting anything for reference. - 4
Test with a controlled heat/cool check
If safe, set the thermostat to heat (or cool) and listen for the HVAC system engaging. Confirm the temperature reading moves toward the setpoint. If there’s no system response, power and wiring are more likely the issue.
Tip: Never bypass safety switches or force-energize the system. - 5
Reset or re-pair (for smart thermostats)
Attempt a soft reset or a full factory reset if you have exhausted basic checks. Re-pair with the Wi‑Fi network and restore any saved settings. Check for firmware updates once reconnected.
Tip: Backup your settings before a full reset. - 6
Document results and monitor
Record what you tested and the outcomes, including any abnormal readings. Monitor the system for 24–48 hours to confirm stability before scheduling a pro visit.
Tip: Keep a small log of changes and outcomes for future reference.
Diagnosis: Thermostat not responding or not maintaining set temperatures
Possible Causes
- highPower issue (outlet, fuse, or breaker)
- highDead or weak thermostat battery
- mediumLoose or damaged wiring
- lowHVAC sensor or control board issue
Fixes
- easyCheck power supply, outlet, and breakers; replace fuses as needed
- easyReplace thermostat battery and clean contacts; reseat batteries if required
- mediumInspect thermostat wires at the backplate; reseat or replace damaged wires
- hardConsult HVAC professional to verify control board/sensor integrity
Questions & Answers
What are the most common thermostat problems?
Most issues are power, battery, wiring, or setting related. Start with power checks, battery replacement, and resetting settings. If problems persist, follow the diagnostic flow to identify deeper faults.
Most issues are power, battery, wiring, or setting related. Start with power checks and battery replacement, then follow the diagnostic flow if needed.
How can I tell if my thermostat needs new batteries?
If the display is dim, unresponsive, or shows low battery indicators, replace the batteries and see if the display returns to normal. In some models, battery life varies; replace with the recommended type and check contacts for corrosion.
If the display is dim or unresponsive, replace the batteries and check for corrosion.
Why won’t my thermostat turn on after a power outage?
Power outages can reset internal components. After restoration, recheck the breaker, reset the thermostat, and re-enter any network connections if it’s a smart model.
Power outages can reset the thermostat; reset it and re-enter any network settings.
Can a thermostat cause my HVAC to run constantly?
Yes. If the thermostat misreads room temperature or is stuck on hold, the HVAC may run more than needed. Verifying sensor placement and recalibrating can help reduce wasted cycles.
A misreading or hold setting can make the system run nonstop; recalibrate if needed.
When should I replace my thermostat?
If the unit is frequently failing, incompatible with your HVAC, or significantly outdated, replacement is often more cost-efficient than ongoing repairs. Consider a model that supports your current HVAC and smart home setup.
If failures are frequent or it's incompatible with your HVAC, replacement is wise.
Watch Video
What to Remember
- Check power and batteries first.
- Verify settings before wiring adjustments.
- Inspect and reseat wiring if needed.
- Call a pro for electrical or control-board issues.