Faulty Thermostat Troubleshooting: Quick Fixes
A practical, urgent guide to diagnose and fix a faulty thermostat, with safe steps, diagnostic flow, and professional thresholds for when to call in help.

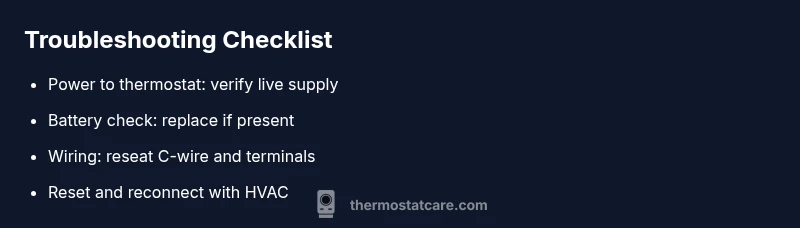
Step 1: Check power to the thermostat. Step 2: If battery-powered, replace the battery. Step 3: Confirm the HVAC power supply and circuit breaker are on. Step 4: Reseat the wires at the thermostat and verify the C-wire connection. Step 5: Reset the thermostat and re-pair with the furnace. Step 6: If it still fails, call a pro.
Understanding the problem with a faulty thermostat
A faulty thermostat disrupts comfort and wastes energy. The Thermostat Care team notes that the most common symptoms are a blank display, unresponsive buttons, or inconsistent temperature readings. Homeowners often panic when the system seems to ignore setpoints, but many problems stem from simple, fixable causes. According to Thermostat Care, a faulty thermostat is frequently caused by power loss, a dead battery (in battery-powered models), or wiring issues at the thermostat. Before suggesting a replacement, perform a structured check to separate phantom readings from actual failures. Understanding the problem clearly will save you time and prevent unnecessary replacements. This guide prioritizes urgent, actionable steps to get you back to comfortable temperatures quickly, while keeping safety at the forefront.
Common causes and quick checks
The leading culprits are power issues, dead or weak batteries, and wiring problems. For battery-powered models, replace the battery and test again. For hard-wired thermostats, check that the furnace or HVAC equipment is powered, the circuit breaker is on, and the thermostat is receiving line voltage. Loose or corroded wires at the terminals can masquerade as a device failure; reseat or tighten connections if you’re comfortable. If the display flickers or the unit resets randomly, inspect the power adapter or the backup battery compartment, if present. Thermostat Care analysis shows that many faults trace back to power or C-wire connections, not to the thermostat’s internal brain. Keep a small multimeter handy to verify voltage where safe.
Safety first: handling electrical components
Safety first means protecting yourself and your equipment. Power down the system before touching thermostat components. If you’re unsure, don’t remove covers or disconnect wires; waiting for a pro is safer. Wear eye protection and use insulated tools. If you smell burning or see melted plastic, stop immediately and call a technician. You can often diagnose the issue without opening the control panel, but if you do proceed, document wire colors and terminal positions for reassembly later.
How to diagnose and decide when to call a pro
Use a simple diagnostic flow: symptom → probable cause → solution. If the thermostat screen is blank, prioritize power and battery checks first. If the unit responds intermittently, inspect wiring connections and C-wire integrity. If the thermostat still misreads temperatures or fails to control the HVAC, the issue may be a faulty control board or internal sensor. When in doubt, contact a licensed professional to avoid HVAC damage. This approach minimizes risk while guiding you toward a safe resolution.
Preventing future thermostat problems
To minimize future faults, schedule regular checks of the thermostat location, ensure clean mounting, and update firmware if supported. Keep the unit away from direct sun, moisture, and heat sources that can confuse sensors. Periodically test the thermostat by changing a setpoint and watching the HVAC respond. Thermostat Care recommends recording model, firmware, and wiring configuration to speed future diagnostics and ensure smoother operation over time.
Steps
Estimated time: 30-45 minutes
- 1
Power down and prep
Turn off the thermostat’s power at the breaker or switch, then set up a clean workspace. This reduces the risk of shock and helps you stay organized. Gather a flashlight, a small screwdriver, and a label for wires.
Tip: Label wires before disconnecting to speed reassembly. - 2
Check power and battery
Verify the thermostat receives power from the main feed. If battery-powered, replace the battery with a fresh one and test the unit. Re-power the system to see if the display returns.
Tip: Use the multimeter to confirm voltage if you’re comfortable. - 3
Inspect wiring connections
Carefully reseat all wire connections at the thermostat, especially the C-wire. Look for signs of corrosion or loose terminals. If you see melted insulation or damaged wires, stop and call a professional.
Tip: Take a photo of the wiring before moving any terminals. - 4
Reset and re-pair
Perform a factory reset on the thermostat if available, then re-pair it with the HVAC system following the model’s instructions. Reprogram schedules as needed.
Tip: Keep a quick note of your preferred temps and schedule settings. - 5
Test operation
Restore power and test by changing the setpoint and observing the HVAC response. Confirm that the system turns on and off as commanded and that the readings align with the room temperature.
Tip: Run through a few cycles to confirm stability. - 6
Know when to stop
If the unit still misbehaves after these steps, don’t push further. A faulty control board or internal sensor may require replacement or professional service.
Tip: Document symptoms and steps taken for the tech visit.
Diagnosis: Thermostat screen is blank or unresponsive
Possible Causes
- highPower issue (outlet, transformer, or furnace power)
- mediumDead or weak battery (battery-powered models)
- mediumLoose or disconnected wiring at the thermostat
- lowTripped circuit breaker or blown fuse
Fixes
- easyCheck the thermostat power source; ensure outlet or furnace power is on and the breaker is not tripped
- easyReplace batteries in battery-powered units and retest
- mediumReseat or tighten thermostat wires and verify C-wire integrity
- hardIf power and wiring are correct but the issue persists, escalate to a licensed technician
Questions & Answers
Is thermostat faulty?
A blank or unresponsive display often points to power or battery issues. Start with batteries, power sources, and then wiring. If problems persist, a professional diagnosis is recommended.
A blank screen usually means power or battery issues. Check the power, replace the battery if present, and consult a professional if it still doesn’t work.
Can a battery fix it?
Yes, replacing the battery can restore function on many models. After replacement, restart the thermostat and test. If issues continue, wiring or internal hardware may be at fault.
Yes. Replacing the battery often fixes many models. If it still fails, you may have a wiring or hardware issue needing a pro.
When to call a pro?
Call a professional when power and battery checks don’t restore function, or when wiring appears damaged or you sense electrical issues. A qualified technician can safely diagnose complex faults and prevent HVAC damage.
If power and battery changes don’t fix it, or you see wiring issues, it’s time to call a pro.
How do I reset safely?
Turn off power to the thermostat, wait a moment, then power back on and follow the model’s reset steps. Reprogram schedules afterward and test system response.
Power it down, wait, then reset per the model instructions and test the system.
Watch Video
What to Remember
- Power and battery checks first
- Safely reseat wiring before replacements
- Reset and re-pair after changes
- Call a pro for persistent or uncertain faults