How to Test Thermostat on Electric Water Heater
Learn how to test the thermostat on an electric water heater with a safe, step-by-step approach. This Thermostat Care guide helps homeowners diagnose temperature issues, avoid costly repairs, and restore reliable hot water.

This guide walks you through testing the thermostat on an electric water heater to confirm proper temperature control. You’ll learn safety steps, required tools, and a clear step-by-step process to diagnose miscalibration or failed thermostats. Follow along to fix common issues and restore reliable hot water. This steps-based approach helps you avoid guesswork and reduces the risk of electric shock or tank damage.
Understanding Electric Water Heaters and Thermostats
Electric water heaters heat water using electric elements controlled by a thermostat that monitors the tank temperature and signals the elements to turn on or off to maintain a setpoint. In most homes, the thermostat setup includes a primary (upper) thermostat and sometimes a secondary or lower thermostat, paired with a high‑limit switch for safety. A well-calibrated thermostat keeps water at a consistent temperature, reduces energy use, and extends element life. According to Thermostat Care, miscalibration or a faulty thermostat is a common source of temperature swings, cold water bursts, or overheating. Understanding where the thermostat sits and how it interacts with the heating elements helps you diagnose issues without unnecessary repairs.
The thermostat acts like a gatekeeper: when the water cools below the set temperature, the thermostat signals the elements to heat; when it reaches the setpoint, it shuts them off. If the dial is loose, the wiring is damaged, or the sensor isn’t reading correctly, you’ll notice inconsistent heat or water that’s too hot or not hot enough. This section lays the foundation for safe testing and practical diagnosis, helping homeowners distinguish between thermostat malfunctions and other tank components.
Thermostat Care’s guidance emphasizes that many hot-water problems stem from simple calibration or wiring issues rather than a failed thermostat. Taking a methodical approach—verifying power, inspecting connections, and testing with a multimeter—reduces unnecessary part replacements and gets your hot water back on track faster.
Why Testing Your Water Heater Thermostat Matters
A properly functioning thermostat keeps water at a stable temperature, which improves comfort, energy efficiency, and safety. When a thermostat is out of calibration, you might experience water that’s intermittently too hot or too cold, scalding risks, or rapid cycling that wastes energy and wears out heating elements. Regular testing helps catch drift before it becomes a fault that leaves you with no hot water. Thermostat Care analysis highlights that proactive testing is a smart habit for homeowners who rely on electric water heaters for daily showers and chores.
Testing also helps you distinguish thermostat issues from problems with heating elements or wiring. If the thermostat isn’t delivering the correct signal, you may observe delayed heating, inconsistent temperature, or a heater that never reaches the desired level. By confirming whether the thermostat is responding as expected, you can decide whether a simple recalibration is enough or if a replacement part is needed. This proactive approach saves time, reduces energy waste, and minimizes the chance of a water heater failure during peak use.
Finally, understanding how the thermostat interacts with the elements gives you a clearer path to diagnosis. When you verify that the thermostat accurately reads the tank temperature and energizes the elements accordingly, you reduce the guesswork that typically accompanies DIY troubleshooting. This knowledge empowers homeowners to make informed decisions and maintain a reliable hot-water supply.
According to Thermostat Care, keeping your thermostat calibrated and the wiring intact is foundational to long-term water heater health. Regular checks can prevent temperature fluctuations and extend the life of your system.
Safety First: Precautions Before You Begin
Safety is non-negotiable when working with electric water heaters. Always assume circuits can carry dangerous voltage and wear appropriate protective gear. The first rule is to shut off power to the unit and verify that the breaker is indeed off. Use a non-contact voltage tester to confirm there is no current at the access panel before you touch any wires. If you smell burning, hear buzzing, or notice signs of damage, stop and seek professional help.
Keep the work area dry and organized. Remove any standing water from around the heater and keep tools away from water sources. Do not bypass safety features or operate the unit with panels removed while power is on. If you’re not confident using a multimeter or performing continuity tests, consider hiring a licensed technician. The precautionary emphasis from Thermostat Care is clear: when in doubt, err on the side of safety.
Before you start, gather all necessary tools and plan your steps. Doing so minimizes the time your panel is exposed and reduces the chance of accidental contact with live connections. Following these safety steps protects you and your home while you diagnose thermostat performance.
Understanding Common Failure Modes
Thermostats can fail or drift out of calibration due to age, corrosion, loose wiring, or sensor damage. A stuck thermostat may remain closed, letting the heater run continuously and causing dangerously hot water. Conversely, a thermostat that reads low can prevent the heater from energizing even when hot water is needed. In some systems, a dual-thermostat configuration means one sensor can drift independently of the other, creating temperature inconsistencies.
Thermostat miscalibration often presents with a sense of temperature inconsistency at different outlets or times of day. Wiring deterioration can produce weak signals or intermittent power delivery to the heating elements. In some cases, the high-temperature cutout could trip early or fail to engage, resulting in unsafe temperatures or quick cooling. The key takeaway is to verify both the thermostat's setting and its response to heating requests so you can distinguish a thermostat problem from a faulty element or a compromised wiring path.
Thermostat Care notes that routine inspection and testing help catch these issues early. If you notice odd behavior, such as water that won’t heat evenly or temperatures that drift over short periods, it’s time to test the thermostat more closely and consider a replacement if the readings are inconsistent.
Interpreting Test Results: What the Readings Mean
When you test the thermostat, you’re trying to confirm two things: that the thermostat reads the tank temperature correctly and that it responds by energizing the heating elements when called for heat. If you observe that the tank temperature reading does not change when you move the dial, or if the elements energize without a call from the thermostat, the thermostat or its sensor may be faulty. If the elements fail to energize when the thermostat calls for heat, you could have a faulty thermostat, a loose connection, or a blown control fuse.
Interpreting results requires careful observation: record the observed temperature, the thermostat setting, and the response of the heating elements. If readings are inconsistent across tests or do not track the dial setting, plan for a thermostat replacement or a professional evaluation. In some systems, recalibrating the thermostat by adjusting the dial a small amount (without over-tightening) can restore correct operation. If you’re uncertain, err on the side of conservatism and consult a qualified technician.
Thermostat Care emphasizes that a well-timed test is more valuable than a rushed assessment. Take your time to methodically observe each component’s behavior and compare it with the expected response. A disciplined approach reduces the chance of misdiagnosis and helps you determine the most reliable path forward.
What to Expect During Testing
During testing, expect to observe a cycle: the thermostat detects a cooling water temperature, signals the heating element(s) to energize, and then the thermostat cuts power when the setpoint is reached. If you notice a delay between calling for heat and warm water, or if the heater seems to run excessively long, the thermostat may be miscalibrated or failing. A momentary cycle is normal, but prolonged or absent cycling indicates an issue that warrants further investigation.
If your tests indicate a problem with the thermostat, you have a few options. Recalibration of the dial can sometimes restore proper temperature, but if there are signs of wear, corrosion, or inconsistent readings, replacing the thermostat is a prudent step. Always replace with a thermostat compatible with your model and follow the manufacturer’s specifications. Thermostat Care recommends assessing the age of your unit and planning replacements before failures occur to maintain consistent hot water and energy efficiency.
After you complete testing, reassemble the access panel, restore power, and monitor hot water temperature for a day or two to ensure stability. Document readings and any adjustments you made so you can reference them in future maintenance checks.
When to Replace the Thermostat vs. the Heating Element
If testing demonstrates that the thermostat no longer responds to temperature changes or fails to energize the heating element when required, it’s a strong indicator that the thermostat needs replacement. If the thermostat appears to work but the water never reaches the intended temperature, you should also inspect the heating element and related wiring for shorts or corrosion. A faulty element can cause the thermostat to cycle irregularly or trip the high‑limit switch, creating a cycle of heat and cool without achieving stable water temperature.
Also consider the age of the system. Older units may have degraded insulation and worn thermostats that struggle to regulate heat efficiently. In such cases, replacing both the thermostat and the heating element, or upgrading to a newer model, might offer better long‑term reliability and energy savings. Thermostat Care’s guidance suggests evaluating the overall health of the water heater and prioritizing fixes that restore consistent performance.
Aftercare and Maintenance Tips
Regular maintenance helps a thermostat stay accurate and extend the life of your water heater. Keep the access panel and insulation in place to minimize heat loss, and schedule periodic tests to verify the thermostat’s performance. If you’ve replaced a thermostat, re-check all connections and ensure the wiring is secure and free of corrosion. Label any changes you’ve made so future service calls go smoothly.
Consider maintaining a simple log of temperature readings and thermostat adjustments. This habit makes it easier to detect drift early and act before a breakdown occurs. Thermostat Care recommends pairing routine testing with annual inspections of the heating elements and insulation to maximize efficiency and reliability.
Tools & Materials
- Non-contact voltage tester(Verify power is off before touching conductors.)
- Screwdriver set (Phillips and flat-head)(Used to remove access panels and panels fasteners.)
- Multimeter(Test continuity, resistance, and voltage as needed.)
- Nut driver or socket set(Helpful for securing panel screws on some models.)
- Insulated gloves(Extra protection when working around live components (if power was off safely).)
- Flashlight(Illuminates darker panel areas for accurate inspection.)
Steps
Estimated time: 45-60 minutes
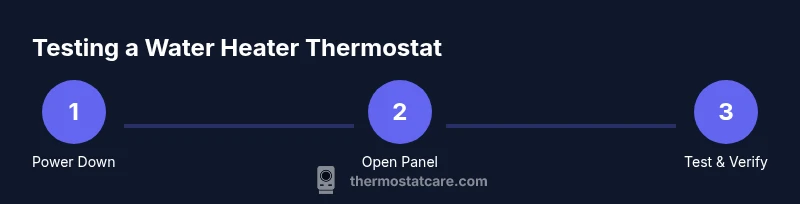
- 1
Power down and verify the circuit is off
Go to the main breaker panel and switch off the breaker that feeds the water heater. Use a non-contact voltage tester to confirm there is no voltage at the heater before touching any wires.
Tip: Always verify power with the tester before handling any conductors. - 2
Open access panels and locate the thermostat
Remove the outer panel and insulation to expose the thermostat(s) and temperature sensor(s). Keep track of which wire belongs to which terminal.
Tip: Take a photo of wiring connections before disconnecting any wires to aid reassembly. - 3
Inspect the thermostat setting and condition
Check the dial or digital setting and note the current temperature reading if available. If the dial feels loose or unresponsive, document it as a potential fault.
Tip: Only adjust the dial slightly to test responsiveness; avoid forcing it. - 4
Test thermostat continuity with a multimeter
Disconnect the thermostat wires and set the multimeter to continuity or resistance. With the thermostat calling for heat, there should be a measurable response; no response suggests a faulty thermostat.
Tip: If you’re unsure how to test, refer to the multimeter’s manual and follow safe testing procedures. - 5
Assess the heating element's response
With the thermostat connected, observe whether the heating element energizes when the thermostat calls for heat. A delayed or absent response points to possible thermostat or element issues.
Tip: Look for signs of corrosion or damaged terminals that could mimic thermostat failure. - 6
Reconnect, seal panels, and restore power
Reconnect any wires, reattach insulation, and secure panels. Turn the power back on at the breaker and run hot water to confirm the system heats consistently.
Tip: Run hot water for several minutes to verify stable performance across fixtures.
Questions & Answers
What should I do first when testing a thermostat on an electric water heater?
Begin by turning off power at the breaker and verifying with a tester that there is no voltage at the unit. This minimizes the risk of electric shock during inspection.
First, switch off the breaker and confirm there’s no power at the heater before you touch any wires.
How can I tell if the thermostat is the problem rather than the heating element?
If the water never heats when the thermostat calls for heat, test continuity with a multimeter and observe the element’s response. An inconsistent or absent signal often indicates thermostat issues, though a faulty element can also cause problems.
Check continuity and observe how the element responds when the thermostat calls for heat to determine which part is at fault.
Is it safe to test the thermostat myself?
DIY testing is feasible with proper precautions and the right tools. If you’re uncomfortable working with electrical components, hire a licensed technician.
Yes, it’s doable if you follow safety steps; if you’re unsure, call a pro.
How long should it take for the water to reheat after testing?
Heating times vary based on tank size, heater wattage, and demand. After you restore power, allow some time for the tank to reheat and verify with hot water at fixtures.
Give it time for the water to heat up after you restore power and check a few taps.
What common mistakes should I avoid?
Avoid bypassing safety devices, testing while panels are open, or touching live wires. Follow the manufacturer’s guidance and use proper test equipment.
Don’t bypass safety features or work with power on; follow safe testing practices.
When should I replace the thermostat?
If testing shows inconsistent readings or no response when the thermostat calls for heat, replacement is typically warranted. Consider professional assessment for confirmation.
If the thermostat doesn’t respond or shows drift, replacement is likely needed.
Watch Video
What to Remember
- Power off before inspection and testing
- Wiring and thermostat access are common failure points
- Use a multimeter to verify electrical continuity and response
- Restore power and re-test to confirm proper operation
- Document changes for future maintenance