Hot Water Thermostat Test: Step-by-Step Guide
Learn how to safely test your hot water thermostat at home with this step-by-step guide from Thermostat Care. Safe, practical checks help maintain correct water temps and energy efficiency.

To perform a hot water thermostat test, you’ll verify the thermostat setting, test accuracy with a thermometer, and inspect heating elements and wiring for safety. Before you begin, turn off power to the water heater and gather a multimeter, a non-contact voltage tester, a thermometer, and basic hand tools. This quick guide outlines safe, step-by-step checks.
Why Test a Hot Water Thermostat and What It Covers
Testing your hot water thermostat ensures safe water temps, prevents scalding, and preserves energy efficiency. An accurate thermostat keeps water heater output within the recommended range and reduces wear on heating elements. According to Thermostat Care, routine testing helps catch drifting setpoints before they cause comfort issues or higher bills. In this section, you’ll learn what the test covers, typical setpoint targets, and how to interpret results. The goal is to give homeowners a clear, safe path to verify temperature control without draining the tank or compromising safety. You’ll see why testing matters, what parts of the system are involved, and when a professional is needed. By understanding the test scope, you can plan a quick, low-risk assessment and decide if adjustment or replacement is warranted. Key components involved include the thermostat dial or sensor, safety devices like high-limit switches, the heating elements, wiring connections, and the cold-water inlet that can affect readings. The test focuses on verifying the thermostat setpoint, confirming actual water temperature, and evaluating whether the safety devices trip correctly. The process is not a full diagnostic of the entire water heater, but it provides a reliable indicator of whether the thermostat is operating within safe limits. Always use the proper tools and follow safety steps to avoid electrical shock or scalding.
Safety First: Power, Tools, and Environment
Safety is the foundation of any thermostat test. Power to the water heater must be shut off at the breaker before you touch wiring or components. Use a non-contact voltage tester to confirm there is no voltage present before removing any panel. Work in a dry area and avoid standing in water. Wear insulated gloves if handling hot components and never bypass safety devices to test the thermostat. The tools you’ll use are designed to minimize risk and improve accuracy. Plan your test for a time when the household can tolerate temporarily cooler water and ensure children and pets are out of the area. If you have a gas heater, additional cautions apply around flame safety and gas controls. Keep a digital camera or notebook handy to document readings for future reference.
Find the Thermostat and Check Its Setting
Most residential water heaters have one or two thermostats located behind an access panel on the side of the tank. Remove the insulation and panel to expose the thermostat dial or digital sensor. Note the printed setpoint on the dial and compare it to your target temperature (commonly 120 F / 49 C in many homes). If your unit uses two thermostats (upper and lower), check both. Record both readings and any evidence of wear. This step gives you a baseline for subsequent temperature checks and helps you decide whether an adjustment is appropriate. If the dial is difficult to turn or the sensor seems loose, avoid forcing it and consult a professional. In some models, the thermostat is part of a digital control board; for those units, follow the manufacturer manual for access and safety.
Measure Actual Water Temperature and Compare to Setpoint
Now you’ll verify how hot the water actually gets. With the water heater powered off, run hot water from a nearby faucet for 5–10 minutes to clear cold water from the lines. Use a calibrated thermometer to measure the temperature of the water at the faucet or at a designated test point. Compare the measured temp to the thermostat setpoint. If the measured temperature is significantly higher or lower, the thermostat may be drifting and require adjustment or replacement. Do not exceed the recommended maximum temperature to reduce the risk of burns. If your readings are close but not exact, minor dial tweaks and rechecks may suffice. Keep a written log of temperatures and settings for future reference.
Inspect Wiring, Limits, and Safety Devices
While panels are off, inspect visible wiring for signs of wear or corrosion. Look for loose screws, burnt smells, or melted insulation. Verify the high-temperature limit switch and other safety devices are intact and not tripped. If you find damaged conductors or a tripped high-limit, do not attempt a repair beyond basic resets — consult a licensed electrician or HVAC pro. This step ensures you don’t create a safety hazard while testing the thermostat. If the wiring looks pristine and readings are stable, you can proceed to reassemble, but only after confirming all wiring connections are tight and secure.
Adjusting or Replacing the Thermostat (When to Intervene)
If readings show drift, you can typically adjust the dial by small increments, following the manufacturer instructions. Re-check the water temperature after each adjustment by running hot water for several minutes and testing again. If a dial adjustment doesn’t bring the temperature in range, or if wiring shows issues, replacement of the thermostat or entire control may be necessary. For electric water heaters, consider whether the unit uses one or two thermostats and whether both must be replaced or calibrated together. Always power down again before any adjustment and re-test after reassembly. If a thermostat refuses to calibrate or shows erratic behavior, the issue may be a faulty sensor or a failing control board.
Practical Troubleshooting Scenarios and Next Steps
In many homes, the test reveals predictable patterns. If the water is consistently too hot, reduce the setpoint slightly and re-test. If the water never gets hot, inspect the power supply, confirm the element is energized, and check safety switches. For dual-element heaters, ensure both thermostats are functioning in concert. If you’re unsure about safe handling or you encounter damaged wiring, stop and call a licensed professional. Document readings, take photos of any discoloration or damage, and schedule a service visit if the issue persists. This approach keeps your system safe while giving you a clear path to resolution.
Tools & Materials
- Multimeter(Test continuity on safety circuits where applicable)
- Non-contact voltage tester(Confirm power is off before touching any components)
- Calibrated thermometer(Measure water temperature accurately (preferably digital))
- Infrared thermometer (optional)(Quick rough surface temp checks)
- Screwdrivers (Phillips and flat-head)(Remove access panel without damage)
- Wrench or pliers (if needed)(Gently adjust mounting or connectors)
- Heat-resistant gloves(Protect hands when handling hot components)
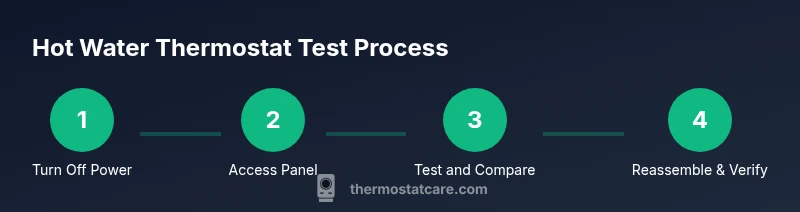
Steps
Estimated time: 30-45 minutes
- 1
Power down and verify safety
Turn off the water heater at the circuit breaker and verify no voltage is present with a non-contact tester. This protects you from electrical shock when panels are opened. If you’re unsure, pause and consult a professional.
Tip: Double-check the breaker label matches the water heater circuit to avoid a misadjustment. - 2
Remove access panel and insulation
Carefully remove the outer panel and the insulating cover to expose the thermostat(s) and wiring. Do not touch terminal screws with bare hands. Place the panel aside in a safe location.
Tip: Keep track of screws and note their original positions for easy reassembly. - 3
Identify thermostat and note the setpoints
Locate the thermostat dial or digital sensor and read the printed setpoint. If there are two thermostats, locate both. Record each setpoint and note any obvious wear or corrosion.
Tip: If the thermostat uses a dial, take a quick photo before turning it to avoid misplacement. - 4
Run hot water and test actual temperature
With power still off, run hot water for 5–10 minutes to flush cold lines. Use a calibrated thermometer to measure water temperature at a faucet. Compare this to the setpoint determined earlier.
Tip: Test at the hottest tap used regularly to reflect real usage conditions. - 5
Compare results and adjust if needed
If the measured temperature consistently deviates from the setpoint, adjust the thermostat dial in small increments and retest after several minutes of hot water usage. If no adjustment brings readings in range, consider a replacement.
Tip: Make one small adjustment at a time and test again before making further changes. - 6
Inspect wiring and safety devices
Check for loose connections, frayed insulation, or signs of overheating. Ensure safety devices like the high-temperature limit switch are intact and not tripped. Do not bypass safety features.
Tip: If you find damaged wiring, stop and call a professional for repair. - 7
Reassemble and verify
Replace insulation, reattach the access panel securely, and restore power. Run hot water and re-measure temperature to confirm stable results.
Tip: Document settings and readings for future reference.
Questions & Answers
What is a hot water thermostat and why test it?
A hot water thermostat controls the temperature of water heated in a tank. Testing it helps prevent scalding, protects energy efficiency, and detects drift before a malfunction occurs. Regular checks can extend heater life and improve safety.
A hot water thermostat controls the tank temperature. Testing it prevents burns and saves energy by catching drift early.
What temperature should water be set to?
Most homes target around 120 F (49 C) for safe and comfortable hot water. You may adjust slightly for preference, but avoid higher temperatures to minimize scald risk.
Aim for about 120 degrees Fahrenheit for safe, comfortable water.
What tools do I need for testing?
You’ll need a multimeter, a non-contact voltage tester, a calibrated thermometer, screwdrivers for access panels, and basic hand tools. These allow safe power checks and accurate temperature readings.
Have a multimeter, voltage tester, thermometer, and basic tools ready.
What are signs a thermostat might be bad?
If water is consistently too hot or too cold, readings drift after adjustments, or safety devices trip often, the thermostat may be failing. Inconsistent results warrant professional evaluation.
If temps are off after adjustments or safety switches trip, get a pro check.
Is it safe to adjust the thermostat myself?
Yes, with power off and proper precautions, small dial adjustments are common. If you’re unsure about wiring, if there’s damage, or if two thermostats exist, hire a licensed professional.
You can adjust if safe, but seek pro help for wiring or dual thermostats.
Watch Video
What to Remember
- Test safely with power off and the right tools
- Check both setpoint and actual water temperature
- Adjust in small increments and re-test
- Inspect wiring and safety devices for safety
- Document readings for future maintenance