Wire Nest Thermostat Wiring Guide: Step-by-Step
Learn how to safely wire a Nest thermostat with clear, actionable steps. This guide covers common wiring configurations, tool needs, safety tips, and troubleshooting to help homeowners wire Nest thermostats correctly.

In this guide you will learn how to safely wire a Nest thermostat for common HVAC setups, including identifying wires, matching them to the correct terminals, and verifying compatibility. You'll see practical wiring tips, safety reminders, and troubleshooting steps to avoid power issues. This article aligns with Thermostat Care best practices.
Wiring fundamentals for a Nest thermostat
Nest thermostats are designed to be installed in most residential HVAC systems, but the wiring must be correct to avoid power issues or short cycling. According to Thermostat Care, the first rule is to power down the system at the breaker before touching any wires. Nest relies on a small amount of current drawn from the control wires to stay awake; if the C-wire is missing, the thermostat may behave erratically or drop offline. The most common wires you’ll encounter are R (or Rh/Rc) for power, C for common, G for fan, Y for compressor, W for heat, and O/B for heat-pump reversing valve. Some older two-wire systems may only have R and W, which means the Nest will use power stealing methods and may require a C-wire adapter or the Nest power connector. Color coding is not universal, so always verify with a multimeter or a voltage tester if you’re unsure. Keep the wires attached to the same terminals on the new thermostat where possible, and take a photo of the old connections before removing the faceplate. This careful preparation reduces mistakes and makes the installation smoother.
Thermostat Care also emphasizes labeling wires and keeping the furnace and air handler powered off during the swap to minimize risk. If you’re ever unsure, consult a licensed HVAC technician to avoid potentially dangerous mistakes.
Compatibility and wiring configurations for Nest
Most homes fall into a few wiring categories: 2-wire, 3-wire, 4-wire, or heat-pump configurations with an O/B reversing valve. A typical 2-wire setup uses only R and W, which powers heat but can cause the Nest to draw power from the heating circuit; this is known as power stealing and can lead to interruptions if the unit demands more power than the circuit can spare. A 3-wire system adds a C or G wire to improve reliability, and a 4-wire system usually includes R, C, G, and Y for cooling control. Heat pumps add O/B and often W2/Aux as separate signals. Nest supports many of these configurations, but you should map each wire to its corresponding Nest terminal exactly as it was on your old stat. This reduces the risk of miswiring and ensures the Nest receives a stable 24V signal. For older systems with multiple transformers or unusual color codes, double-check each conductor with a multimeter or voltmeter before connecting. Thermostat Care’s guidance helps homeowners verify compatibility and avoid common wiring mistakes.
Tools, safety, and prep steps
Before you touch any wiring, gather the essential tools and take safety precautions. You should have a screwdriver set (Phillips #2 is common), wire strippers, a non-contact voltage tester, and a multimeter if available. A notebook or phone camera to document the existing wiring is invaluable; label each wire with its terminal designation (R, C, G, Y, W, O/B) before removing the old stat. Turn off power at the breaker to the thermostat circuit and, for extra safety, switch off the corresponding convenience or furnace disconnect if present. Clear the wall area and disengage the old thermostat from its mounting plate to expose the terminal block. If a wire is stuck or the terminals are corroded, do not force it—remove the power, inspect for damage, and consider replacing damaged wires.
Note: If you’re lacking a C wire and your system is known to require reliable power, consider a C-wire adapter or professional installation. Many DIY guides underestimate the importance of a solid common connection for modern smart thermostats. Use a low-stress grip when handling wires and avoid bending copper sharply, which can break strands over time.
Wiring configurations and mapping to Nest terminals
The Nest thermostat is designed to be intuitive, but accurate wiring is essential. Here are typical mappings for common setups:
- R (or Rc/Rh) -> R: Provides 24V power. If your system has separate Rc and Rh, bridge them on the Nest or at the control board, depending on your wiring style.
- C -> C: The common wire that completes the circuit. This is the most reliable option for keeping the Nest powered without relying on power stealing.
- G -> G: Fan control.
- Y1 (Y) -> Y1: Cooling signal. If you have multiple compressors, you may see Y2 as well, but Nest usually uses Y1 for standard cooling.
- W1 (W) -> W1: Heat signal. Some systems use W2/Aux for auxiliary heat; map accordingly if present.
- O/B -> O/B: Reversing valve for heat pumps. Some systems require O for cooling, B for heating; verify with the old stat labels.
If you don’t have matching wires, do not improvise. For unconventional configurations, consult Thermostat Care’s troubleshooting primer and confirm with your HVAC equipment manual. When in doubt, a professional assessment can prevent costly mistakes and ensure your Nest remains reliable.
After wiring: testing and validation
Once you’ve mapped each wire to the proper Nest terminal, carefully reattach the Nest plate and restore power. Use the Nest app to run a quick wiring check and confirm that each function responds (heat, cool, fan, and, if applicable, emergency heat). If the Nest detects a missing common wire, it will prompt you to add one or adjust power settings. Take a moment to verify that the fan runs when expected and that heating and cooling respond correctly to temperature changes. If you see a blinking light or the Nest shows a warning about no power, power down, re-check all connections, and reseat the wires. If you still encounter problems, consider a dedicated C-wire adapter or consult a licensed technician. Thermostat Care recommends documenting your configuration in case you need to troubleshoot later or re-wire the system for a different thermostat.
Common mistakes and troubleshooting
Even experienced DIYers can make mistakes that disrupt furnace or AC operation. Common errors include swapping R and RC/RH bridges incorrectly, omitting the C wire, mislabeling wires, or forcing a wire into a terminal that’s not designed for it. A frequent oversight is forgetting to remove the old jumper between RC and RH when your new thermostat doesn’t require it. Nest devices are designed to handle common configurations, but an incorrect mapping can cause intermittent power loss, reboot loops, or system short cycling. If you encounter a failure after wiring, power down, recheck every connection against the old thermostat diagram, and verify you’re using the right terminal for each conductor. If required, consult your equipment manual for terminal designations or seek professional help. Thermostat Care also notes that some systems with two transformers require special attention to avoid backfeeding, so be cautious with heat-pump configurations and unusual setups.
Tools & Materials
- Screwdriver set (Phillips #2 and flathead)(Small screws on thermostat base; keep bits handy for globe fittings)
- Non-contact voltage tester(Verify power is off before handling any wires)
- Wire strippers/cliers(Trim insulation without nicking copper; maintain clean ends)
- Multimeter (optional)(For confirming voltage and wire function when uncertain)
- Notebook or smartphone camera(Document old wiring and terminal labels before removal)
- C-wire adapter or spare wire kit (optional)(Helpful if your system lacks a dedicated C wire)
Steps
Estimated time: 60-90 minutes
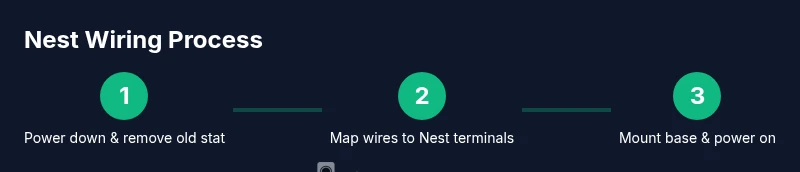
- 1
Power down and remove old thermostat
Shut off power at the breaker to the thermostat circuit. Remove the faceplate and take a high-resolution photo of the current wiring. Disconnect wires one by one, keeping them labeled as you go to avoid confusion later.
Tip: Label each wire with its terminal on a piece of tape to prevent misplacement during transfer. - 2
Identify and label wires
Match each conductor to its function (R, C, G, Y, W, O/B). If a wire is unclear, use a multimeter to confirm voltage and continuity. Label anything that isn’t clearly marked.
Tip: Double-check that R is the 24V power line and that C is the common; mixing them is a common wiring error. - 3
Map wires to the Nest base
Insert the wires into the corresponding Nest terminals: R to R, G to G, Y to Y1, W to W1, C to C, and O/B to O/B (for heat pumps). Ensure the wires are fully seated and not loose.
Tip: If you see a second R terminal (R and RC/RH), bridge them on the Nest or on the control board, depending on your wiring setup. - 4
Mount the Nest base
Attach the Nest base to the wall with the supplied screws. Gently push the wires back into the wall cavity as you align the base, making sure not to kink or pinch any conductor.
Tip: Use a stud finder to avoid mounting into a drywall hollow that could loosen over time. - 5
Restore power and configure
Power the system back on and follow the on-screen prompts in the Nest app. Confirm the wiring check reports a healthy connection and complete any system setup questions.
Tip: If the app reports a missing C wire, consider substituting with an adapter or running a dedicated C conductor. - 6
Test heating and cooling
Set a test temperature and verify that heat, cool, and fan operate as expected. Listen for smooth startup and check that the temperature responds quickly to changes.
Tip: Run a full cycle to ensure both heat and cool modes respond correctly before finalizing the installation. - 7
Security and final checks
Recheck all connections, re-seat the thermostat, and replace the faceplate. Keep a record of the wiring configuration for future reference.
Tip: If anything feels loose or unusual, power down and re-check the connections again before leaving the thermostat energized.
Questions & Answers
Do I need a C-wire for a Nest thermostat?
A C-wire provides a stable power return for the Nest and helps prevent power issues. If your system lacks a C wire, a power adapter or adapter kit can be used, but verify compatibility with your HVAC system.
The Nest benefits from a C-wire for stable power. If you don’t have one, consider a C-wire adapter and confirm compatibility with your HVAC.
Can Nest work without a C-wire?
Yes, Nest can operate without a C-wire using power-stealing methods, but this may cause dimming, reboot cycles, or inconsistent performance. A C-wire improves reliability.
Nest can run without a C-wire, but it’s less reliable. A proper C-wire improves stability.
What if wires aren’t labeled?
Label wires based on their terminal provenance or use a multimeter to verify voltage. If labeling is uncertain, pause and seek professional help to avoid miswiring.
If wires aren’t labeled, identify them carefully or ask for professional help to avoid mistakes.
Is Nest compatible with heat pumps?
Nest supports many heat-pump configurations, including O/B reversing valves. Follow the wiring layout carefully and verify auxiliary heat requirements if present.
Nest works with many heat pumps, but you must map O/B and any auxiliary heat correctly.
What should I do if Nest shows a 'no power' error?
Power issues usually mean a loose connection or missing C wire. Recheck wires, reseat connections, and verify the C path before trying again.
If you see a no power error, recheck the wiring and C connection before retrying.
Should I hire a professional to wire Nest?
If you’re unsure about live wiring, unfamiliar with HVAC systems, or facing unusual configurations, hiring a licensed professional is the safest choice.
If you’re unsure, it’s wise to hire a pro to ensure safe, correct wiring.
Watch Video
What to Remember
- Plan wiring carefully before removing the old stat
- Verify wire functions with labels or testing tools
- Map each wire to the correct Nest terminal
- Power down fully before any disassembly
- Test heating, cooling, and fan after wiring