Wire a Google Nest Thermostat: A DIY Wiring Guide
Learn how to safely wire a Google Nest thermostat with compatible wiring, step-by-step prep, and setup tips from Thermostat Care. This guide covers R, C, Y, G, W connections and testing for reliable HVAC control.

Learn how to wire a Google Nest thermostat safely and correctly. This quick guide covers compatibility checks, wiring prep, and connecting R, C, Y, G, and W terminals without exposing line voltage. According to Thermostat Care, a careful, step-by-step approach reduces risk and ensures reliable HVAC control for everyday use in most homes and climates.
Understanding google nest thermostat wiring
google nest thermostat wiring is the backbone of a reliable smart home climate control. In this section, we cover the basic wiring layout and what each wire does. The Nest thermostat typically uses a simple set of conductors: R for power, C for common, Y1 for cooling, G for fan, and W1 for heat. Some systems also use O/B for heat pump reversing valve. The wiring configuration depends on your HVAC type, whether you have conventional gas/electric, a heat pump, or multiple stages. Understanding these wires helps you identify which conductors to connect to the Nest base. For homeowners, labeling wires before disconnecting helps prevent mistakes and reduces the chance of miswiring. According to Thermostat Care, the most frequent wiring issues arise from missing C-wire or mislabeling wires during a retrofit, which can cause the Nest to fail to power on or cycle improperly. Throughout this guide, we will refer to the two common scenarios: a standard single-stage system and a heat pump with a reversing valve. With these basics in hand, you can proceed to compatibility checks and safe preparation with confidence.
Compatibility and common wiring configurations
Before you physically touch any wires, confirm that your thermostat replacement is compatible with your HVAC system. Google Nest thermostats are designed to work with many systems, but some older or specialized configurations require extra steps or a C-wire adapter. In a typical single-stage system, connecting R, C, Y1, G, and W1 is sufficient. If you have a heat pump, you may need to connect O/B and possibly AUX/E. If a C-wire is not present, Nest provides a power-sharing method or a "Nest Power Connector" option, but adding a C-wire is generally best for power stability. Thermostat Care analysis suggests ensuring C-wire presence improves power stability and display reliability. Have a clear wiring diagram from your control board and cross-check terminal labels with your old thermostat. If your control board uses different labels, map them to the Nest equivalents. Always label wires before disconnecting and take a photo for reference. For multi-stage systems, you might see Y2, W2, or Aux terminals; consult your equipment manual to confirm compatibility before wiring.
Safety and prep: power off and tool prep
Safety must come first. Turn off the power at the furnace and the circuit breaker feeding the thermostat. Use a non-contact voltage tester to confirm there is no live electricity in the wires you’ll touch. Remove the old thermostat’s faceplate and set the backplate aside in a safe location. Gather tools and materials: screwdriver, labels, Nest base, and a smartphone for the app. Keep the wiring area dry and uncluttered. Do not work on energized circuits. If you feel uncertain, stop and call a professional. Remember: the Nest is a low-voltage device; handling line voltage wiring is dangerous and should never be attempted. This approach aligns with Thermostat Care’s emphasis on safety and methodical preparation.
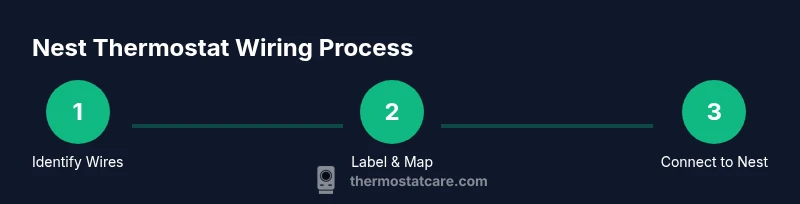
Identify wires and labeling for Nest
Before disconnecting anything, photograph the existing wiring and label each conductor with its terminal name. Typical colors map as: red to R, white to W1, yellow to Y1, green to G, blue or black to C. If your system uses O/B or AUX, note those separately. Some older systems may use uncommon labels like RC, RH, or Y2; in such cases, refer to your control board diagram and the old thermostat’s wiring labels. The goal is to create a wiring map you can trust when moving wires to the Nest base. A clean map helps prevent miswiring and makes app setup smoother.
Wiring scenarios and diagrams (text-based)
Scenario A: Standard single-stage heat/cool
- R -> R, C -> C, Y1 -> Y1, G -> G, W1 -> W1
- Optional: O/B not used unless you have a heat pump with a changeover valve
Scenario B: Heat pump with auxiliary heat
- R -> R, C -> C, Y1 -> Y1, G -> G, O/B -> O/B, AUX/E -> W2/Aux
- Do not connect W1 if your system uses AUX for heat strip only
If you encounter a different configuration, map the labels to Nest equivalents and avoid forcing a terminal that isn’t present. Always double-check the control board schematic and your thermostat’s wiring diagram.
Final steps: install, configure, and test
Mount the Nest base on the wall, insert the labeled wires into their corresponding terminals, and secure the base. Restore power at the furnace and the breaker, then follow the on-screen prompts in the Nest app to set up your system. Run a quick test cycle: heat, cool, fan, and system off. If any functions don’t respond as expected, re-check wire seating and terminal labeling. Thermostat Care notes that most post-install issues originate from loose wires or miswired terminals, so re-checking is essential.
Authority sources and further reading
- https://www.energy.gov
- https://www.nist.gov
- https://www.consumer.ftc.gov
Tools & Materials
- Phillips screwdriver(Size #2; used to remove old thermostat and secure Nest base)
- Flat-head screwdriver (optional)(For stubborn terminal tabs or faceplates)
- Wire labels or masking tape(Label wires before disconnecting to prevent confusion)
- Nest thermostat base (new)(Includes mounting screws and base plate)
- Smartphone with Nest app(Needed for setup and configuration)
- Non-contact voltage tester(Verify power is off before touching wires)
- Electrical tape(Can secure labels and insulate exposed conductors)
Steps
Estimated time: 45-60 minutes
- 1
Power down and prep
Turn off the furnace power and the thermostat circuit breaker. Confirm no power with a non-contact tester. Remove the old thermostat's faceplate and take a photo of the wiring for reference.
Tip: Label wires immediately after removal to prevent mix-ups. - 2
Map and label wires
Label each wire with its function (R, C, Y1, G, W1, etc.) and note any heat-pump specific wires (O/B, AUX/E). Compare the labels to the Nest wiring diagram to avoid wrong connections.
Tip: A clear map reduces post-install troubleshooting. - 3
Install Nest base
Mount the Nest base on the wall using the included screws. Ensure the surface is clean and dry. Do not fully tighten yet; you’ll insert wires after seating them in terminals.
Tip: Level the base to ensure a clean display alignment. - 4
Connect wires to Nest terminals
Insert each labeled wire into the corresponding Nest terminal (R, C, Y1, G, W1, and any O/B or AUX). Push firmly until you hear a click. If a C-wire is missing, leave C empty and proceed only if your Nest model supports power without C.
Tip: Make sure no bare wire sticks out beyond the terminal. - 5
Mount the display and power on
Attach the Nest display to the mounted base. Restore power at the furnace and the circuit breaker. The Nest should power up and begin the on-screen setup flow.
Tip: Don’t rush the initial boot; wait for the on-screen prompts. - 6
Configure in the Nest app
Follow the app prompts to identify the system type (single-stage, heat pump, etc.) and run a quick test of heating and cooling modes. Review the programming options and schedules to match your household needs.
Tip: Double-check mode and fan settings after initial setup. - 7
Test and finalize
Test all modes (heat, cool, fan) and confirm the thermostat reports accurate room temperatures. If something reads incorrectly, re-check wire seating and compatibility notes.
Tip: Keep the original wiring photo handy in case you need to revert.
Questions & Answers
Do I always need a C-wire for a Google Nest thermostat?
Most Nest models work without a C-wire, but having a C-wire improves power stability and reduces risk of power-related issues. If you lack a C-wire, consider alternatives like the Nest Power Connector or running a dedicated C-wire if possible.
Most Nest models can run without a C-wire, but a C-wire improves reliability. If you lack one, consider a power connector or adding a C-wire.
What if my HVAC uses O/B or AUX wires?
Heat pump systems use O/B for reversing valve and AUX/E for auxiliary heat. You should connect these as appropriate and follow the Nest's compatibility instructions. Do not force unused wires into terminals.
Heath pump systems use O/B and AUX. Connect them as instructed and avoid forcing unused wires.
Can I install the Nest wiring myself or should I hire a pro?
If you follow the safety steps, map the wires carefully, and stay within the low-voltage terminals, DIY wiring is feasible for many standard systems. If you have a complex multi-stage system or suspect a control-board issue, consider professional help.
DIY is fine for many standard setups; for multi-stage or uncertain systems, a pro is safer.
How can I tell if wires are labeled correctly?
Cross-check each wire against its terminal on the old thermostat and the Nest base. If in doubt, rely on the photo you took earlier and consult the control board diagram.
Cross-check with your old thermostat labels and the control board diagram.
How long does the wiring and setup take?
A typical installation takes about 45-60 minutes, depending on system complexity and your familiarity with the process. Allow extra time for app setup and testing.
Most folks finish in under an hour, plus time for app setup.
Does Nest wiring differ for heat pump vs conventional systems?
Yes. Heat pumps often require O/B and AUX/E wiring, while conventional systems use simpler R, C, Y1, G, W1 configurations. Always follow system-specific wiring diagrams.
Heat pumps can require O/B and AUX connections; conventional systems are simpler.
What maintenance is needed after wiring the Nest?
No regular maintenance changes wiring, but periodically check that the Nest is reporting accurate temperatures and that the app shows the correct system type. Re-check connections after HVAC service or replacements.
Keep the Nest updated and verify temperature readings after any HVAC work.
Watch Video
What to Remember
- Identify R, C, Y1, G, W1 and any O/B/AUX wires before wiring.
- Power off at both the furnace and breaker to stay safe.
- Label, map, and photograph wires to prevent miswiring.
- Confirm Nest app setup matches your HVAC configuration.
- Test all modes after installation to ensure proper operation.