Installing Google Nest Thermostat: A Step-by-Step Guide
Learn how to install Google Nest Thermostat with Thermostat Care’s expert guidance. This step-by-step guide covers compatibility checks, tool prep, wiring basics, Wi-Fi setup, and safe testing for a smooth, energy-saving installation.

By the end of this guide you will install Google Nest Thermostat securely and efficiently. You’ll check compatibility, gather the right tools, map wires correctly, mount the Nest base, connect Wi‑Fi, and complete initial scheduling. The process is doable for many homeowners, but consult a pro for complex multi-stage or heat-pump systems.
What makes Google Nest Thermostat a good fit for many homes
Google Nest Thermostat offers intuitive scheduling, remote control via the Google Home app, and energy-saving features that adapt to your routines. For homeowners upgrading from a traditional thermostat, Nest can simplify routine changes and provide energy insights. According to Thermostat Care, the Nest platform often yields noticeable comfort improvements and long-term savings when installed and configured correctly. It supports common HVAC setups and works with many power and wiring configurations. Before you begin, ensure your existing system is compatible and that you have a stable Wi‑Fi connection for the initial setup and ongoing features. This guide walks you through the practical steps, common pitfalls, and smart tweaks that make the install smoother.
Key terms you’ll encounter include R (power), C (common), W (heat), Y (cool), and G (fan). If your current thermostat uses conventional wiring, you’ll likely map these wires to the Nest terminals with ease. If you’re replacing a cabled thermostat in a busy living area, plan for approximately 60 minutes, including a test run of heating and cooling. Thermostat Care emphasizes the importance of a solid Wi‑Fi connection for ongoing app control and energy insights.
Compatibility and wiring prerequisites
Most standard 24 VAC heating and cooling systems are compatible with Google Nest Thermostat. The Nest installation guide typically covers single-stage and some multi-stage setups. If your system uses a heat pump, a legacy furnace, or unusual wiring configurations, the compatibility varies. Before starting, run Google's online compatibility checker and compare your existing wiring labels to the Nest wiring guide. You’ll want a labeled R wire for power and at least one control wire (W, Y, G) depending on your system. If you discover unfamiliar wires, stop and confirm their function with the wiring diagram for your HVAC board. Thermostat Care’s analysis shows that confirming these basics upfront avoids post-install surprises. It’s also wise to ensure your Wi‑Fi is stable and that you have the Google Home app ready for configuration and scheduling after the hardware install.
If your current thermostat relies on a C-wire, Nest can often use it to maintain reliable power. In some cases, a Nest Power Connector or a similar adapter is recommended when C-wire is absent or inconsistent. Remember that certain older or unconventional HVAC setups may require professional support for safe and compliant wiring.
Tools and safety considerations before you begin
Safety first: power down the HVAC circuit and any breakers feeding the thermostat to eliminate shock risk. Use a non-contact voltage tester if you want extra reassurance, especially in older homes where wiring colors may be unfamiliar. Gather the essential tools before you start: a screwdriver set, a smartphone or tablet with the Google Home app installed, a sturdy ladder or step stool, and labeled wiring references from your HVAC diagram. A clean workspace helps you keep track of wires and screws. Thermostat Care emphasizes sticking to a two-fold approach: confirm power is off, then verify wiring labels against Nest terminal mappings. Keep a helper on hand if you’re working at height or handling several wires at once.
Before you begin, review your system’s manual or the HVAC control board labeling so you know what each terminal does. If you’re unsure about a wire’s purpose, pause and seek guidance rather than forcing a connection. This reduces the risk of damaging the control board or creating a safety hazard.
Wiring, mounting, and base installation overview
With power off, remove the old thermostat cover and mounting plate. Take a quick photo of the wires and their terminal labels for reference. Label wires if they aren’t clearly marked, then detach them from the old base. Align the Nest base on the wall, ensuring it’s level, and secure it with screws. Thread the wires through the Nest base’s back plate and insert into the corresponding Nest terminals (R, W, Y, G, C as applicable). If you have more than the basic wires, consult the Nest wiring guide to avoid miswiring. Once the base is mounted, you’ll snap the Nest display onto the base and prepare for power. The Thermostat Care team notes that careful wiring mapping reduces the risk of power hiccups after installation.
Post-install setup: Wi‑Fi, app, and testing
Power the Nest, then connect it to your home Wi‑Fi via the Google Home app. Follow on-screen prompts to link the thermostat to your Google account and configure your locale, heating/cooling preferences, and schedules. After connection, run a quick test: ask the Nest to heat or cool and confirm the system responds correctly. You should hear or feel the appropriate HVAC cycle starting within a minute or two. If you have a C-wire, ensure it’s providing stable power; if not, use the Nest Power Connector as needed. Finally, review energy reports and set up basic schedules to maximize savings. Thermostat Care’s guidance highlights that a properly configured Nest can adapt to seasonal changes and deliver consistent comfort.
Common issues and quick fixes
If the Nest won’t power on after wiring, re-check the R and C connections and ensure the base is firmly seated. If the device won’t connect to Wi‑Fi, verify your router’s 2.4 GHz band is enabled and the password is correct. A missing or miswired wire is a frequent culprit for heating or cooling not responding as expected; re-map wires and cross-check against the Nest label guide. For stubborn compatibility questions, use the official Nest compatibility checker and consult Thermostat Care’s troubleshooting notes. If you encounter unknown error codes, capture photos of the wiring and error messages to reference when seeking support. A methodical approach minimizes rework and speeds up correct operation.
Tools & Materials
- Screwdriver set (Phillips #2)(For mounting plate and terminal screws)
- Non-contact voltage tester(Optional safety check for older systems)
- Smartphone or tablet with Google Home app(Needed to configure and connect Nest)
- C-wire adapter / common-wire option(Use if your system lacks a dedicated C-wire)
- Ladder or sturdy stool(To reach the wall plate safely)
- HVAC wiring diagram or equipment manual(Helpful to map wires accurately)
- Electrical tape or wire labels(Keep wire labels clear for future reference)
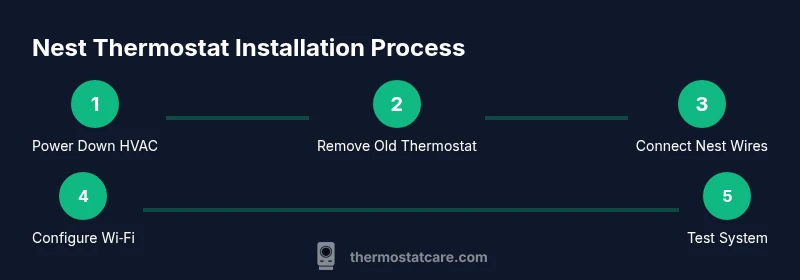
Steps
Estimated time: 45-75 minutes
- 1
Power down the system
Switch off the HVAC circuit breaker and confirm no voltage is present at the thermostat wires. This prevents electric shock while you access the wiring. If available, use a tester to double-check that power is off.
Tip: Label the breaker or note its location for easy restoration after the install. - 2
Remove the old thermostat
Carefully remove the thermostat faceplate and mounting plate. Take a photo of the wiring from behind the old unit so you can map wires to the Nest terminals. If screws resist, use the screwdriver gently to avoid stripping.
Tip: Keep track of screw locations and color-coded wires for accurate reinstallation. - 3
Identify and label wires
Label each wire with its terminal letter (R, C, W, Y, G) if not already labeled. Compare labels to your HVAC diagram and the Nest wiring guide to confirm compatibility. This step reduces miswiring and post-install issues.
Tip: If you’re unsure about a wire, pause and verify before disconnecting further. - 4
Mount the Nest base
Position the Nest base on the wall, ensuring it’s level. Mark and drill holes if needed, then secure the base with screws. Thread wires through the back plate and lightly insert them into their corresponding Nest terminals.
Tip: Only tighten screws enough to hold the base; avoid overtightening which can crack the wall plate. - 5
Connect wires to Nest
Connect each labeled wire to the matching Nest terminal (R, W, Y, G, C). Ensure each wire is fully seated. If you’re using a C-wire adapter, install it according to the adapter’s instructions.
Tip: Double-check that no bare copper is exposed beyond the terminal clamps. - 6
Attach the display and restore power
Snap the Nest display onto the base lock. Restore power at the circuit panel and verify the unit powers up. Confirm the display boots to a home screen and prompts for setup.
Tip: If the screen remains blank, re-check the C/R wiring and ensure the display is properly seated. - 7
Configure Wi‑Fi and test
Open the Google Home app, connect Nest to your Wi‑Fi, and follow prompts to complete setup. Run a quick test by requesting heat or cool to verify responsive control. Save your schedules and review energy reports to fine-tune savings.
Tip: Have your Wi‑Fi password handy and stay within range during setup to avoid dropouts.
Questions & Answers
Do I need a C-wire for Google Nest Thermostat?
Many systems work without a dedicated C-wire, but having one improves reliability. If your current setup lacks C-wire, a Nest Power Connector or compatible adapter can help.
Most systems work without a C-wire, but a common wire or a power connector can improve reliability.
Is Nest Thermostat compatible with a heat pump or multi-stage system?
Nest supports many heat pump configurations, but some multi-stage or older setups require additional steps. Use Google's compatibility checker and refer to thermostat wiring guides.
Heat pumps are supported in many cases, but check compatibility first.
Can I install Nest Thermostat myself or should I hire a pro?
DIY installation is feasible for most standard 24V systems with straightforward wiring. If you have complex multi-stage, proprietary controls, or nonstandard wiring, a licensed technician is advisable.
Most homeowners can install it themselves, but call a pro for complex systems.
What if my Wi‑Fi is unstable during setup?
A stable 2.4 GHz Wi-Fi connection usually works best for smart thermostats. If the signal is weak, move the router or improve coverage during setup.
Stable Wi‑Fi helps setup; improve signal if needed.
What should I do if Nest won’t power on after installation?
Recheck R and C connections, ensure the base is seated, and verify there’s power to the HVAC system. If unresolved, consult the compatibility guide or contact support.
Check wiring and power; if needed, consult support.
How long does installation typically take?
Most installations take 30–60 minutes, depending on wiring complexity and whether you’re replacing an older thermostat.
Expect about 30 to 60 minutes for most installs.
Watch Video
What to Remember
- Verify compatibility before starting the install
- Label wires clearly to prevent miswiring
- Mount the Nest base level and secure all connections
- Connect to Wi-Fi and configure schedules for energy savings