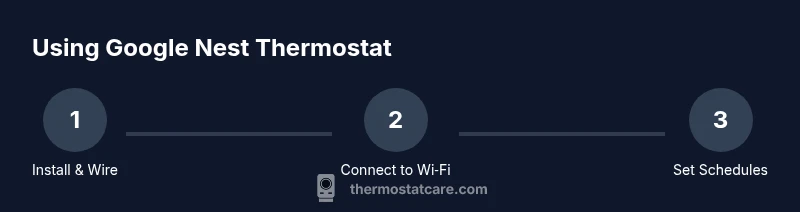
How to Use Google Nest Thermostat: A Step-by-Step Guide
Master how to use Google Nest Thermostat with step-by-step setup, schedules, Eco modes, and voice control. Learn wiring basics, Wi‑Fi setup, app linking, and common troubleshooting to optimize comfort and energy savings.

According to Thermostat Care, this guide helps you use Google Nest Thermostat to control home temperature, save energy, and create automations. You’ll connect the thermostat to Wi‑Fi, set up the Google Nest app, configure schedules, enable Eco temperatures, and use voice commands with Google Assistant. The steps cover installation basics, daily use, and troubleshooting common connectivity issues for reliable comfort.
Overview and prerequisites
Google Nest Thermostat integrates with Google Home and the broader Nest ecosystem to help you manage home heating and cooling more efficiently. It learns occupancy patterns, supports room-based temperature control, and provides energy data through the Nest app. It works with most 24‑V heating and cooling systems and can be controlled locally or remotely. Before you begin, confirm you have a stable Wi‑Fi connection, a compatible HVAC setup, and a Google account. The setup wizard will guide you through language, time zone, and location settings, and it will prompt you to install firmware updates. According to Thermostat Care, validating compatibility and readiness reduces installation friction and ensures you can access important features safely. If you’re unsure about wiring or power, plan for professional support rather than forcing a DIY fix. Once you’ve completed these prerequisites, you’re ready to install the base and start the guided setup.
Hardware compatibility and mounting basics
The Nest Thermostat base is designed for most 24‑V systems, including conventional furnaces, heat pumps, and boilers with zones. A common C‑wire supplies continuous power and helps keep the display bright and responsive; if your system lacks a C‑wire, you’ll see limited features or require a power adapter. Before removing old equipment, take a photo of the current wiring to reference colors and terminals. Use the included mounting plate to align the base, then insert wires into the labeled terminals and secure the backplate. If you encounter loose wires or unusual colors, pause and recheck with the wiring diagram. Ensure the thermostat sits level and away from sources of heat or direct sunlight. Thermostat Care emphasizes safety: turn off power at the breaker before touching any wiring and avoid twisting wires too hard, which can fray conductors.
Wi‑Fi, app, and account setup
Power on the Nest Thermostat and begin the guided setup on the display, which will prompt you to connect to your Wi‑Fi network. Install the Google Nest app on your phone or tablet, then sign in with your Google account to access full features. The app will guide you through linking your thermostat, creating a home structure, and enabling two‑factor authentication for security. If your network uses a guest access, connect the thermostat’s network once you’re back on the main network. After pairing, the device will check for firmware updates and apply them automatically, which can take several minutes. Keeping the app updated ensures you receive new features, bug fixes, and energy reporting capabilities. If you run into connection problems, restart your router and retry the setup; most issues resolve quickly.
Creating schedules and Eco modes
Configure schedules that match your daily routine, including wake, leave, return, and sleep times. The Nest app lets you create separate weekday and weekend profiles and adjust for seasonal changes. Eco Temperatures reduce energy use when you’re away or sleeping; the thermostat can automatically switch to Eco based on motion sensing and preset thresholds. You can also use Home/Away Assist to adapt temperatures when you or your family members are away. For best results, pair schedules with your real-life patterns and adjust periodically as seasons change. Thermostat Care notes that micro-adjustments to temperature, rather than large swings, lead to steadier comfort and greater energy efficiency over time.
Voice control and routines with Google Assistant
Link your Google Assistant-enabled devices to the Nest Thermostat to control temperature with voice commands like “Hey Google, set the living room to 72.” Create routines that trigger scenes (e.g., mornings, evenings) and combine with other smart devices. You can also use the Nest app to review energy data and see how routines affect consumption. If you rely on voice control throughout the day, consider enabling notifications for temperature changes and reminders when Eco temperatures kick in. Regular practice with voice commands helps you reach comfort goals faster and reduces manual adjustments.
Troubleshooting common connectivity issues
Connectivity problems are common when setting up a new Nest Thermostat; most issues relate to Wi‑Fi strength, password changes, or router settings. Start by confirming the thermostat is connected to a 2.4 GHz network if your router is dual‑band, as some devices have trouble with 5 GHz. Re-enter your Wi‑Fi password on the display or in the Nest app, then restart both the router and the thermostat. Check for firmware updates and ensure your Google account is active. If the device still won’t enroll, try removing and re-adding the thermostat from the app or perform a soft reset from the settings menu. Avoid factory resets unless you’ve tried the other steps, since you’ll need to reconfigure everything.
Energy savings and maintenance best practices
To maximize savings, keep schedules consistent with your real schedule and use Eco Temperatures during away times. Review energy reports in the Nest app to identify patterns and adjust routines accordingly. Regular firmware updates improve efficiency and fix bugs that could affect performance. Keep the device clean and dust-free, inspect the base for loose connections annually, and verify that outdoor conditions do not affect sensors. Thermostat Care suggests checking daylight saving time changes and ensuring the thermostat location remains representative of living areas for accurate readings.
Tools & Materials
- Nest Thermostat (gen-1 or gen-2, as compatible)(Do not use if your HVAC system is incompatible; refer to the compatibility checker in the Nest app.)
- Compatible HVAC system (24V)(Ensure it supports common wiring (C-wire) for reliable power.)
- Wiring labels or tape(Helpful for marking wires during removal.)
- Screwdriver set (Phillips-head)(For mounting the base to the wall plate.)
- Wi‑Fi network with stable 2.4 GHz/5 GHz access(Nest often performs better on 2.4 GHz channels.)
- Smartphone with the Nest app installed(Needed to link accounts and configure schedules.)
Steps
Estimated time: 30-60 minutes
- 1
Power off and remove the old thermostat
Turn off the power at the breaker to the heating/cooling system, then carefully remove the old thermostat from the wall plate. Take a photo of the existing wiring and label wires by terminal color so you can match them later. This prevents miswiring and speeds up the Nest installation step.
Tip: Take the photo before disconnecting wires to avoid confusion. - 2
Attach Nest base and wire connections
Mount the Nest base to the wall using the mounting plate and route wires through the back. Insert each wire into the labeled terminal according to your photo reference; ensure the C-wire is securely connected if your system uses it. Use gentle, even pressure to avoid damaging terminals.
Tip: If a wire won’t fit, stop and verify the terminal type before forcing it in. - 3
Mount the display and secure the faceplate
Snap the thermostat display onto the base and attach the faceplate. Make sure the display is level and that all wires are neatly tucked behind the backplate so they won’t be pinched. Confirm nothing is loose before proceeding.
Tip: Use the built‑in leveling aid on the base to ensure alignment. - 4
Power on and complete the setup wizard
Restore power and follow the on‑screen prompts to select language, time zone, and location. The wizard will guide you through pairing with your Wi‑Fi network and linking the thermostat to your Nest account. Allow firmware updates to install if prompted.
Tip: Have your Google account credentials handy for quick linking. - 5
Connect to Wi‑Fi and sign in to Nest app
On your phone, open the Nest app and connect the thermostat to your home Wi‑Fi. Sign in with the same Google account you use for other Nest devices and enable two‑factor authentication for security. The app will confirm the device is online and ready to configure.
Tip: If your network requires a browser sign‑in, complete it on a computer or mobile device first. - 6
Configure schedules, routines, and test
Set up daily schedules and Eco temperatures, then test by adjusting the thermostat and issuing a couple of voice commands to Google Assistant. Verify that changes appear in the app and that energy reports begin to populate over time.
Tip: Test a morning and evening routine to ensure consistent behavior.
Questions & Answers
How do I connect Nest Thermostat to Wi‑Fi?
Open the Nest app or the thermostat display, select Network, choose your Wi‑Fi name, and enter the password. Confirm the connection on the Nest app and ensure firmware updates complete.
Connect via Network settings on the thermostat or in the Nest app, then confirm the connection.
Do I need a C-wire for Nest Thermostat?
Many Nest thermostats require a C-wire for reliable power. If your system lacks a C-wire, you may experience limited features or need a power adapter, per the manufacturer guidelines.
A Common wire is usually needed for steady power; without it, features may be limited.
How do I reset Nest Thermostat?
Go to Settings > Reset on the thermostat or in the Nest app and choose Factory Reset if you need to restore default settings. Reconfigure afterward.
Reset can be done from the settings menu on the device or in the app.
Can I control Nest Thermostat with Google Assistant?
Yes. Link your Google account to Assistant and use voice commands such as ‘Hey Google, set the thermostat to 72.’ Create routines to automate temperatures.
Yes—just link accounts and use simple voice commands.
What should I do if Nest Thermostat won’t turn on?
Check the breaker, verify C-wire connections, and ensure the furnace is operational. If it still won’t power, try a soft reset or re‑install the device.
Check power at the breaker, wiring, and try a reset if needed.
Watch Video
What to Remember
- Connect Wi‑Fi and sign in to Nest app
- Enable Eco temperatures and schedules for energy savings
- Use voice control via Google Assistant for hands-free operation
- Review energy reports to optimize settings