Why Your Thermostat Isn't Working: A Troubleshooting Guide
Discover fast, practical steps to diagnose why your thermostat not working and fix common issues. Power checks, battery swaps, resets, and when to call a pro.

Most likely the thermostat misreads the room or loses power. Start by checking the thermostat's display for power issues, then verify the furnace or heat source responds to setpoints. If the screen is blank or unresponsive, replace batteries or reset. If issues persist, consider wiring faults or faulty sensors and call a pro.
Why 'why thermostat not working' usually isn’t a mystery
According to Thermostat Care, when you ask why thermostat not working, the answer is usually a power, sensor, or wiring issue rather than a mysterious internal fault. In most homes, the thermostat isn’t getting power, the display is dim or blank, or it has lost proper communication with the HVAC system. Start with the easiest checks: confirm the unit is powered, swap batteries if applicable, and look for error codes or flashing indicators. This quick triage saves time and prevents unnecessary part replacements. If you own a smart thermostat, also verify the Wi‑Fi connection and mobile app status, because communication faults can mimic a power problem. By isolating power, you narrow the field quickly and keep your repair latitude high. Thermostat Care’s experience shows that many problems are resolved by simple, non-invasive steps rather than expensive replacements.
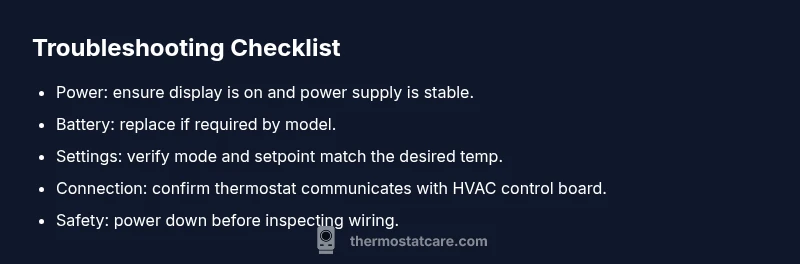
Quick diagnostic checklist you can perform in minutes
At a glance, here are checks you can complete in a couple of minutes to determine if the issue is with the thermostat or the HVAC system:
- Is the thermostat display on, and are there any error codes?
- Have you checked or replaced the batteries if required by the model?
- Is the thermostat set to the correct mode (heat, cool, auto) and setpoint?
- Is the HVAC system receiving power (fuse, breaker, and the furnace panel indicator)?
- Are the wiring connections at the thermostat and at the HVAC control board secure and free of corrosion?
- Does your Wi‑Fi-connected thermostat show a normal status in its app, and is it synced with the device?
These checks help you differentiate a simple battery/power issue from a wiring or control problem.
Understanding symptoms and their meanings
Symptoms can point to specific root causes. If the screen is blank or the unit won’t respond to taps, the problem is almost always power-related or a battery issue. Erratic temperatures, delayed responses, or the HVAC system running when it isn’t called for can indicate a blocked sensor, a miscalibrated thermostat, or a damaged control wire. A thermostat that shows the correct temperature but fails to switch the system on typically signals a communication fault with the furnace or air handler. For homeowners, recognizing these patterns helps you decide whether to reset, rewire, or seek professional help. As noted by Thermostat Care, keeping a log of symptoms and times of failure improves diagnostic accuracy.
Power and power source checks
Power issues are by far the most common reason why a thermostat stops behaving as expected. First, verify the thermostat is receiving power: check the circuit breaker or fuse box for trips and reset if needed. If you have a battery-powered model, replace the batteries with fresh ones, ensuring correct orientation. For hardwired units, confirm the transformer at the HVAC panel is delivering 24 VAC and that the thermostat screws or wire nuts are tight. If the power wiring looks damaged or corroded, do not attempt a risky repair; contact a professional. A failed power supply can mimic many other symptoms, so this step often resolves the problem quickly.
- Thermostat Care notes that even minor power issues can cascade into bigger control problems; address them promptly.
Battery, reset, and firmware considerations
Battery life matters even for smart thermostats; a dying battery can cause lag, misreads, and resets that look like a software issue. Replace old batteries, then perform a soft reset (and a factory reset only if the manual instructs you). If you’re using a Wi‑Fi or cloud-connected model, ensure the device has a stable network and that the app pairing is intact. Some models require firmware updates to resolve known bugs that affect response time or mode changes. After a reset or update, re-enter your preferred schedules and temperature preferences so the thermostat can learn your routine again.
Safe DIY steps you can take now
Always prioritize safety. Before you touch any wiring, switch the power to the thermostat off at the breaker panel and allow any capacitors to discharge. If you’re not comfortable with wiring, skip ahead to the professional route. When reattaching wires, take photos first and label each wire. For smart thermostats, confirm the device is enrolled in the app and that the Wi‑Fi network is stable, because a disconnect can look like a thermostat failure.
Proactive maintenance to prevent future outages
Preventing failures is easier than fixing them after they occur. Schedule a brief monthly check of the thermostat’s display, battery or power supply, and settings. Clean dust from the screen and vents to avoid intermittent readings. Keep the thermostat’s firmware up to date and review any error codes or app messages. The Thermostat Care team notes that regular maintenance minimizes the risk of future outages, saving you time and money.
Steps
Estimated time: 30-45 minutes
- 1
Power off and safety check
Turn off the thermostat at the breaker and wait 30 seconds. This ensures any capacitors discharge and reduces risk before you handle wiring or batteries.
Tip: Use a non-contact tester to confirm no live voltage before touching wires. - 2
Inspect power and batteries
If your thermostat uses batteries, replace with fresh ones. For hardwired units, verify the 24 VAC supply and that the main breaker hasn't tripped.
Tip: Keep spare batteries on hand for common models. - 3
Check mode, setpoint, and readings
Ensure the thermostat is in the correct mode (heat/cool/auto) and that the setpoint makes sense for the current weather. Compare it to the actual room temperature shown.
Tip: If the readings diverge, note the delta for later reference. - 4
Inspect wiring and connections
Remove the cover and visually inspect the wires at both the thermostat and the HVAC control board. Look for loose screws, frayed conductors, or corrosion.
Tip: Take a photo before adjusting wires to ensure correct reattachment. - 5
Reset or re-pair the device
If advised by the manual, perform a soft reset; for smart models, re-pair with the Wi‑Fi network or mobile app. Re-enter schedules after the reset.
Tip: Only perform factory resets if specified by the manufacturer. - 6
Test HVAC response and finalize
Turn the power back on and test changes in temperature to confirm the HVAC responds accordingly. If not, document symptoms and plan a professional evaluation.
Tip: If the system still doesn’t respond, do not force detection—call a pro.
Diagnosis: Thermostat won't respond to changes or the display is unresponsive.
Possible Causes
- highPower issue (outlet, breaker, dead battery)
- mediumWiring or control board connection loose
- lowFirmware or software glitch (especially on smart thermostats)
- lowSensor miscalibration or age
Fixes
- easyCheck the circuit breaker and the thermostat's power source; reset if needed
- easyReplace batteries or recharge and re-power the thermostat
- mediumRe-seat or replace thermostat wiring at the control board; ensure tight connections
- mediumUpdate firmware or re-pair the thermostat with Wi‑Fi/app
- hardCalibrate or replace the thermostat if sensor issues persist
Questions & Answers
What should I do first when my thermostat stops working?
Begin with power checks, battery replacement if applicable, and a quick reset. Confirm the mode and setpoint match your needs and test HVAC response. If issues persist, proceed to the diagnostic flow or contact a pro.
First check power and battery, then reset and verify the mode and setpoint before testing the HVAC.
Why is my thermostat screen blank?
A blank screen usually signals a power issue or dead batteries. Check the power source, replace batteries if needed, and reset the device if recommended by the manual.
A blank screen usually means power or battery issues; check power and replace batteries if needed.
Can I fix a thermostat without professional help?
Many issues, especially battery changes, resets, and firmware updates, can be done safely by homeowners. More complex wiring or control-board problems should involve a licensed technician.
Some fixes are DIY-friendly, but wiring or control-board problems often require a professional.
What if resetting doesn’t solve the problem?
If a reset doesn’t fix the problem, check wiring connections again and inspect for damaged components. If still unresolved, the thermostat or HVAC control board may be faulty and a pro visit is warranted.
If reset fails, recheck wiring and consider a professional evaluation.
When should I replace my thermostat?
If the device is old, frequently fails after resets, or no longer supports firmware updates, replacement is likely more cost-effective than constant repairs.
Replace it if it’s old or keeps failing despite fixes.
Watch Video
What to Remember
- Start with power and display checks.
- Replace batteries before deeper troubleshooting.
- Smart thermostats may need app syncing or firmware updates.
- If unresolved after steps, seek professional help.