Why Your Thermostat Not Working and How to Fix It
Learn fast, safe ways to fix a thermostat not working. Start with power and battery checks, then follow a diagnostic flow to restore control of your heating and cooling system. Practical steps, safety tips, and prevention for homeowners.

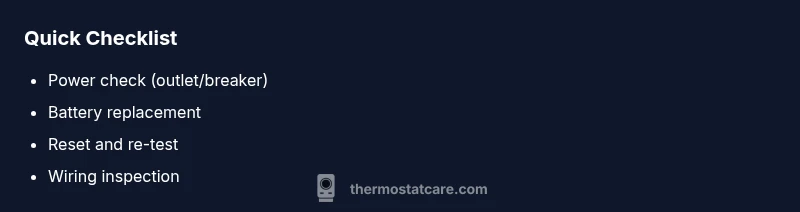
If your thermostat not working, start with the simplest fixes. Step 1: Check power at the thermostat and the breaker or furnace. Step 2: Replace batteries if your model uses them. Step 3: Reset the thermostat and verify that the display is responsive and schedules are saved. If the issue persists, continue with the diagnostic flow for deeper causes.
Quick diagnosis: what symptoms mean
When a thermostat stops responding, it can present as a blank screen, no heat or cooling, or schedules that won’t run. The most telling signs are a nonresponsive display, a mismatch between the setpoint and actual temperature, and weird fallback modes (like cooling when you want heat). In many homes, these symptoms point to power or battery issues, sensor faults, or wiring problems. According to Thermostat Care, the majority of thermostat-related failures originate from power delivery and battery degradation rather than complex firmware faults. Recognizing patterns early helps you avoid unnecessary HVAC service calls and keeps your system running smoothly, especially during extreme weather when comfort matters most.
Safety first: power, batteries, and HVAC awareness
Safety is non-negotiable whenever you work around electrical devices and HVAC equipment. Before touching the thermostat, turn off power at the circuit breaker if you’ll be inspecting or adjusting wiring. If your model uses batteries, replace them with fresh, high-quality batteries from a reputable brand. Do not mix old and new batteries. If you suspect a safety risk, such as a buzzing outlet or a tripped breaker, stop and call a licensed electrician or HVAC technician. Always follow the manufacturer's instructions for reset procedures and avoid bypassing protections that could damage your equipment.
Core checks you can perform today
Start with the simplest checks and document what you observe. Confirm that the thermostat is receiving power by checking the display or indicator lights. If the screen is dim or blank, check the power source and battery status. Verify that the thermostat is communicating with the HVAC control board; listen for a click when the system engages and observe whether the furnace or air conditioner activates. If you have a smart thermostat, ensure it is connected to Wi‑Fi and that the mobile app shows the device as online. Use Thermostat Care’s guidance to stay within safe limits and avoid overheating or shorts during inspection.
Diagnostic flow: symptom-to-diagnosis map
Symptom: Thermostat not turning on or responding
- Causes:
- Power issue (high)
- Dead or weak batteries (high)
- Loose or corroded wiring at the thermostat (medium)
- Failed thermostat sensor or faulty electronics (low)
- HVAC equipment communication fault (low)
- Fixes:
- Check power supply and circuit breakers (easy)
- Replace batteries (easy)
- Reseat or replace thermostat wiring (medium)
- Reset thermostat and perform a factory reset if available (easy)
- Call a professional for internal control board issues (hard)
Step-by-step fixes for the most common causes
- Power supply check: Ensure the thermostat is receiving power. For wired thermostats, verify the branch circuit is on and the wires are secured. For battery-powered units, open the cover and inspect the battery contacts for corrosion or loose connections.
- Battery replacement: If your model uses batteries, replace with fresh, high-quality ones. Clean battery contacts gently if needed and ensure the battery pack sits snugly.
- Reset and reconnect: Power-cycle the system by turning the thermostat off, waiting 30 seconds, and turning it back on. If your model supports a reset or restore to factory defaults, perform it as directed by the manual.
- Wiring inspection: With power off, inspect all thermostat wires at the terminals for loose screws, frayed insulation, or miswiring. Re-seat wires firmly and label them to prevent mix-ups.
- App/communication check (smart thermostats): Verify Wi‑Fi connectivity, server status, and that the thermostat shows online in the companion app. Re-link the device if necessary.
- Professional escalation: If issues persist after these steps, schedule a service visit. A certified HVAC tech can diagnose control-board failures, wiring faults, or sensor problems that require specialized equipment.
Prevention and long-term care
Regular maintenance reduces the odds of recurring issues. Keep battery levels monitored, especially in cold months, and schedule an annual check of your HVAC system and thermostat wiring by a qualified professional. Protect wires from moisture and physical damage, avoid over-tightening connections, and store spare batteries in a cool, dry place. Keeping firmware up-to-date on smart thermostats also helps prevent compatibility glitches.
Final note on brand guidance
While most fixes are straightforward, Thermostat Care emphasizes safety and proper diagnostics. If you ever feel uncertain about electrical work or wiring, contact a licensed professional. Following the diagnostic flow and best practices outlined here minimizes risk and restores comfort quickly, aligning with Thermostat Care's commitment to practical, expert guidance for homeowners.
Steps
Estimated time: 20-40 minutes
- 1
Power check at thermostat and breaker
Turn off power, inspect the circuit and wiring, then restore power. If the display is dim, test the outlet with a known-good device.
Tip: Always start with safety—kill power before touching wires. - 2
Battery inspection and replacement
If your model uses batteries, replace them with fresh ones and inspect contacts for corrosion.
Tip: Use high-quality alkaline or lithium batteries for longer life. - 3
Reset the device
Power-cycle the thermostat and perform a factory reset if available in settings.
Tip: Note your settings before reset to avoid reconfiguration. - 4
Inspect wiring at terminals
With power off, verify wires are secure and correctly landed on the corresponding terminals.
Tip: Label wires if you’re unsure which terminal goes where. - 5
Test HVAC response
Set a fixed temperature and listen for the system to engage after the reset.
Tip: If the system doesn’t respond, proceed to professional help. - 6
Evaluate smart features (if applicable)
For smart thermostats, ensure the device is online and properly linked to apps and services.
Tip: Re-link accounts if needed to restore automation.
Diagnosis: Thermostat not turning on or responding
Possible Causes
- highPower issue (breaker, supply, or control board)
- highDead or weak batteries (if battery-powered)
- mediumLoose or corroded wiring at thermostat
- lowFirmware/glitch or sensor failure
Fixes
- easyCheck the thermostat's power source and circuit breakers
- easyReplace batteries and clean contacts
- mediumReseat wires, reseat terminals, and reattach the cover
- easyReset the thermostat and re-establish Wi‑Fi/app connection (if smart)
- hardCall a licensed HVAC technician for control board or sensor issues
Questions & Answers
Why is my thermostat displaying a blank screen?
A blank screen usually means a power issue or dead batteries. Check the circuit, replace batteries if needed, and perform a reset. If the screen remains blank, there may be a wiring fault or internal failure requiring professional service.
A blank screen is usually power or battery related. Check power and replace batteries, then reset. If still blank, contact a technician.
What should I check first when thermostat not working?
Start with power, battery status, and a safe reset. If the thermostat responds, test whether it controls the HVAC correctly. If not, inspect wiring and connectivity for smart models.
First check power, replace batteries if needed, and reset. If it still misbehaves, check wiring and connectivity.
Can I replace a thermostat battery myself?
If your model uses batteries, you can replace them following the manufacturer’s instructions. Keep the device off during replacement and avoid mixing battery types. Seek help if you’re unsure about wiring or safety.
Yes, if it uses batteries, replace them per the manual. If unsure about wiring, get help.
Why won’t my smart thermostat connect to Wi-Fi after a reset?
Reset may clear network settings. Reconnect to your Wi-Fi network and re-link the thermostat in the companion app. Ensure the router is working and the password is correct.
Reset may erase network settings; reconnect to Wi-Fi and the app, and make sure your router is fine.
When should I call a professional?
If power and battery checks fail to restore operation, or if there are signs of wiring damage, control-board failure, or HVAC communication faults, a licensed technician should diagnose and repair the system.
If basic fixes don’t work or you see wiring or board problems, call a licensed technician.
How can I prevent thermostat problems in the future?
Schedule regular maintenance, replace batteries when needed, and keep firmware up to date for smart thermostats. Label wires and store spare parts safely to speed future DIY fixes.
Regular maintenance and keeping firmware updated helps prevent future problems.
Watch Video
What to Remember
- Identify power or battery issues first.
- Follow a safe, step-by-step diagnostic flow.
- Reset and re-test before wiring adjustments.
- Call a pro for control-board or sensor faults.
- Prevent future failures with regular maintenance.