If Thermostat Is Not Working in House: Troubleshooting Guide
Urgent, practical guide to diagnose and fix a non-working thermostat at home. Safety-first, clear diagnostic flow, step-by-step fixes, and prevention tips from Thermostat Care.

If thermostat is not working in house, start with a quick three-step check: ensure power is supplied to the unit (breaker or battery), confirm the thermostat is set to the correct mode and schedule, and scan the display for error codes or blinking lights. If these basics don’t restore function, follow the diagnostic flow and the step-by-step fixes outlined below. Thermostat Care recommends safety-first, and escalating to a professional when needed.
Understanding What Goes Wrong
When a thermostat stops communicating or refuses to respond, it disrupts comfort and wastes energy. Common signs include a blank display, inaccurate readings, HVAC cycling on/off, or the system ignoring temperature requests. The problem may reside in the thermostat itself, the power supply, or the wiring to the HVAC equipment. According to Thermostat Care, most home failures fall into a few controllable categories: power issues, battery problems on wireless units, and loose or damaged wiring. If thermostat is not working in house, recognizing the symptom helps you decide whether to fix it yourself or bring in a pro. Start by confirming you can safely power the device and observe any error codes or blinking LEDs as these provide valuable clues about the root cause.
Quick Safety Checks You Can Do Right Now
Before you touch the internals, focus on safety and simple verifications. Power and batteries come first:
- If your thermostat is battery-powered, replace the batteries with fresh ones and re-test.
- If it’s hardwired, locate the dedicated circuit breaker for the HVAC system and ensure it is ON; reset if tripped.
- Inspect the thermostat display for error codes or blinking lights. A blinking indicator often points to a communication fault or sensor error.
Then verify the HVAC side works:
- Listen for the furnace or air handler when you adjust the thermostat; if nothing runs, there may be a power issue upstream.
- Check the location and mounting of the thermostat; excessive temperature gradients or loose mounting can impact readings.
These checks are deliberate and safe; if you’re unsure about electricity, pause and proceed to the diagnostic flow or call Thermostat Care Team for guidance.
Common Causes and How Likely They Are
Understanding likely culprits helps prioritize actions:
- Power supply issue (breaker, fuse, or line voltage): high likelihood for blank displays or unresponsive units.
- Dead or weak batteries (for wireless thermostats): medium likelihood for intermittent response or reset issues.
- Loose, damaged, or corroded wiring at the thermostat or furnace: medium likelihood of misreporting temperatures or failure to respond.
- Faulty sensor or aging internal board: low likelihood but can cause erratic behavior or slow cooling/heating.
- Extreme ambient conditions or thermostat placement (near heat sources or drafts): low likelihood but can affect readings.
Keeping a quick list of likely causes helps you stay organized and improves your odds of resolving the problem without unnecessary replacements.
Building a Diagnostic Plan (From Symptoms to Solutions)
A structured approach reduces guesswork. Start by describing the symptom, such as “blank display,” “inaccurate readings,” or “HVAC won’t respond.” Then map the symptom to a likely cause using the quick checks above. Use a simple decision tree: power/test, mode/schedule, wiring, and then device health. As you work, record each step and the result so you don’t repeat unnecessary checks. The Thermostat Care team stresses documenting any codes, blinking patterns, or error messages; these details speed up professional diagnosis if needed. When you’re ready to move beyond basics, the diagnostic flow below guides you through symptom→diagnosis→solution in a repeatable, homeowner-friendly sequence.
Step-by-Step Fixes for the Most Common Issue
The most frequent failure is a power problem or a tripped breaker. Use this sequence:
-
Restore power: Turn off the breaker feeding the HVAC and thermostat, wait 60 seconds, then turn it back on. This resets most minor faults and often clears error codes.
-
Replace batteries: If the thermostat uses replaceable batteries, install fresh alkaline or lithium cells following manufacturer polarity.
-
Re-seat connections: With power off, remove the thermostat cover; gently remove and reinsert wires on the correct terminals; look for loose screws and corroded contacts.
-
Verify thermostat compatibility and wiring: Ensure the wires match the terminal labels (R, C, W, Y, G) and confirm the C-wire is connected if your model requires it.
-
Test system response: Return power, set a simple test temperature, and listen for furnace activation or cooling. If nothing occurs, proceed to professional help. Tip: Keep a log of changes and responses to help your next technician.
Safety, Warnings, and When to Call a Pro
- Never work on energized circuits unless you’re trained; always switch off power at the breaker and use a non-contact voltage tester.
- If you detect burning smell, melted insulation, or scorch marks on a thermostat or wiring, stop immediately and call a licensed electrician or HVAC tech.
- If your thermostat is integrated with a smart home hub, check hub status and app permissions only after basic thermostat checks.
- When in doubt, especially if there’s any gas or furnace safety concern, contact a pro rather than attempting risky fixes yourself.
Remember: DIY is fine for basic checks, but professional diagnosis is essential for wiring faults, non-responsive control boards, or hazardous situations.
Prevention Tips to Avoid Future Issues
- Schedule regular thermostat maintenance and firmware updates where available.
- Keep the thermostat on a stable wall with minimal exposure to heat, drafts, and direct sunlight.
- Use a U.S.-standard C-wire-powered thermostat when possible to avoid battery drainage and compatibility problems.
- Maintain clear communication with your HVAC equipment; ensure the furnace or air handler is healthy, and the thermostat is correctly paired.
- Create a simple, written plan for resets and code interpretation so you can act quickly next time.
These habits save energy, reduce wear on your components, and minimize unscheduled repairs.
Interpreting Error Codes and Indicators
Error codes vary by brand but common patterns exist: E- codes indicate sensor or communication issues; blinking sequences point to connection problems; a solid display often means power or internal fault. Always refer to your model’s manual for precise definitions. Thermostat Care recommends keeping a quick reference that maps blink patterns to probable causes to save time during a breakdown.
Printable Troubleshooting Checklist
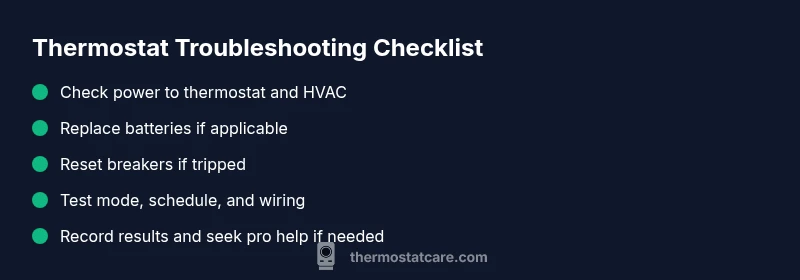
Save this checklist for quick reference:
- Power verified to thermostat and HVAC.
- Batteries replaced if applicable.
- Breaker reset done.
- Mode and schedule checked.
- Wiring connections secured.
- Error codes checked and logged.
- System tested and results recorded.
- Pro help on standby if unresolved.
Print and keep near your thermostat.
Steps
Estimated time: 45-90 minutes
- 1
Power verification and safe reset
Power off the thermostat and HVAC at the main breaker, wait 60 seconds, then restore power. This resets many minor faults and clears temporary glitches. Re-check the display and try a basic temperature call.
Tip: If a breaker won’t reset or trips again, stop and seek professional help. - 2
Battery and mode check
If your thermostat uses batteries, replace with fresh alkalines. Confirm the device is set to the correct mode (heat or cool) and that the schedule matches your home needs.
Tip: Always follow polarity when inserting batteries. - 3
Wiring inspection
With power off, remove the thermostat cover and inspect wires at both ends. Look for loose screws, frayed insulation, or discoloration. Reseat wires on the correct terminals (R, C, W, Y, G) and tighten.
Tip: If you see burnt or melted insulation, stop and call a pro. - 4
System test after fixes
Restore power, set a simple target (e.g., 72°F), and listen for the furnace or air handler engaging. Verify that the space cools or heats accordingly within a reasonable time.
Tip: Document the outcome for your records. - 5
Decide on replacement or professional help
If the thermostat still doesn’t respond or shows unfamiliar codes, replace the unit or contact a licensed HVAC technician for a non-contact diagnostic.
Tip: Keep your warranty or manual handy for model-specific steps.
Diagnosis: Thermostat display is blank or thermostat not responding
Possible Causes
- highPower issue (dead breaker, blown fuse, or lost supply)
- mediumBattery failure in wireless thermostat
- mediumLoose/damaged wiring at thermostat or furnace
- lowInternal thermostat hardware fault
Fixes
- easyCheck main breaker and reset any tripped circuit; replace blown fuses as needed
- easyReplace thermostat batteries if model is battery-powered
- mediumInspect and reseat thermostat wires; tighten terminals at both ends
- hardIf issues persist after basic fixes, consider thermostat replacement or professional diagnosis
Questions & Answers
Why won't my thermostat turn on?
Most often it’s a power issue, dead batteries, or a tripped breaker. Start by verifying power to the unit, replace batteries if needed, and check for any display error codes.
Usually a power or battery problem. Start with power checks, then replace batteries if needed and look for any error codes.
What should I check first if the display is blank?
Check for power at the thermostat and the HVAC system, inspect for a tripped breaker, and ensure the unit has a healthy 24V supply. If it remains blank, refer to the diagnostic flow.
If the display is blank, confirm power and 24V supply first, then try the diagnostic steps.
How do I reset a thermostat safely?
Use the reset option in the thermostat settings if available, or power-cycle the unit by turning it off, waiting 30-60 seconds, then turning it back on. Avoid tampering with HVAC components.
Try a reset from settings or a simple power cycle, then test.
When should I call a professional?
If there’s no power, signs of burning, melted insulation, unusual noises, or unfamiliar error codes, contact a licensed HVAC technician. Complex wiring or control-board faults also require pro help.
Call a pro if power is absent or you see burning, or if wiring looks damaged.
Can wiring errors affect HVAC performance?
Yes. Loose or incorrect wiring can prevent the system from responding properly and may damage components. Consult wiring diagrams and, if unsure, hire a professional.
Wiring errors can stop the system from working; it’s best to get a pro if you’re unsure.
Is a battery-powered thermostat different from a wired one?
Battery-powered units rely on batteries and may need replacements regularly, while wired thermostats draw power from the house. Differences affect maintenance and reliability.
Battery vs wired changes what you need to do to fix issues.
Watch Video
What to Remember
- Check power and supply before touching components
- Follow the diagnostic flow, not guesswork
- Call a pro when safety or wiring concerns arise
- Document settings to restore preferences and avoid repeats