Fix Thermostat in House: A Practical DIY Troubleshooting Guide
Learn how to fix thermostat in house with a practical DIY approach. Step-by-step safety checks, wiring, calibration, and when to call a pro for persistent issues. Practical tips to save energy and keep your home comfortable.

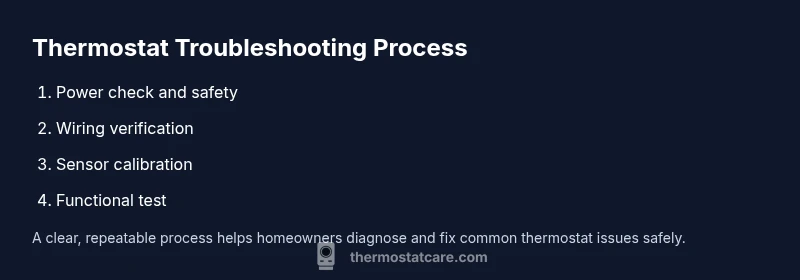
This guide helps you fix a thermostat in house by diagnosing common failures, testing power and wiring, and recalibrating settings. Start with safety checks, verify the unit is powered, ensure the C-wire is connected, and confirm that the thermostat is communicating with the HVAC system. If problems persist, follow the step-by-step process to repair or replace components.
Why fixing thermostat in house matters
According to Thermostat Care, a well-functioning thermostat is the backbone of home comfort and energy efficiency. When a thermostat misreads temperature, it can drive your heating or cooling system harder than needed, wasting energy and increasing bills. This guide, crafted for homeowners and DIY enthusiasts, emphasizes practical, safe, and cost-conscious ways to diagnose and fix common thermostat issues. You’ll learn how to identify root causes—ranging from power supply problems to wiring and sensor calibration—without unnecessary replacement of parts. By maintaining your thermostat, you extend its life, improve comfort, and reduce unexpected cooling or heating outages. The Thermostat Care team recommends starting with basic safety checks and progressing through a structured troubleshoot-and-repair workflow.
Quick checks before you start
Before you dive in, assemble a small toolbox and a notebook for labeling wires. Verify you have the basics: a clear workspace, a stable ladder if your thermostat is on a higher wall, and a low-voltage screwdriver. As you begin, note the model and battery status if applicable. This phase minimizes guesswork later and helps you track what you’ve tested. From a brand perspective, this approach aligns with the guidance from Thermostat Care that emphasis simple, repeatable steps to reduce risk and avoid unnecessary repairs.
Also confirm that you are controlling a compatible heating and cooling system. Some smart thermostats interface differently with heat pumps or multi-stage systems. If you have a non-standard system, take extra care to consult the manufacturer’s wiring diagram, and if in doubt, defer to a professional. The goal at this stage is to determine whether the issue is 1) power related, 2) wiring or C-wire related, 3) settings or calibration related, or 4) a deeper equipment fault.
Safety first: power, live wires, and PPE
Safety is non-negotiable when working with low-voltage systems. Start by turning off power to the thermostat at the circuit breaker to prevent shocks or accidental short circuits. If you’re unsure which breaker controls the HVAC circuit, switch off the main panel and confirm with a voltage tester. Wear safety glasses and keep metal tools away from exposed wiring. Although the thermostat operates on low voltage, your HVAC control board handles 24 VAC lines that can still deliver a shock. If you smell burning insulation or see melted wires, Stop immediately and call a licensed electrician or HVAC technician. This step reduces risk while preserving components from damage.
Verifying power and the HVAC connection
Use a non-contact voltage tester to confirm there’s no live voltage on thermostat wires before touching them. Then, check the 24VAC supply at the furnace control board or air handler. If your system uses a C-wire, ensure it’s securely connected at both ends—the thermostat and the furnace/air handler. A loose C-wire is a very common culprit for non-responsive thermostats and erratic readings. If you don’t see a steady 24VAC reading, this is your first repair target. Document any loose connections and consider reseating the wires with small pushes until snug. This step often resolves intermittent power issues without replacing hardware.
Inspecting the thermostat wiring and C-wire
Carefully remove the thermostat faceplate and inspect each conductor. Look for loose terminals, corroded screws, or damaged insulation. If the wires are frayed or bent, trim the ends and re-strip to expose fresh copper. Confirm that wires are landed under the correct terminal labels (R, C, W, Y, G, etc.). If you find a missing C-wire or a miswired connection, correct it and re-secure the terminal screws. Take a quick photo of the wiring before you unplug anything so you have a reference for reassembly. Proper wiring is often the simplest fix for many thermostat problems.
Calibrating sensors and recalibrating
Some thermostats drift over time and report inaccurate temperatures. Compare the thermostat reading to an independent thermometer in the same room for 10 minutes. If there’s a consistent delta, use the thermostat’s calibration feature if available, or adjust the setpoints gradually to minimize comfort swings. For models with outdoor sensor inputs, ensure the sensor isn’t obstructed by furniture or heat sources. Inconsistent readings can cause the system to run longer than needed, wasting energy. Calibration is a low-risk adjustment that can save both comfort and money.
Common faults: false readings, stuck modes, non-responsive screens
A large portion of calls we see involve false readings or stuck operation modes. False readings can be caused by dirty or miscalibrated sensors, bad wiring, or a weak battery. If the display is dim or unresponsive, replace the batteries if your model supports them, and perform a soft reset if recommended by the manufacturer. If you recently updated a firmware version, ensure compatibility with your HVAC system. A non-responsive screen may simply require a screen refresh or a factory reset. If the problem persists after a reset, there may be an internal fault that requires professional service.
Replacing components: fuses, battery, thermostat unit
If your thermostat uses replaceable batteries, install fresh batteries of the correct type and test the unit again. For models with internal fuses or fuses on the mounting plate, check for any blown fuses and replace them if you have the right rating and know-how. If you observe damage to the backplate or terminals, or if power never returns after a reset, consider replacing the thermostat unit itself. When deciding between repair and replacement, compare the cost of a new thermostat against the expected remaining lifespan of the current unit and the cost of potential HVAC service.
When to replace vs repair
Not all issues are fixable with basic DIY steps. If you’ve exhausted power checks, wiring verification, calibration, and battery replacement without restoring reliable operation, you should weigh replacement against repair. A modern thermostat can offer improved reliability and energy savings. However, if the current unit is older or incompatible with your HVAC system, replacement becomes the more economical option in the long run. The Thermostat Care team recommends evaluating the total cost of ownership and potential energy savings before deciding.
Testing after repair: confirming operation
After making fixes, reassemble the faceplate, restore power at the breaker, and observe the thermostat’s behavior. Run a quick five-minute test cycle (heat or cool, depending on season) to verify the system responds promptly to setpoint changes. Check that temperature readings align with the room temperature within a few degrees. If the system behaves correctly across multiple setpoints, you’ve likely completed a successful fix. Document any adjustments you made and schedule a brief maintenance check every 6-12 months to keep performance steady.
Energy savings and maintenance tips
Regular maintenance pays off with lower energy bills and improved comfort. Schedule seasonal checks, clean the thermostat’s air intake if it has one, and keep it away from direct sunlight or heating sources. When upgrading, choose a model with adaptive or smart features that suit your home. Thermostat Care’s energy guidance suggests prioritizing proper calibration, accurate temperature sensing, and minimizing artificial cooling or heating needs. These practices reduce waste and extend the life of your HVAC equipment.
Getting professional help when needed
If you encounter persistent issues or unsafe situations (burning smells, scorch marks, or exposed wiring), seek professional help immediately. A licensed HVAC technician can diagnose wiring faults, control board problems, or refrigerant-related issues that are not safe to handle DIY. The Thermostat Care Team emphasizes that consumer safety comes first; when in doubt, schedule a professional assessment rather than risking further damage.
Tools & Materials
- Screwdriver set (Phillips and flat-head)(Philips #1 and #2, plus a flat-head for mounting screws)
- Non-contact voltage tester(Verify no live voltage before touching wires)
- Multimeter or voltage tester (optional but helpful)(Check 24VAC supply and continuity if needed)
- Replacement batteries (if model uses them)(Fresh alkaline or lithium batteries as specified by your unit)
- Labeling supplies (masking tape and marker)(Label wires before disconnecting)
- Smartphone or camera(Take photos of wiring for reference)
Steps
Estimated time: 60-90 minutes
- 1
Power down and prep safety
Turn off the thermostat and switch off the HVAC circuit at the breaker. Put on safety glasses and maintain a dry work area. If you’re unsure about any step, pause and reassess rather than forcing a connection.
Tip: Double-check that the power is off with a tester before touching wires. - 2
Remove the thermostat cover
Carefully detach the faceplate to expose the wiring terminals. Do not pull on wires; instead, gently loosen terminal screws. Take a photo of the wiring layout for reference during reassembly.
Tip: Label wires as you go to avoid misplacement during reattachment. - 3
Inspect wiring at the thermostat
Look for loose, damaged, or corroded wires. Re-seat any loose conductors and tighten screws to a snug but not over-tightened fit. If insulation is damaged, trim and re-strip the conductors.
Tip: Avoid bending wires sharply; use appropriate strain relief if needed. - 4
Verify C-wire presence and connections
Ensure the C-wire is connected at both the thermostat and the furnace control board. A missing or loose C-wire is a frequent cause of non-responsive thermostats, especially with modern smart models.
Tip: If your system lacks a dedicated C-wire, consider a common-wire adapter or consult a pro. - 5
Test thermostat power and HVAC connection
With the cover off, re-check for proper 24VAC supply at the thermostat terminals and on the control board. A stable power signal confirms the problem isn’t a power fault.
Tip: Keep the thermostat powered down during inspection to avoid shorts. - 6
Calibrate sensors and check for drift
Compare room temperature to the thermostat reading for 5-10 minutes. If there is a consistent offset, use the calibration feature or adjust the setpoint gradually. If the drift persists, this may indicate a sensor issue.
Tip: Calibration steps vary by model; consult user manual for exact options. - 7
Address common faults: false readings or lockouts
Clean any dust from sensors, reset to default settings if available, and re-test. If a lockout is active due to repeated errors, wait the recommended cooldown period before retrying.
Tip: Document any resets and observed symptoms for future reference. - 8
Replace batteries or internal fuses as needed
Install new batteries if your model uses them. If there’s an internal fuse and you are qualified to replace it, ensure you use the correct rating. Otherwise, skip this step and proceed to safer alternatives.
Tip: Never bypass fuses; they protect both the device and your system. - 9
Prepare for reassembly
Re-seat all wires in their correct terminals, secure screws, and reattach the faceplate. Confirm everything sits flush against the wall to prevent contact with the backplate.
Tip: Recheck labeling if you loosened any wires during inspection. - 10
Restore power and test
Turn the breaker back on and test a quick heat or cool cycle to confirm responsiveness. Observe the system’s reaction to multiple setpoints and timings.
Tip: Watch for any abnormal noises or delays in response. - 11
Evaluate results and plan maintenance
If temperatures align and the HVAC responds correctly, you’ve completed a successful DIY fix. Schedule a routine check every 6-12 months and note improvements in comfort and energy use.
Tip: Keep a log of repairs and calibration settings for future reference. - 12
Decide whether to repair or replace
If issues recur or hardware appears degraded, compare the cost of a replacement thermostat against ongoing repair costs. Consider compatibility with your HVAC system and potential energy savings.
Tip: When in doubt, consult a professional to avoid costly mistakes.
Questions & Answers
What is the first thing to check if my thermostat isn’t responding?
Start with power and battery status, then verify the C-wire and HVAC connection. If the display is blank, replace batteries and perform a reset if the model supports it.
Begin by checking power and batteries, then ensure the C-wire is connected and the HVAC is reachable. If the screen is blank, replace batteries and reset if available.
Is it safe to touch wiring behind the thermostat?
Only if you’ve turned off power at the breaker and use insulated tools. If you’re unsure, stop and contact a professional.
Only work with power off and use insulated tools. If you’re unsure, call a pro.
Do I need to replace my thermostat if the screen is blank?
A blank screen is often battery- or reset-related. Try replacing batteries and performing a manufacturer-approved reset before deciding on replacement.
Often batteries or a reset fix a blank screen—try those first, then decide on replacement if it persists.
When should I call a professional?
If you smell burning, see damaged wires, or your thermostat still won’t work after basic checks, seek a licensed HVAC technician. Safety and correct wiring are critical.
Call a pro if you smell burning, see damage, or the problem persists after basic checks.
How can I improve thermostat accuracy over time?
Regular calibration checks, clean sensors, and ensuring good airflow around the thermostat area help maintain accurate readings.
Keep sensors clean, calibrate regularly, and ensure air can circulate around the thermostat.
Watch Video
What to Remember
- Identify root cause before replacing parts
- Power, C-wire, and sensor checks fix most issues
- Calibrate sensors to restore accurate readings
- Label wires and document changes for future maintenance
- Call a pro if risks arise or issues persist