What to Do If Your Thermostat Breaks: A Practical Step-by-Step Guide
Learn a practical, step-by-step approach to diagnosing and fixing a broken thermostat. Safe DIY checks, when to reset, and when to call a pro—Thermostat Care guides homeowners to restore comfort quickly.

To recover from a thermostat that breaks, start with a safe power check and simple resets. Confirm the unit has power (batteries or C-wire), verify wiring connections, and run a basic reset or firmware update if available. If the issue persists, document symptoms and consult the thermostat's manual or a licensed pro.
Why thermostats fail and what this means for your home
Thermostats fail for a few common reasons, and most are manageable by homeowners with basic tools. In many cases, power issues or aging sensors are to blame, while loose wiring can cause intermittent temperature readings or no heat/cool at all. Understanding the typical failure modes helps you triage safely and avoid unnecessary replacements. According to Thermostat Care, a large share of failures trace back to power delivery problems or sensor faults, not to a wholesale device replacement. Recognizing these patterns helps you decide whether you can fix it today or if you should call a pro. In this guide we’ll walk through a practical, actionable approach you can follow from your kitchen table, with safety first in mind. We’ll also share tips on maintenance that can prevent many common failures. Whether your thermostat is a simple dial, a modern smart model, or a wired wall unit, the repair mindset is similar: verify power, inspect connections, test signals, and validate system response. We’ll cover both battery-powered and hard-wired configurations, plus tips for avoiding common mistakes like resetting without saving schedules, or mixing up wires when reseating the thermostat. If your home relies on a C-wire for continuous power, a loose C terminal or a tripped breaker can mimic a dead thermostat. With a careful approach, most issues resolve without service calls, saving time and money while keeping your family comfortable. In short, a thoughtful, methodical plan beats guesswork every time. According to Thermostat Care, keeping a cool head and following a checklist reduces frustration and speeds up a fix.
Safe first steps you can take today
Before you reach for tools, ensure your safety. Start by turning off power to the HVAC system at the main breaker to prevent shocks or equipment damage. If your thermostat uses batteries, replace them with fresh alkaline or lithium cells. If it uses a C-wire, confirm the wire is connected and not loose at the thermostat or the furnace control board. Remove any dust from the display and outer housing; a dirty sensor can cause odd readings. Next, perform a straightforward reset: power cycle the thermostat by turning it off for 30 seconds and back on, and reinitialize any settings if prompted. If the unit stores schedules, be prepared to re-enter them after the reset. This stage often resolves firmware hiccups or stuck displays without any further tools. Thermostat Care notes that small resets account for a surprising number of quick fixes for modern devices. Document any changes you make and the symptoms you observe for future reference.
How to identify the root cause: power, wiring, sensors
Power problems are the most common culprits. If the thermostat won’t power up at all, check batteries first, then the C-wire, and finally the HVAC control board for signs of tripped breakers or blown fuses. Loose or corroded terminals can mimic dead power; reseat and tighten each connection carefully. Sensor or temperature readings that drift or fail to respond usually point to dirty or aging temperature sensors, debris on the sensing element, or a need for firmware updates. GPS-style troubleshooting isn’t required here, but a structured check helps you avoid guessing. If you observe frequent disconnects or readings that don’t match room temperature, you may be dealing with an unreliable sensor or a failing display. As you investigate, maintain a log of observed symptoms, times, and actions to help you decide whether to replace or repair.
Step-by-step diagnostic workflow
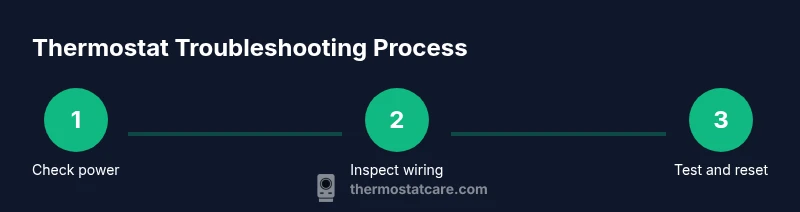
This section outlines a practical sequence to diagnose a thermostat issue without skipping essential safety checks. Start with power verification, then inspect wiring, followed by a controlled reset, and finally test the system response across heating and cooling modes. If you encounter error codes, document them and refer to the manual for code explanations. Use a multimeter to check voltage at the thermostat terminals when applicable, but only if you’re comfortable with basic electrical testing. If the thermostat remains unresponsive after these steps, the fault may lie in the HVAC control board or a more complex sensor issue. In that case, consult Theremostat Care’s guidelines and consider professional service. Keeping a calm, methodical approach reduces errors and speeds resolution.
Common fixes you can attempt safely
Many fixes are straightforward: replace dead batteries in battery-powered units, reseat loose wires at the thermostat base, and perform a gentle reset to clear firmware glitches. Clean dust from air vents and the thermostat housing; accumulation can affect sensor accuracy. If you have a C-wire system and the power is flaky, you may need to re-secure the C terminal at the furnace control board. Firmware updates, when available from the manufacturer, can address software glitches that cause unresponsive displays or wrong readings. Never push on internal components you’re not comfortable with. If you’re unsure about any step involving live voltage, skip it and proceed with non-electrical checks or call a professional. The goal is to restore accurate temperature sensing and stable control without introducing new risks.
When to seek professional help and what to expect
If the basic checks don’t restore function or you encounter melted wires, buzzing from the panel, or persistent error codes you cannot interpret, contact a licensed HVAC technician or an authorized service provider. A pro can safely test the control board, diagnose wiring faults, and replace failing components. Expect a diagnostic visit to include a quick system test, confirmation of power supply, and a review of thermostat compatibility with your HVAC system. Thermostat Care recommends documenting all symptoms and steps you’ve taken before the visit, which helps the technician identify root causes faster and reduces the downstream cost of service. A professional service often includes a system calibration to ensure accurate readings and efficient operation.
Preventive maintenance to extend thermostat life
Regular maintenance is cheaper than frequent replacements. Replace batteries when the low-power indicator appears and clean the thermostat faceplate periodically to prevent sensor drift. Ensure cable connections remain tight and free from corrosion, particularly in humid environments. If you use a smart thermostat, check for firmware updates monthly and review the compatibility of new HVAC components after repairs. Consider scheduling an annual thermostat health check as part of your home maintenance routine. Thermostat Care’s insights emphasize that proactive checks save time and prevent breakdowns while keeping your system running optimally.
Tools & Materials
- Digital multimeter(Test voltage on C-wire and power terminals if you’re comfortable.)
- Non-contact voltage tester(Verify live circuits without touching wires.)
- Screwdriver set (Phillips #2, flathead)(Open wall plate and terminal screws safely.)
- Replacement batteries (as required by model)(Keep correct type (AA/AAA or lithium) on hand.)
- Wire labels or painter’s tape(Label wires before disconnecting to ensure correct reconnection.)
- Smartphone or camera(Take photos of wiring before you reseat terminals.)
Steps
Estimated time: 30-60 minutes
- 1
Power down the system
Turn off the HVAC system at the main breaker and switch off the thermostat. If possible, unplug the furnace or air handler to prevent any accidental activation during inspection. This protects you from shocks and avoids damaging live components. After safety is ensured, take a quick inventory of the installed device (battery vs. hardwired) so you know what to test next.
Tip: Label wires before disconnecting and keep a photo log for reference. - 2
Check power supply and battery health
If your unit runs on batteries, replace them with fresh cells and observe display behavior. For hardwired thermostats, verify the C-wire is properly connected at both the thermostat and the furnace control board. Use a multimeter to confirm expected voltage if you’re comfortable with basic electrical checks. Document any changes in function or display.
Tip: If you see blinking lights after replacement, note the pattern as it may indicate a specific fault code. - 3
Inspect and reseat wiring
Remove the thermostat faceplate and inspect terminal screws for tightness and corrosion. Reseat each wire, ensuring it reaches the terminal fully and is under the correct screw. Reassemble the faceplate and re-program schedules if needed. This tightens connections that often loosen with temperature swings.
Tip: Use the screwdriver gently; over-tightening can damage terminals. - 4
Test continuity and signals (optional)
If you’re comfortable, use a digital multimeter to test the voltage at the thermostat terminals and, if applicable, the furnace control board. Look for consistent readings when the system calls for heat or cool. If readings are erratic or zero, a wiring fault or control board issue is likely. Record the measurements for reference.
Tip: Only perform this step if you have prior electrical experience. - 5
Reset and reconfigure
Power the thermostat back on and perform a full reset if your model supports it. Re-enter schedules and preferences, and check for firmware updates if available. Confirm that temperature changes on the thermostat translate to the HVAC system response.
Tip: Keep a note of the original settings in case you need to revert. - 6
Final test and confirmation
Test heating and cooling across several setpoints to verify consistent performance. If the system responds correctly, you’ve likely resolved the issue. If not, proceed to step back to the previous checks and consider professional evaluation. Maintain a short log of outcomes.
Tip: If you hear unfamiliar noises or smell burning, shut down and call a pro immediately.
Questions & Answers
What should I do first when my thermostat stops working?
Begin with power checks and a simple reset. If it has batteries, replace them; if it’s wired, inspect the C-wire and terminals. Consult the manual for error codes before proceeding.
First check power and reset, then verify batteries or C-wire connections.
Can I fix a thermostat myself?
Basic fixes like battery replacement, reseating wiring, and a safe reset are appropriate for many models. Do not attempt high-voltage work if you’re unsure.
DIY is possible for simple power and reset tasks; avoid risky wiring if you’re not trained.
How do I know if the problem is the thermostat or the HVAC system?
If temperature changes fail to trigger the HVAC system after a reset, the issue could be the thermostat or control wiring. If the system responds inconsistently to different setpoints, you may have a broader HVAC fault.
If the system doesn’t respond after resets, it could be the thermostat or control wiring, not just the HVAC.
What if the thermostat battery dies quickly?
Replace with the correct battery type, clean terminal contacts, and ensure the unit is receiving steady power. If it continues to drain, the thermostat may be faulty or have a wiring issue.
If batteries die quickly, check power and contacts; consider replacing if the issue persists.
Should I replace rather than repair a broken thermostat?
If the thermostat is older or offers limited compatibility with your HVAC system, replacement is often more cost-effective than repeated repairs. Compare model compatibility and energy savings to decide.
Replacement is often worth it if the model is outdated or repeatedly failing.
How long do thermostats typically last?
Most thermostats last 10-15 years, depending on usage, model, and maintenance. Regular updates and battery checks can extend life and reliability.
Most thermostats last about a decade; maintenance helps extend that life.
Watch Video
What to Remember
- Start with power and reset first.
- Wiring and C-wire faults are common culprits.
- Know when DIY ends and professional help begins.
- Regular maintenance reduces future failures.