Broken Thermostat Troubleshooting: A Practical Guide
Discover fast, practical steps to diagnose and fix a broken thermostat. From power checks to wiring and replacement guidance, Thermostat Care helps homeowners regain comfort safely.

Most likely a broken thermostat stems from a power issue or dead batteries. Start by confirming the thermostat is powered (check the HVAC circuit breaker and supply), then replace batteries if your model uses them, and perform a quick reset. If it remains unresponsive, proceed with wiring checks or replacement.
Why a broken thermostat matters for home comfort
When a thermostat stops communicating with your heating or cooling system, you lose precise control over indoor temperatures. A broken thermostat can lead to energy waste, rooms that won’t heat or cool evenly, and uncomfortable swings in temperature. According to Thermostat Care, the root of many thermostat failures is something homeowners can address without expensive service calls. By starting with basic checks and safe inspections, you can reclaim comfort quickly and prevent overnight energy waste. A well-maintained thermostat also protects your HVAC system by avoiding short cycling and improper furnace or AC operation. In short, a broken thermostat isn’t just an annoyance—it can drive up bills and shorten equipment life if ignored.
Common causes of a broken thermostat
There are several frequent culprits behind a broken thermostat. Understanding them helps you diagnose what’s really going on without guesswork. Common causes include power issues (breaker trips, blown fuses, or a dead HVAC supply), battery depletion in non-smart units, loose or damaged wiring at the thermostat terminals, and a faulty thermostat itself. Smart thermostats can fail due to app connectivity problems or outdated firmware, while traditional models may simply fail to read sensors correctly after years of use. By identifying the most likely cause, you can choose a safe, targeted fix and avoid unnecessary replacements.
Quick checks you can perform safely
Before you dive into complex fixes, run a few basic checks. Ensure the thermostat is receiving power by checking the circuit breaker and the HVAC power switch. If your thermostat uses batteries, replace them with fresh ones. Inspect the thermostat’s display for indicators like a blinking light or error codes. If you have a wired thermostat, gently reseat the wire connections at the terminals, ensuring no loose strands short against adjacent terminals. Always turn off power to the thermostat before removing the cover to prevent shock or equipment damage. If the unit warms your home unevenly after these steps, note whether one zone behaves differently, which can point to a zoning or wiring issue rather than a faulty thermostat.
Diagnostic flow: symptom to diagnosis
This section maps common symptoms to likely causes so you can prioritize fixes efficiently. If the display is blank or unresponsive, power issues are the top suspect. If the unit reports an error code, consult the manual or Thermostat Care’s guidance for interpretation. A thermostat that reads the room poorly or doesn’t reach the setpoint usually indicates sensor problems or calibration drift. Wires that appear loose or corroded point toward a wiring fault. For most households, the first steps are power checks, battery replacement (if applicable), and a careful wire inspection. If none of these address the symptom, the fault may lie with a failing thermostat that needs replacement.
How to fix the most common issue (step-by-step overview)
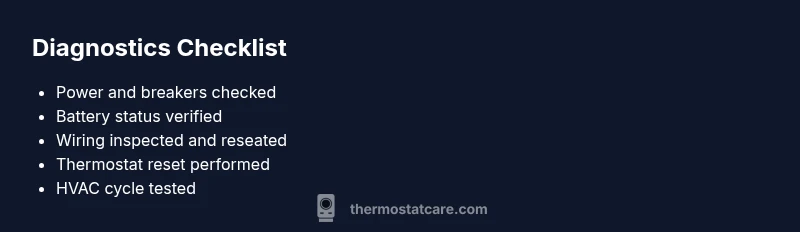
The most common issue is a power or battery problem. A safe, methodical approach is to verify power, replace batteries, reseat wires, reset the device, and test the system. If the thermostat still won’t respond after these steps, consider replacing the thermostat or consulting a professional. Throughout the process, be mindful of safety and keep the power off whenever you open the device.
Prevention tips to extend thermostat life
To prevent future failures, perform regular maintenance: clean dust from the thermostat, keep it away from heat sources and direct sunlight, check battery health for battery-powered models, and ensure compatible wiring and control board signals. Software-based thermostats should have firmware updates installed and be reconnected to Wi-Fi for reliable performance. By following these practices, you reduce the likelihood of recurring issues with a broken thermostat and keep your HVAC system operating efficiently.
Bonus: when to call a pro
If you’re uncomfortable working with electrical components, if you suspect a dangerous wiring condition, or if the thermostat continues to fail after all safe troubleshooting, contact a licensed HVAC technician. A professional can diagnose hidden wiring faults, test the control board, verify the thermostat’s compatibility with your system, and install a replacement unit correctly. Remember, working with live electrical circuits carries risk, and safety should always come first.
Steps
Estimated time: 20-40 minutes
- 1
Power down and verify safety
Switch off the HVAC breaker and the thermostat power if present. Remove the thermostat cover carefully to expose wiring. This prevents shocks and protects equipment during inspection.
Tip: Always work with power off; safety first. - 2
Check power sources
For wired units, confirm that the furnace has power and that 24V control signals are present at the thermostat terminals. For battery-powered models, replace with fresh batteries of the correct type.
Tip: Use fresh batteries from a reputable brand. - 3
Inspect wiring and terminals
Look for loose, corroded, or burnt-looking wires. Reseat wires on their terminals, ensuring no stray strands touch neighboring terminals. Re-secure the mounting plate so wires stay in place.
Tip: Take a photo before disconnecting wires to aid reassembly. - 4
Perform a reset and test
Replace the cover, power the system back on, and perform a reset on the thermostat and the HVAC control board if applicable. Set a test temperature to confirm proper cycling of heat and cool modes.
Tip: If your model supports a factory reset, use it as a last resort. - 5
Evaluate results
If the thermostat now responds and cycles correctly, you’ve addressed the issue. If not, proceed to evaluation for sensor/calibration issues or consider replacement.
Tip: Document any codes shown on the display for reference. - 6
Decide on replacement vs repair
If the unit is old, showing sensor drift, or repeatedly failing after safe fixes, replacement is often more cost-effective than repeated repairs.
Tip: Compare the cost of a replacement with service call estimates.
Diagnosis: Thermostat won't turn on or control HVAC as expected
Possible Causes
- highPower issue (tripped breaker, blown fuse, or no supply)
- mediumDead batteries in non-smart unit
- mediumLoose or damaged wiring at thermostat terminals
- lowFaulty thermostat (dead display or non-responsive)
Fixes
- easyCheck the HVAC power supply and circuit breaker; reset if tripped
- easyReplace batteries if the thermostat uses them; reseat all wires firmly
- easyInspect terminals for loose or damaged wires and re-tighten
- mediumIf power and wiring are solid but no response, test with a known-good thermostat or consider replacement
Questions & Answers
What should I check first when my thermostat is not responding?
Start with power: ensure the HVAC circuit breaker is ON, confirm the thermostat has power, and replace any batteries if applicable. A quick reset often resolves unresponsiveness.
First check the power and batteries, then reset the thermostat.
Is a blinking or blank thermostat a sign of failure?
Yes, a blinking or blank display usually signals power or wiring problems. Check power supply, battery status, and wiring connections before replacing the unit.
A blinking or blank display usually means power or wiring issues.
Can I fix a broken thermostat myself?
Many issues can be resolved with basic checks, battery replacement, and careful wiring reseats. If the problem persists or involves high voltage, contact a licensed HVAC technician.
You can handle basic checks yourself, but consult a pro for complex issues.
When should I replace instead of repair?
If the thermostat is old, frequently failing, or requires costly repairs, replacement is often more cost-effective and offers better efficiency and features.
Replace if repairs would cost more than a new unit or it’s old.
How long do thermostats typically last?
Thermostats commonly last 10-15 years depending on usage, environment, and model. Regular maintenance can extend life and prevent breakdowns.
Most thermostats last about a decade or more with proper care.
Do I need a professional if power is involved?
If you suspect wiring faults, control board damage, or 24V signal issues, a licensed HVAC technician should inspect your system to prevent safety hazards.
Yes—call a pro if you encounter electrical or control board problems.
Watch Video
What to Remember
- Diagnose power and battery issues first
- Secure all wiring before testing
- Reset and test in increments
- Choose replacement when repairs exceed cost