How to Fix Thermostat: A DIY Troubleshooting Guide
Step-by-step guide to diagnose and fix common thermostat problems, from power issues to sensor drift. Learn safe methods, required tools, and when replacement is wiser for your home.

This guide shows you how to diagnose and fix common thermostat problems yourself, covering power issues, wiring checks, sensor drift, and recalibration. You’ll need basic tools, a compatible model, and safety steps to prevent shocks. Follow the step-by-step approach to reset, test, and verify results, or know when to call a pro.
How to fix thermostat: a practical DIY approach
Fixing a thermostat can range from simple battery replacement to recalibrating sensors or replacing a faulty module. This guide focuses on practical, safe methods you can perform at home with common tools. According to Thermostat Care, most thermostat problems stem from wiring, power, or sensor drift, not mysterious faults in the device itself. By understanding how your thermostat communicates with the HVAC system, you can identify the root cause and act with confidence. The goal is reliability and comfort, not guesswork. Keep your manual handy and respect the limits of your system. This article uses clear steps, safety reminders, and checks you can perform before escalating to a professional.
Common thermostat problems and quick checks
Thermostats can fail for several reasons: dead batteries, loose or corroded wiring, sensor drift, or software glitches. In many homes, the thermostat loses accuracy because of a simple battery swap, a loose terminal, or a reset needed after a power surge. It’s also common for sensors to become less accurate in extreme temperatures or after long seasons. Use the quick checks below to decide if you can safely proceed or if you should stop and call a pro. The goal is to restore proper temperature control without damaging the HVAC system.
Essential tools and safety considerations
Before you touch the thermostat, organize your tools and review your safety steps. You’ll typically need a multimeter, a small screwdriver set, and a non-contact voltage tester. Have a flashlight, a notepad, and photos of existing wiring for reference. Safety first means turning off the power at the breaker and at the thermostat, then testing that the display is unresponsive before you begin any disassembly. If you smell burning or see scorch marks, stop immediately and contact a licensed professional. This section also covers model-specific cautions you should be aware of before you start.
Step 1: Power verification and safety shutdown
Power is the first line of defense in any thermostat repair. Begin by turning off the circuit breaker feeding the HVAC system, then switch off the thermostat’s own power if it has a separate switch. Use a non-contact tester to confirm there is no live voltage on the thermostat wires before you touch them. If the breaker trips again after you re-power, there may be a short, or a wiring fault that could be unsafe to address without professional help. Document what you observe for reference during reassembly.
Step 2: Accessing the thermostat and documenting wiring
Carefully remove the faceplate and any screws holding the base plate. Take clear photos of how wires are connected to the terminals (R, C, W, Y, G, etc.). Label wires if needed, so you can reattach them exactly as they were. Check for loose, frayed, or discolored wires; these symptoms suggest a connection issue or corrosion. If multiple wires are tucked behind the plate, avoid tugging them loose. This step creates a safety baseline and a reference for later checks.
Step 3: Checking the battery, sensors, and calibration
Many thermostats run on battery power. If your unit has a replaceable battery, install a fresh one and test the display. If the unit is powered by the HVAC system, verify that power from the transformer is stable. Inspect the temperature sensor area for obvious obstruction or dust, which can interfere with readings. If your model supports calibration, follow the manufacturer’s instructions to adjust the setpoint temperature reading to match the actual room temperature. Small drift can cause the system to heat or cool incorrectly.
Step 4: Performing reset and reconfiguration
Resetting the thermostat can clear stale software and faulty memory. Use the model’s reset procedure (soft reset first; if issues persist, a full factory reset may be needed). After reset, re-enter your preferences: display brightness, scheduling, and setpoints. If your thermostat is a smart device, reconnect it to Wi-Fi or a hub according to the manual. Keep an eye on the status indicators to verify the device is back to normal operation.
Step 5: Reattachment, testing, and final verification
Reattach the front plate, secure all screws, and restore power at the breaker. Set the thermostat to heat or cool and observe whether the fan starts and the display updates correctly. Use a manual test, like setting a higher or lower temperature than the current room temperature, to confirm responsive control. If there is a delay between changes and system response, check the wiring again, especially on heat-call and cool-call terminals. Document results for future reference.
Step 6: When to replace or call a professional
If the thermostat continues to misread temperature, fails to power on, or exhibits burnt smells or buzzing, replacement or professional service is advised. Some units have reached the end of their lifecycle, or their wiring may be unsafe to handle. In those cases, consider upgrading to a model compatible with your HVAC system, which can improve efficiency and reliability over time.
Step 0: Aftercare and ongoing maintenance
After you complete any fix, perform periodic quick checks every few months: ensure batteries are fresh, verify temperature readings align with room temperature, and keep the device free of dust. A clean and well-maintained thermostat reduces the risk of future faults and extends the life of your HVAC system. Keeping a small log of fixes and readings helps you track degradation patterns and plan upgrades before issues become serious.
Tools & Materials
- multimeter(Measure voltage at thermostat terminals; ensure ranges match model specs)
- screwdriver set ( Phillips & flat-head )(Remove faceplates and terminal screws)
- non-contact voltage tester(Confirm no live voltage before touching wires)
- replacement thermostat battery (if battery-powered)(Check model compatibility and type)
- model-specific manual or guide(Reference for reset and calibration steps)
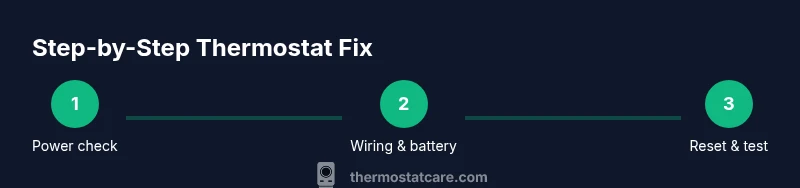
Steps
Estimated time: 60-90 minutes
- 1
Power down and verify safety
Turn off the breaker feeding the HVAC circuit and switch off the thermostat if applicable. Confirm no voltage on wires with a tester before touching anything.
Tip: Double-check the power with the tester after re-disabling settings to avoid shocks. - 2
Access and document wiring
Carefully remove the thermostat cover and plate; photograph wires connected to R, C, W, Y, G terminals. Label wires if needed and note any signs of corrosion or looseness.
Tip: Organize wires with labeled tape to simplify reassembly. - 3
Check battery, sensors, calibration
If battery-powered, replace with a fresh battery; ensure sensor exposure isn’t obstructed. Calibrate per model instructions if available to correct drift.
Tip: Avoid touching sensor areas with bare hands; static can affect readings. - 4
Reset and reconfigure the device
Perform a soft reset first; if issues persist, perform a full factory reset as directed by the manual. Re-enter scheduling, display options, and connectivity settings.
Tip: Record your preferred settings before resetting. - 5
Reattach and test the system
Reassemble the unit, restore power, and test heating/cooling calls. Verify the display responds to setpoint changes within a reasonable time.
Tip: Test both heat and cool modes to confirm full functionality. - 6
Evaluate repair vs replacement
If misreads persist or safety concerns arise, consider replacement with a compatible model or call a licensed technician.
Tip: Upgrading to a smart thermostat can improve efficiency and control.
Questions & Answers
What are the most common thermostat problems you can fix yourself?
Most issues stem from dead batteries, loose wiring, sensor drift, or software glitches. Many problems are solvable with basic tools and careful steps.
Common fixes include battery replacement, securing wiring, sensor recalibration, and a soft reset.
Is it safe to fix a thermostat yourself?
DIY fixes are safe for simple tasks like battery replacement and cleaning terminals. Avoid handling high-voltage wiring or gas furnace connections—these require a pro.
Yes, for basic maintenance, but avoid hazardous wiring or furnace integrations.
When should I replace a thermostat instead of repairing it?
If the unit is old, shows frequent failures, or can’t reliably communicate with the HVAC system, replacement is often the best choice.
If reliability is poor and recals or repairs don’t fix the issue, replacement is wiser.
What tools do I need for basic thermostat fixes?
A multimeter, screwdriver set, and a non-contact voltage tester cover most basic diagnostics and safety checks.
You’ll typically need a multimeter, a screwdriver, and a voltage tester.
How can I recalibrate my thermostat?
Follow your model’s calibration procedure in the manual. If readings are off by several degrees, recalibration or sensor replacement may be needed.
Calibration depends on the model—check the manual for exact steps.
Who should I call for electrical or HVAC wiring issues?
For any electrical hazards, wiring faults, or safety concerns, contact a licensed HVAC technician or electrician.
If there’s wiring trouble or safety risk, call a pro.
What to Remember
- Verify power before touching any wiring
- Document connections with photos for safe reassembly
- Calibrate or replace sensors if readings drift
- Reset only after backing up settings and manuals