Repair Thermostat: Troubleshooting and Repair Guide
A practical, step-by-step guide to repair thermostat issues, with safety checks, diagnostic tips, and decisions on repair vs replacement. Learn how to test power, wiring, and sensors, and keep your HVAC performance efficient.

Goal: Learn how to diagnose and repair a malfunctioning thermostat safely, without unnecessary replacements. You’ll verify power, inspect wiring and sensors, test the thermostat with basic tools, and decide whether to repair or replace. Key requirements: a multimeter, screwdriver set, spare batteries, and a non-contact voltage tester. This guide emphasizes safety and knowing when to call a pro.
What 'repair thermostat' means in practice
When homeowners talk about repairing a thermostat, they usually mean diagnosing why the unit isn’t accurately controlling your heating or cooling and fixing the root cause rather than replacing the entire system. This can involve checking for loose wire connections, sensor drift, dead display, or communication issues between the thermostat and the furnace or air handler. The Thermostat Care team emphasizes a measured approach: identify symptoms, verify power, and use safe tests before deciding on replacement. By understanding the underlying fault, you can save time, reduce waste, and improve overall comfort. Throughout this guide you’ll see practical checks, tool recommendations, and steps you can perform in a typical home lab setup. The goal is to empower homeowners and DIY enthusiasts to handle common thermostat problems with confidence and safety. Remember: any repair should prioritize safe power isolation and adherence to local electrical codes. If you’re unsure at any point, seek professional help. Thermostat care matters for comfort and energy efficiency, and a careful diagnostic can prevent unnecessary replacements.
Common causes of thermostat failures
Thermostat failures fall into a few predictable buckets. Loose or corroded wire terminals are a leading cause of intermittent readings and miscommunication with the HVAC system. Battery-powered models can drift or die, causing the display to vanish or become unresponsive. Sensor drift—where the internal temperature sensor slowly loses accuracy—leads to uncomfortable rooms and odd temperature swings. Environmental factors like extreme humidity, dust, or poor mounting can also affect performance. Finally, older thermostats or those with outdated firmware may fail to communicate commands reliably with modern HVAC equipment. Before you start any repair, establish the symptoms: is the display blank, is the temperature reading off, or is there a failure to trigger heat or cooling? Thermostat Care analysis shows most issues are fixable with wiring checks, battery replacement, and sensor recalibration, rather than wholesale replacement. By grouping symptoms into categories, you can apply targeted fixes quickly.
Safety first: power, gas, and electrical considerations
Working on a thermostat involves electrical components and, depending on your setup, interacts with the HVAC system’s power. Always power down the system before touching terminals to prevent shocks or shorts. If you have a gas furnace, be mindful of gas valves and avoid any actions that could affect fuel lines. Use a non-contact voltage tester to confirm there is no live voltage at the thermostat wiring before touching wires. Wear safety glasses and keep the area dry. If you’re not comfortable working near high-voltage connections or gas lines, stop and call a licensed professional. Proper safety procedures protect you and your equipment, and non-technical mistakes can escalate into bigger problems. The Thermostat Care team stresses that safety is the first step in any repair workflow.
Testing tools and diagnostic checks
Having the right tools makes repairing thermostat problems straightforward. A digital multimeter helps you verify the 24-volt power supply and check continuity on wire runs. A non-contact voltage tester confirms power is off before you touch any conductors. A screwdriver set (Phillips and flat-head) lets you remove the faceplate and access terminals. Spare batteries are essential for battery-powered models, and a clean rag and isopropyl alcohol help you remove dust from contacts. Take notes or photos of wire labels before disconnecting anything to make reassembly accurate. When you test, start with power checks, then inspect individual terminals for corrosion or loose screws. If a sensor appears dirty or misaligned, a gentle clean or recalibration step may restore accuracy without replacement. Consistent, careful testing is the core of effective thermostat repair.
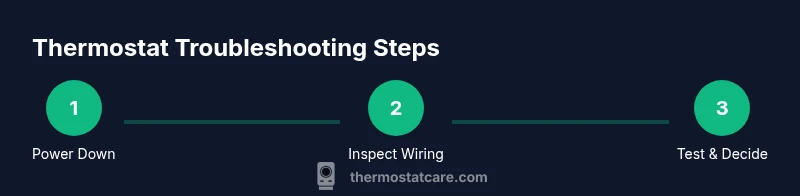
Step-by-step troubleshooting approach
A systematic approach helps you isolate the fault without guesswork. Begin with a safe power-down and access the thermostat faceplate to inspect wiring and battery status. Check for loose screws or damaged insulation on all terminal connections. If the display is blank, replace the batteries and verify the 24V supply to the thermostat. If readings are inconsistent, test the furnace control board connections and ensure the C-wire (common) is present and secure. Re-seat every connector and clean surfaces to remove dust. If the problem persists after batteries are fresh and connections are tight, consider replacing the thermostat or upgrading to a model with better compatibility for your HVAC system. This process minimizes the risk of further damage and clarifies whether a repair or replacement is the best path. Thermostat Care’s guidance is to document findings at each step and proceed with a plan you can safely justify.
When to repair vs replace: cost, longevity, and warranties
Not every thermostat fault warrants a replacement. If symptoms are limited to a single sensor or a loose terminal, repair is often cost-effective and extends the life of your current unit. Sensor drift, intermittent readings, or a stubborn non-response that persists after battery changes and wiring fixes may indicate a failing control board or outdated firmware, in which case replacement becomes sensible. Consider the age of the thermostat and whether it supports current features like smart connectivity or advanced energy reporting. Check warranty coverage—many thermostats have limited warranties that cover certain components or labor. Weigh the inconvenience of continued troubleshooting against the benefits of a newer model with better compatibility and energy savings. Ther most thermostat repair projects are manageable for DIYers, but if you encounter high voltage, gas line interactions, or uncertain wiring, a professional should intervene. The Thermostat Care team recommends documenting symptoms and results to guide the final decision.
Maintenance tips to prevent future thermostat problems
Prevention beats diagnosis, so a little routine care goes a long way. Regularly remove dust from the outer housing and around the sensor openings to preserve accurate readings. Periodically replace batteries in battery-powered models to avoid unexpected shutdowns. If your thermostat uses a C-wire, verify the wire is intact and terminated properly to prevent intermittent power loss. Keep the thermostat software up to date when updates are available, as firmware improvements can fix glitches and improve compatibility with HVAC equipment. Mount the unit away from direct sunlight or heat sources that can skew readings and cause the system to run unevenly. A well-maintained thermostat maintains comfortable temperatures and reduces energy waste. Thermostat Care’s best practice is to set reminders for battery checks and firmware updates and to perform a quick diagnostic each season to catch potential issues early.
Tools & Materials
- Screwdriver set (Phillips and flat-head)(Phillips #1 and #2; vary by model)
- Non-contact voltage tester(Verify power off before touching wires)
- Digital multimeter(Check 24V supply and continuity on wiring)
- Replacement thermostat (if needed)(Only necessary if the current unit is failing beyond repair)
- Fresh batteries (AA/AAA as required)(For battery-powered models; replace with correct type)
- Thermostat mounting screws and wall anchors(Keep extra hardware for secure mounting)
- Camera or smartphone for wiring photos(Document connections before disconnecting)
Steps
Estimated time: 60-120 minutes
- 1
Power down and verify safety
Turn off the thermostat's circuit at the breaker panel or HVAC disconnect. Use a non-contact tester to confirm no voltage is present before touching conductors. This prevents shocks and protects equipment during inspection.
Tip: If you can’t locate the breaker, switch off power at the HVAC panel and verify the thermostat screen goes dark. - 2
Remove the thermostat faceplate
Gently pry off the faceplate to expose wiring. Take a quick photo of the terminal labels and wires for reference during reassembly. Label wires if needed to avoid mix-ups.
Tip: Keep track of each wire by note or color to avoid miswiring later. - 3
Inspect wiring and terminals
Check each terminal for loose screws, corrosion, or damaged insulation. Re-seat any loose connections firmly and clean corrosion with a dry brush or alcohol wipe. Ensure the C-wire (common) is present if your system uses one.
Tip: Do not yank wires; loosen screws slightly, reseat, then tighten only to snug, not overtight. - 4
Check batteries (if applicable)
If your model uses batteries, replace with fresh ones of the correct type. Confirm the thermostat powers up and shows normal display after replacement. A dead battery can mimic more serious faults.
Tip: Use high-quality batteries to prevent premature failure and intermittent power loss. - 5
Test voltage and sensor signals
With the power off, reconnect the wiring and then restore power. Use the multimeter to verify a steady 24V supply between R and C. Check sensor readings by comparing the thermostat’s reported temperature with an external thermometer.
Tip: If voltage is unstable or sensor reads wildly different than ambient, consider wiring issues or sensor replacement. - 6
Reassemble and perform a functional test
Secure the faceplate and turn the system back on. Set a test temperature and observe whether heating and cooling cycles respond appropriately. If you see delays, temperature swings, or miscommunication, re-check wiring and firmware.
Tip: Let the system run through a couple of cycles to confirm stability. - 7
Decide on repair vs replacement
If symptoms persist after all checks, weigh the cost and benefits of replacing the thermostat. Consider compatibility with your HVAC system, energy features, and warranty coverage. If in doubt, consult a professional.
Tip: Document findings and outcomes to justify your next step.
Questions & Answers
What are the most common signs my thermostat needs repair?
Common signs include a blank display, inaccurate temperature readings, delayed or failed heating/cooling responses, and frequent resets. Start with power checks, battery replacement, and wiring inspection before replacing the unit.
Look for a blank screen or odd temperature readings. Start with power checks and battery change before deciding if replacement is needed.
Is it safe to repair a thermostat myself, or should I hire a professional?
Many thermostat issues are safe for DIY repair, especially battery changes and wiring reseat. However, high-voltage wiring, gas furnaces, or uncertain wiring should be handled by a licensed technician for safety and code compliance.
DIY repairs are fine for batteries and wiring checks, but call a professional for high-voltage or gas furnace connections.
How do I know if the issue is with the thermostat or the HVAC system?
If the thermostat responds to settings but the system doesn’t engage, the issue may be HVAC wiring or equipment rather than the thermostat. Check for control signals, confirm the furnace/AC receives power, and observe error codes from the HVAC unit.
If the thermostat changes settings but the system doesn’t respond, the problem might be in the furnace or wiring, not the thermostat.
Will replacing the thermostat guarantee better performance?
Replacement can improve reliability and compatibility with modern HVAC systems, but it isn’t a guaranteed fix for every issue. Ensure the new unit supports your system’s wiring and has the features you need.
A new thermostat can fix many issues, but make sure it matches your setup before buying.
What should I do if the thermostat is still not working after steps?
If issues persist, review your notes, re-check connections, and consider professional assessment. Persisting faults may indicate a control board problem or incompatible components.
If it still fails after troubleshooting, it’s time to get a professional opinion.
Do warranties cover thermostat repairs or replacements?
Many thermostats have limited warranties that may cover certain parts or labor. Read the warranty terms and consult the manufacturer or retailer for coverage details before purchasing a replacement.
Check your warranty terms to know what repair or replacement costs might be covered.
Watch Video
What to Remember
- Identify symptoms before actions
- Power down and verify safety first
- Wiring and batteries are common fault sources
- Replace or repair based on evidence and warranty