Replacing a Thermostat in House: A DIY Guide
A comprehensive, practical guide to replacing a thermostat in house. Learn compatibility checks, step-by-step removal and wiring, safety tips, and maintenance for reliable, energy-saving performance.

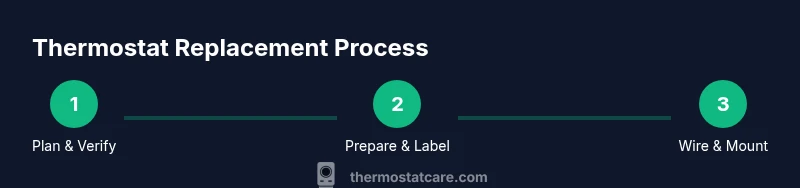
This guide shows you how to replace a thermostat in house from start to finish. You’ll confirm compatibility, gather tools, safely disconnect the old unit, wire the new thermostat, mount it, and test performance. Before you begin, ensure the replacement model is compatible with your HVAC system, have your wiring diagram handy, and turn off power at the breaker to prevent shocks.
Why replacing a thermostat in house matters
Replacing a thermostat in house is more than a simple faceplate swap. A modern, properly installed thermostat can improve comfort, reduce energy waste, and give you precise control over heating and cooling. The Thermostat Care team notes that upgrading to a programmable or smart model often leads to better scheduling, remote access, and the ability to fine-tune energy use. When you replace a thermostat, you ensure your system communicates correctly with the control device, which helps prevent overshoot on temperature and improves comfort in rooms that previously felt drafty or too warm.
Compatibility matters just as much as features. Before you buy, confirm the new unit supports your HVAC type (furnace, boiler, heat pump, or multi-system). Check for a common C-wire if your system requires powered HP/CLD control, and verify electric supply ratings so the thermostat can operate safely. According to Thermostat Care, replacing a thermostat in house is a task many homeowners can complete in a few hours with the right plan and a wiring diagram. Common missteps include labeling wires inconsistently or misplacing a mounting bracket, which can affect sensor readings and the display. By approaching the project methodically, you’ll reduce surprises and ensure reliable performance from day one.
This is not just about replacing hardware; it’s about preserving comfort, safety, and energy efficiency. You’ll gain a better understanding of your HVAC control and learn skills that apply to future upgrades, such as smart thermostats or integrations with home automation systems. The guidance here emphasizes safety first, clear labeling, and testing across heating and cooling cycles to confirm everything works as intended.
Assessing compatibility and choosing a replacement thermostat
Choosing a replacement thermostat starts with compatibility checks. Determine your HVAC type (gas furnace, electric heat, boiler, or heat pump) and confirm whether a C-wire is required for powered operation. If your current wiring is limited or missing a C-wire, you’ll need a kit or a different model that supports power stealing. Review the new thermostat’s wiring diagram and terminal labeling, and ensure the control board voltage matches the thermostat’s requirements. If you have a multi-stage system or a heat pump, verify support for O/B reversing valve, AUX/E heating, and auxiliary heat control.
Beyond wiring, consider features that match your needs: simple 7-day or 5-2-2 scheduling, smart connectivity (Wi-Fi, smartphone app), and compatibility with your existing HVAC equipment. If you’re replacing a basic non-smart model with a smart thermostat, check app reliability, update channels, and potential firmware requirements. The Thermostat Care analysis shows that most users see the biggest gains when they replace an outdated model with a modern thermostat that supports scheduling and remote access, while ensuring the device is compatible with their system. Keep in mind that install instructions vary by brand; some use a backplate, while others attach directly to the wall.
By mapping out your system configuration in advance—HVAC type, wiring, and desired features—you’ll avoid buying a thermostat that can’t be installed or won’t meet your energy goals. Take photos of the existing wiring and note wire colors. If you’re unsure about compatibility, consult your HVAC installer or the manufacturer’s compatibility tool and keep the model number handy for reference when you buy.
Safety and prep steps before you begin
Safety is the foundation of any thermostat replacement. Start by turning off power to the HVAC system at the main breaker panel and at the thermostat if there’s a dedicated switch. Use a non-contact voltage tester to confirm no live power is present on the wires you’ll touch. Remove jewelry, wear eye protection if needed, and work in a dry area away from water or damp surfaces. Gather all tools and materials before you begin to avoid delays that tempt you to improvise.
Next, label the wires as you disconnect them. A simple label system with color codes or numbered tags helps prevent confusion when you reconnect on the new thermostat. If you have a C-wire, test for continuity to ensure the circuit can provide a stable power source to the device. Thermostat wiring can be delicate; if you’re unsure about wire insulation, terminal polarity, or whether a wire is a jumper, stop and consult the wiring diagram or a professional. The goal is to protect both your equipment and your safety while laying the groundwork for a clean installation.
Step-by-step removal of the old thermostat
Begin by removing the thermostat faceplate and any decorative housing. Use the appropriate screwdriver to detach the mounting screws that secure the backplate to the wall. As you remove the unit, take clear photos of the terminal labels and wire positions. Gently disconnect each wire from its terminal, keeping it organized by the color and label. If a wire is stubborn, use a small flathead or needle-nose pliers to loosen the clamp without pulling the wire out of the terminal.
Carefully set the old thermostat aside, ensuring no bare wires contact each other or metal surfaces. If you’re using a backplate, mount it to the wall and confirm it sits perfectly level before continuing. Check for any signs of damage in the wall box or loose connections; if you see scorched marks or melted insulation, stop and reassess. This is a crucial phase because mislabeling or misconnecting wires can prevent the new thermostat from functioning properly or damage the HVAC controls.
Document each step as you go, and store the old model for recycling according to local guidelines. A methodical approach here reduces the risk of errors in the next stage and keeps your project aligned with safety best practices. Finally, compare the existing wiring against the new unit’s terminal map to confirm you’ll be connecting correctly.
Wiring the new thermostat and configuring settings
With the old unit removed and wires labeled, you’ll start wiring the new thermostat. Begin by identifying the common terminals on the new device, such as R (power), C (common), W (heat), Y (cool), G (fan), and O/B (reversing valve for heat pumps). Attach each wire to the corresponding terminal, ensuring a snug fit and avoiding copper strands that protrude beyond the terminal. If the new thermostat requires a C-wire and you don’t have one, you may need to install a common wire adapter or a power extender kit—follow the manufacturer’s guidance.
After wiring, attach the thermostat to the backplate or wall mount according to the model’s instructions. Recheck every connection and ensure wires are not pinched behind the base. Power up the system and enter the configuration menu to set your heating and cooling stages, preferred temperature units, and any scheduling options. If your model supports learning features or adaptive recovery, enable them gradually to monitor impact on comfort. Use the app or display to verify that the thermostat reads room temperature accurately and responds to manual adjustments. If you see a fault code, consult the manual for diagnostic steps and common fixes.
Mounting, testing, and troubleshooting
Mount the new thermostat securely to the wall, making sure the mounting plate is level and firmly anchored in the wall box. Reinstall the faceplate and restore power at the breaker. Once powered, verify the thermostat boots correctly and display reads the current room temperature. Test turning heat and cool on and off to confirm the system responds promptly, then check for proper cycle timing and airflow control. If there is no response, double-check wire connections against the terminal map, ensure there are no loose strands, and re-seat any wires as needed. Listen for the sound of the furnace relay engaging when calling for heat or cooling; a failed relay can indicate wiring or power issues.
If you encounter intermittent behavior, review the wiring gauge and connector quality. Faulty or corroded terminals can create poor contact and unstable readings. Common problems include a miswired C-wire, incorrect R-W-Y-G pairing, or a backplate that isn’t firmly mounted, which can cause sensor drift or display misalignment. Take time to run a full test cycle across different temperatures and settings. If issues persist, consider revisiting the wiring diagram, verifying compatibility, or consulting Thermostat Care’s guidance for model-specific troubleshooting steps.
Maintenance, energy savings, and long-term considerations
After a successful replacement, establish a maintenance routine to keep your system performing efficiently. Replace batteries in non-powered models as recommended by the manufacturer, and periodically inspect the thermostat's mounting to ensure it remains level. Schedule regular checks of the HVAC system, especially before seasonal transitions, to confirm that wiring connections and power supplies remain secure. A well-configured thermostat can deliver meaningful energy savings by aligning heating and cooling with your occupancy patterns and local climate.
If you plan future upgrades, such as a smart thermostat with remote sensing or an integration with a home automation hub, verify compatibility with your existing HVAC equipment and internet setup. Keep your user manuals handy and store model numbers for future reference. Thermostat Care emphasizes the value of documenting wiring colors and terminal labels for every replacement, which makes service faster and more reliable next time. Remember to recycle the old device according to local electronics collection guidelines and dispose of batteries properly.
Quick checklist recap
- Verify system compatibility and wiring requirements before purchase.
- Label wires clearly and photograph connections during removal.
- Follow the thermostat’s terminal map exactly to connect wires.
- Mount securely, restore power, and test all modes across heating and cooling.
- Maintain documentation for future upgrades and safety checks.
Tools & Materials
- Replacement thermostat (compatible with your HVAC system)(Check C-wire needs, voltage, and compatibility with heat pump or multi-stage systems)
- Screwdrivers (Phillips #2 and flathead)(For removing cover plates and screws)
- Non-contact voltage tester(Confirm power is off before touching wires)
- Labeling materials (wires labels or masking tape)(Label each wire as you disconnect to avoid miswiring)
- Wire stripper/culler(A little exposed copper helps make solid connections)
- Electrical tape(Finish and secure exposed connections if needed)
- Multimeter (optional)(Optional for verifying voltage on R and C wires)
- Mounting screws and backplate (compatibility checked)(Ensure the new unit's backplate fits the wall box)
Steps
Estimated time: 60-90 minutes
- 1
Turn off power at the breaker
Locate your main breaker panel and switch off the circuit feeding the thermostat and HVAC equipment. Use a non-contact tester to confirm no voltage is present on wires you’ll handle. This step prevents shocks and protects control electronics.
Tip: Double-check at the furnace control board if accessible before touching any wires. - 2
Remove faceplate and label wires
Take photos of the current wiring and terminals. Remove the faceplate with a screwdriver and gently pull the wires from their terminals while keeping them organized by color and terminal label.
Tip: Label each wire immediately with the corresponding terminal name for easy reference. - 3
Disconnect old thermostat wiring
Loosen each terminal clamp to free the wires. Avoid tugging the wires out whole; loosen clamps one by one and place wires in a labeled tray.
Tip: If a wire won't release, use a small tool to lift the clamp gently while pulling the wire. - 4
Inspect and prepare the wire ends
Inspect insulation for nicks or fraying. Trim any damaged copper, then twist and straighten wire ends for clean contact. Route wires neatly to the new thermostat location.
Tip: Expose about 1/4 inch of copper for a solid clamp connection. - 5
Connect wires to the new thermostat
Match each labeled wire to the corresponding terminal on the new device (R, C, W, Y, G, O/B, etc.). Push wires fully into clamps and secure with screws. If a required wire is missing, reassess compatibility before proceeding.
Tip: If no C-wire exists, use the manufacturer’s recommended adapter or consult a professional. - 6
Mount and power up
Attach the backplate securely to the wall and mount the thermostat. Restore power at the breaker and confirm the unit powers on. If the display stays blank, re-check wire seating and terminal labeling.
Tip: Ensure the device is level to prevent sensor misreads and button sticking. - 7
Configure settings and perform test
Enter your HVAC settings, set schedules, and test heating and cooling commands. Observe responses and correct any misbehaviors by re-checking connections and settings.
Tip: Run a full cycle across expected temperatures to verify consistency. - 8
Final checks and cleanup
Tidy wires, snap on the faceplate, and discard old hardware according to local rules. Keep a photo log and model information for future reference.
Tip: Keep the original packaging until you’re confident the new thermostat works reliably.
Questions & Answers
Do I need to turn off power at the breaker before starting?
Yes. Always cut power at the breaker and verify with a non-contact tester before touching wires to avoid shocks.
Yes. Always switch off the breaker and double-check with a tester before touching any wires.
What if my HVAC is a heat pump and I don’t see an O/B terminal on the new thermostat?
Check the thermostat’s compatibility for heat pump systems and ensure it has an O/B terminal. If not, you may need a model that specifically supports heat pumps.
If you have a heat pump, make sure your thermostat supports an O/B terminal; if not, you may need a different model.
What should I do if there is no C-wire in my connection?
Use a power extender kit or a thermostat that supports power stealing, per the manufacturer’s guidance. Avoid forcing power from other wires, which can cause damage.
If there’s no C-wire, use the recommended adapter or power-stealing option from the thermostat maker.
How long does a typical thermostat replacement take?
Most replacements take about one hour to one and a half hours, depending on wiring complexity and whether there are compatibility issues.
Most replacements take about an hour to an hour and a half.
Should I hire a professional for this task?
For standard residential setups with clearly labeled wires, a confident DIY approach is feasible. If you encounter unfamiliar wiring or safety concerns, consult a licensed technician.
If you’re unsure about wiring or safety, it’s wise to get a licensed technician.
Will replacing my thermostat save energy?
A new thermostat can improve energy efficiency when paired with proper scheduling and climate control, especially with smart models that adapt to your routine.
Yes, energy savings are possible with a modern thermostat and good scheduling.
Watch Video
What to Remember
- Plan compatibility before purchase.
- Label wires and photograph connections.
- Follow the terminal map precisely when wiring.
- Test heating and cooling cycles after installation.
- Document the setup for future upgrades.