Thermostat Replacement for Home: A Step-by-Step Guide
Learn how to safely replace a thermostat in your home with a step-by-step guide covering planning, wiring, testing, energy savings, troubleshooting, and maintenance.

Thermostat replacement for home is the process of swapping an aging or nonfunctional thermostat for a modern model that improves comfort, control, and energy efficiency. You’ll learn how to plan compatibility, choose the right unit, and perform a safe installation. This quick guide sets expectations, lists essential tools, and outlines safety steps so homeowners can start with confidence.
What thermostat replacement for home accomplishes
Thermostat replacement for home is more than just swapping a device on a wall. It aligns your heating and cooling with modern controls, improves comfort, and enables energy savings through scheduling, adaptive algorithms, and remote access. According to Thermostat Care, selecting the right thermostat begins with understanding your HVAC system, your daily routine, and your budget. A well-planned replacement reduces system cycling, improves temperature consistency, and supports easier maintenance over time. In this guide, you’ll learn how to verify compatibility, pick a model that fits your setup, and execute a safe installation. The goal is to empower homeowners and DIY enthusiasts to complete the project with confidence, minimal downtime, and lasting results. You’ll also find practical tips, safety reminders, and a clear test plan to verify that everything works as intended.
Planning and compatibility before you replace
Before you buy a new thermostat, take a close look at your HVAC system, wiring, and power source. Confirm your furnace or air handler is compatible with the thermostat type (electric, gas, or heat pump). Check voltage (24VAC is standard for most thermostats) and ensure you have a C-wire for power-hungry smart models. If you don’t have a C-wire, decide whether you’ll use a power extender kit, a backplate that supports two-wire operation, or a thermostat that does not require a C-wire. Thermostat Care analysis shows that doing compatibility checks early helps avoid nonfunctional installs later (Thermostat Care Analysis, 2026). Also note the wall surface, mounting height, and the space for the thermostat’s display. Planning now reduces surprises during installation.
Choosing the right thermostat for your home
Your choice should balance HVAC compatibility, features, and usability. If you have a simple heating-only system, a basic programmable model may be enough; for heat pumps or multi-stage systems, you may need a multi-stage thermostat with advanced wiring. Consider smart features like Wi-Fi connectivity, voice control, and app-based scheduling. If you live in a home with a busy schedule or energy goals, a thermostat with adaptive scheduling and energy reports can help you track savings over time. Ensure your choice supports your HVAC type (gas, electric, oil, heat pump) and your existing wire count. The Thermostat Care team emphasizes matching the thermostat’s wiring diagram to your wires to avoid mismatches and outages.
Wiring basics and system checks
Wiring is the heart of a successful thermostat replacement. The most common wires are R (hot), C (common), W (heat), Y (cool), G (fan), and O/B (heat pump reversing valve). Before disconnecting anything, take a clear photo of the old wiring and label each conductor. Verify there is a C-wire or determine if you’ll use a power extender kit. If you have a two-wire setup, you may need a thermostat designed for power-sharing without a C-wire. Always turn off power at the breaker and at the furnace switch before touching wires. This reduces the risk of electric shock and equipment damage.
Safety first: powering down and handling wires
Power safety is non-negotiable in thermostat replacement for home projects. Turn off the furnace and main circuit breaker, then switch off any local switches near the thermostat. Use a non-contact voltage tester to confirm there’s no live voltage on the wires you’ll touch. Wear protective gloves if you’re handling bare conductors, and keep metal tools away from the HVAC control board to avoid short circuits. If you’re unsure about wiring, halt the project and consult a professional. Safety is the foundation of a successful replacement.
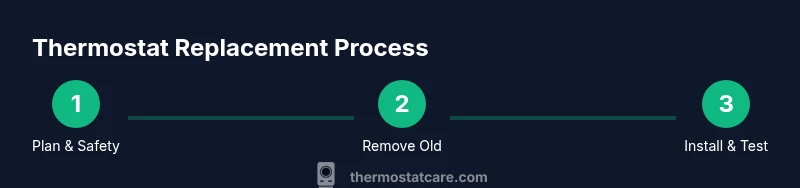
The installation process in 8 clear steps
This section outlines a high-level view of the installation sequence. For a detailed, step-by-step approach, see the dedicated STEP-BY-STEP block below. Start by mounting the new backplate, then align and connect wires according to the thermostat’s wiring diagram. Secure the thermostat to the wall, restore power, and verify the unit powers on. Follow the prompts to configure system type, schedules, and any smart features. Finally, test heating and cooling cycles to confirm proper operation and safety. Diagrams and manufacturer instructions will help ensure accuracy.
Smart features and compatibility considerations
If you’re upgrading to a smart thermostat, check compatibility with your HVAC system, home Wi‑Fi, and smartphone ecosystem. Some systems require a hub, a specific app, or firmware updates. Review energy reporting and scheduling features to ensure they align with your goals. Be aware that smart thermostats can occasionally trip circuit protections if the wiring isn’t properly connected. Always confirm that the device is receiving 24VAC power and that the C-wire, if used, remains secure.
Configuration, testing, and troubleshooting after install
After wiring and mounting, configure the thermostat by selecting your system type (gas, electric, heat pump), prefered units (C/F), and daily schedules. Connect to Wi‑Fi if you’re using a smart model, then run a few test cycles to verify heating, cooling, and fan operations. If the unit doesn’t respond, recheck wire connections, confirm no tripped breakers, and consult the backplate diagram. Maintain a log of any settings changes to simplify future maintenance and potential upgrades.
Maintenance and long-term care
Regular maintenance extends the life of your thermostat and HVAC system. Clean the screen and vents, check for loose wiring at the wall and the backplate, and keep the area around the thermostat free of dust. Update firmware if available and review settings seasonally to preserve comfort and efficiency. If you notice erratic behavior or unresponsive controls, consider a professional inspection to prevent bigger issues.
Energy savings, ROI and practical takeaways
A well-executed thermostat replacement for home often yields better energy usage and more predictable comfort. Use programmable schedules and occupancy features to avoid unnecessary heating or cooling. Smart thermostats can provide energy reports to help you refine routines. The key takeaway is that compatibility, correct wiring, and deliberate testing lead to the best long‑term outcomes.
Quick reference: common mistakes to avoid
- Skipping the power-off step and touching live wires
- Reusing incompatible backplates that don’t fit the new unit
- Losing the original wiring diagram or forgetting to label wires
- Not sealing the wall gap around the mounting plate
- Ignoring the thermostat’s compatibility list with your HVAC system
Tools & Materials
- New thermostat(Model compatible with your HVAC system (voltage, wiring, and backplate compatibility))
- Screwdriver set(Phillips and flat-head; typical screws are #6 or #6-32, 1/4 inch driver)
- Non-contact voltage tester(To verify power is off before touching wires)
- Wire strippers/pliers(For cleanly trimming and bending conductors)
- Labeling tape and marker(Label wires as you disconnect to avoid mix-ups)
- C-wire adapter or power extender kit(Only if your new thermostat requires power and you lack a C-wire)
- Safety gloves(Hand protection when handling exposed conductors)
- Backplate mounting screws(New screws compatible with your wall and the new thermostat)
Steps
Estimated time: 45-90 minutes
- 1
Turn off power and prepare workspace
Shut off the furnace circuit breaker and the thermostat’s local power switch if present. Remove the thermostat cover and take a photo of the wiring. Clear the area and lay out tools in a stable workspace.
Tip: Double-check with a non-contact tester to ensure no voltage is present before touching wires. - 2
Remove the old thermostat
Detach the thermostat from the wall plate, then unscrew and remove the old backplate. Label each wire with the supplied tape and marker for later reference. Photograph the wiring for your records.
Tip: Keep the screws organized and note which wire goes to which terminal to avoid mistakes. - 3
Inspect wiring and C-wire status
Identify R, C, W, Y, G, and O/B wires. Confirm whether you have a C-wire; if not, decide on an adapter or a different model. If you have a heat pump, ensure the O/B wiring is distinct from the Y wire.
Tip: If you lack a C-wire, plan for an adapter or model that supports power stealing to avoid future outages. - 4
Mount the new baseplate
Attach the new backplate to the wall using the new mounting screws. Ensure it is level and firmly anchored in the wall. If needed, patch any gaps around the plate to prevent drafts or interference.
Tip: Use a level and a pencil to mark exact screw locations for a clean install. - 5
Connect wires to the new thermostat
Connect each labeled conductor to the corresponding terminal on the new thermostat based on the wiring diagram. Ensure each wire is fully inserted and secured with the terminal screw. Keep wire ends tidy and avoid stray strands.
Tip: Avoid overtightening screws; snug is enough to maintain a solid connection without damaging conductors. - 6
Attach the thermostat to the mounting plate
Snap or screw the thermostat unit onto the baseplate according to the manufacturer’s instructions. Ensure the faceplate sits flush against the wall and aligns with the plate.
Tip: If the unit is loose, recheck screw tension and plate alignment before finishing. - 7
Restore power and begin configuration
Turn the power back on at the breaker and the furnace switch. The thermostat should power up—follow the on-screen prompts to set date/time and system type.
Tip: Have your HVAC system information handy (gas/electric, single/multi-stage) to speed setup. - 8
Test heating, cooling, and safety checks
Run a few test cycles for heat and cool, verify fan operation, and confirm that the system responds to changes in the interface. Listen for any unusual hums or tripping breakers and resolve immediately.
Tip: Document any irregularities and consult a professional if you detect unstable voltages or error codes. - 9
Finalize, document, and plan maintenance
Record model details, wiring layout, and any adapters used. Schedule seasonal checks and clean the surrounding area to maintain reliability.
Tip: Keep the installation photos and wiring notes for future upgrades or troubleshooting.
Questions & Answers
Do I need to turn off the power at the breaker before starting?
Yes. Always switch off the main breaker and, if possible, the furnace switch before touching any wiring. Verify with a tester that no voltage is present.
Yes. Turn off the power at the breaker and confirm there’s no voltage before you touch any wires.
Can I reuse my old wiring and backplate?
You can often reuse wiring and the backplate if they are compatible with the new thermostat, but always check the wiring diagram and backplate fit. Some models require a new backplate or a C-wire adapter.
You can usually reuse the old wiring if compatible, but check the diagram and fit.
What if my thermostat is hard-wired without a C-wire?
A C-wire adapter or a thermostat rated for two-wire operation can solve power issues, but in some cases you may need to run a dedicated C-wire or select a thermostat that doesn’t require one.
If you lack a C-wire, you might need an adapter or a different thermostat that doesn’t require one.
Is a smart thermostat compatible with my furnace/AC?
Most modern HVAC systems are compatible with smart thermostats, but confirm wiring count, control board compatibility, and whether your system supports Wi-Fi features.
Most systems work with smart thermostats, but verify wiring and compatibility first.
How long does thermostat replacement take in a typical home?
Most installations take about 30-90 minutes, depending on wiring complexity and whether a new C-wire or adapter is needed.
Typically 30 to 90 minutes, based on wiring and adapters.
Watch Video
What to Remember
- Plan compatibility before buying any thermostat.
- Label wires to streamline reassembly.
- Test all functions thoroughly after installation.
- Respect safety protocols to avoid shocks and damage.