How to Replace a Thermostat: A Complete DIY Guide
Learn how to replace a thermostat safely and effectively with a step-by-step approach, from choosing the right model to wiring, testing, and troubleshooting for reliable heating and cooling.

By following this guide, you will safely replace a thermostat in your home, ensuring compatibility with your HVAC system and minimal downtime. You’ll choose a replacement model, turn off power at the breaker, transfer wiring with care, and configure the new device for heating and cooling schedules. This task suits confident DIYers who value clear wiring diagrams and test procedures.
Understanding When to Replace Your Thermostat
An old thermostat may still turn the heating and cooling on and off, but it may not deliver accurate temperatures or energy savings. Signs you should consider replacing include inconsistent comfort, frequent thermostat battery changes (for battery-powered units), and a screen that's slow to respond or unresponsive. If the unit is more than 10-15 years old, it's likely become less compatible with modern efficiency features and with smart home ecosystems. Replacement isn't only about new hardware; it's about maintaining reliable control of your home's climate and energy usage, especially as your HVAC system evolves. Your decision should also account for your system type (gas furnace, electric furnace, heat pump) and whether the existing wiring can support a newer model. The right replacement will match your current wiring (24V control circuits are standard in most homes) and provide the features you want — from simple scheduling to remote control. According to Thermostat Care, replacing a thermostat is a practical DIY task for many homeowners, provided you follow safety steps and choose a model that suits your system. When planning, consider whether you want basic programmability or a smart thermostat with learning routines and energy reports. Keep in mind that smoother temperature control often translates into fewer temperature swings and less energy waste.
Choosing the Right Replacement Thermostat
Start by identifying your goals: Do you want easier scheduling, energy savings, or smart features like voice control and remote access? Then check compatibility: Most residential HVAC systems use 24-volt control circuits. Not all thermostats work with all systems, especially heat pumps or multi-stage furnaces. If you are replacing an older model, you may need a thermostat that supports C-wire power or has a battery backup. Decide between a non-programmable or programmable thermostat, and between a wired or wireless model. A basic programmable thermostat keeps a schedule manually and is inexpensive, while a smart thermostat offers learning features, remote control, and energy reports. When shopping, look for a model with a clear display, intuitive controls, and compatibility with your HVAC equipment. If you have a heat pump, ensure the thermostat supports heat pump operation and auxiliary/emergency heat. You may also want to consider compatibility with smart home ecosystems (Alexa, Google Assistant). Thermostat Care analysis shows homeowners who upgrade to modern thermostats often experience more reliable scheduling and improved comfort. The Thermostat Care team recommends starting with compatibility checks, then choosing a model with the features you’ll actually use. Finally, obtain the necessary wiring or mounting accessories if needed.
Safety and Power Considerations
Before touching any wiring, power down your HVAC system at the main breaker and, if available, the switch at the furnace or air handler. Use a non-contact voltage tester to confirm that no 24-volt circuit is live near the thermostat wires. Never assume color codes alone determine connections; always verify with the wiring diagram for your model. If you feel unsure, stop and consult a professional. When in doubt, disconnect power, label wires, and keep the building's circuits clearly marked to prevent accidental re-energizing. Thermostat work involves low-voltage circuits, but mistakes can damage the control board or void warranties. By taking careful precautions, you minimize risk and create a safe path to successful replacement. The Thermostat Care analysis shows that proper power isolation and verification are essential steps for reliable results.
Tools, Materials, and Preparation
Gather the items you’ll need before starting to replace your thermostat. Basic tools include a small screwdriver set (Phillips and flat-head), a level for mounting, a tape measure, and a pencil for marks. You’ll also want a non-contact voltage tester or multimeter to verify power, wire labels or tape to identify conductors, and a camera or notebook to document the existing wiring. Don’t forget the replacement thermostat itself, plus any mounting plate or trim kit that comes with it. If your new device requires a C-wire, you may need a C-wire adapter or extra thermostat wire; check your existing cable bundle to determine if an upgrade is necessary. Optional but helpful items include electrical tape, plastic wire guards, and a small container to group screws. With these tools ready, you’ll reduce frustration and speed up a careful, accurate installation.
Step-by-Step Overview
Replacing a thermostat involves a series of clear actions performed in order. This overview outlines the main phases: power down and safety checks, removing the old unit, labeling and documenting wiring, mounting the new base plate, wiring the new thermostat, and powering up to configure settings. Use the wiring diagram for your replacement model and refer to your HVAC system's manual for compatibility notes. A visual reference, such as a photo you took earlier, can prevent mix-ups during connections. For best results, keep the new thermostat’s instruction manual nearby as you perform each action. The steps in the full guide expand on this overview with exact terminal labels and wiring color mapping.
Installation Pitfalls and Common Mistakes
Common mistakes include mixing up wires between R, C, Y, W, and G terminals, skipping the C-wire connection when required, or overtighting screws that crack the mounting plate. Avoid placing the thermostat on a wall with strong direct sunlight, which can skew sensor readings. Do not twist wires beyond their insulation or leave exposed conductors; secure all terminals and cap any unused wires. Another frequent issue is failing to calibrate the thermostat after installation, which can cause incorrect temperature readings. Keep a calm pace, verify each connection against the wiring diagram, and reference the manual for your model’s limits and requirements. These precautions help ensure long-term reliability and comfort.
After Installation: Testing and Configuration
Power the system back on and enter the setup wizard on the new thermostat. Set the display language, unit of temperature, time, date, and preferences for scheduling. Run a quick test by selecting heat and then cool, observing the system’s response. Check that the fan operates correctly and that the temperature on the wall matches the thermostat reading. If you have a heat pump or multi-stage system, validate the auxiliary heat operation and stage changes. Save a basic schedule and test it at several times during a 24-hour cycle. If you encounter any error codes, consult the device’s manual or the manufacturer’s support site. Thermostat Care analysis shows careful testing reduces callbacks and returns. The Thermostat Care team recommends documenting the final wiring configuration and storing a copy of the old wiring notes for future reference.
Authority Sources and Further Reading
- https://www.energy.gov/energysaver/thermostats
- https://www.energy.gov/eere/buildings/articles/thermostats
- https://www.epa.gov/iaq
Thermostat Care's Verdict
The Thermostat Care team recommends upgrading to a modern thermostat when your current unit no longer meets your comfort or energy goals and is compatible with your HVAC system. A well-chosen replacement, installed with care and tested thoroughly, delivers reliable climate control, better energy management, and smoother integration with smart home setups. Follow manufacturer instructions and consult a professional if you encounter uncertainties during wiring or calibration.
Tools & Materials
- Screwdriver set (Phillips #1 and #2)(Used to remove faceplates and mounting screws)
- Non-contact voltage tester(Verify power is off and check for live circuits)
- Wire labels or tape(Label each wire to document function)
- Camera or notebook(Document existing wiring before disconnecting)
- Replacement thermostat(The new unit you will install)
- Mounting plate or trim kit (if included)(Use if needed for proper fit)
- Electrical tape(Secure wires and insulate exposed conductors)
Steps
Estimated time: 45-90 minutes
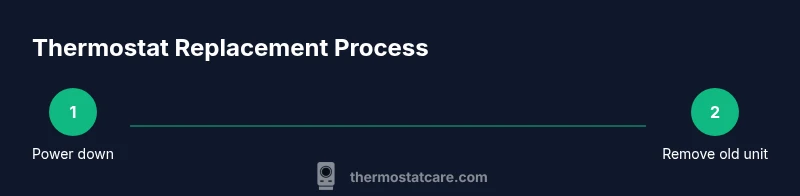
- 1
Power Down and Verify 24V System
Turn off the HVAC circuit breaker and, if available, switch at the furnace or air handler. Use a non-contact tester to confirm no voltage on the thermostat wires before touching anything. This reduces the risk of shock or damage to control boards.
Tip: Double-check with a non-contact tester; 24V circuits are low, but mis-wiring can harm equipment. - 2
Remove the Old Thermostat Faceplate
Carefully remove the faceplate and disconnect mounting screws. Take note of how wires are connected and which terminal each wire sits on. If it's hard to remove, gently wiggle the unit while supporting the wall to avoid damaging the wall.
Tip: Take a clear photo from multiple angles before removing any wires. - 3
Label and Document Wiring
Label every conductor and create a quick schematic of the wiring path. This will help you map wires to the new thermostat accurately and avoid mistakes during reinstallation.
Tip: Label expected functions (R, C, Y, W, G) even if colors look familiar. - 4
Disconnect Old Wiring and Inspect Wires
Gently disconnect wires from the old base and inspect the insulation for cracks or fraying. Trim any damaged sections and keep wires neat to prevent shorts on the new unit.
Tip: If a conductor is damaged, trim and re-crimp a fresh section or replace the cable if needed. - 5
Install the New Mounting Plate
Attach the new base to the wall using screws. Use a level to ensure the base is perfectly vertical, as an off-kilter mount can affect sensor readings.
Tip: Use a level and start with one screw to set alignment before final tightening. - 6
Connect Wires to the New Thermostat
Match each wire to its corresponding terminal on the new thermostat according to its wiring diagram. Secure each connection and ensure no stray strands contact neighboring terminals.
Tip: If your new unit requires a C-wire, ensure it is properly connected to C terminal and insulated. - 7
Power On, Configure, and Test
Restore power and follow the thermostat’s setup wizard to configure language, units, time, and schedules. Run a quick test of heat and cool, and verify that the wall temperature aligns with the thermostat readout.
Tip: Document final wiring configuration and keep the original notes for future service.
Questions & Answers
Do I need a professional to replace a thermostat?
Most homeowners can replace a thermostat if they follow safety steps; however, if you have a complex system or gas furnace, consult a pro.
You can usually replace a thermostat yourself if you follow safety steps, but call a pro for complex systems.
Will replacing a thermostat save energy?
A modern thermostat can improve energy efficiency through better scheduling and sensor features.
Yes, newer thermostats can help you save energy through smarter scheduling.
What if my thermostat wires are different colors?
Ignore color alone; follow the thermostat's wiring diagram and the labels you added.
Don't rely on wire color; use the diagram and labels.
Can I replace a wired and wireless thermostat?
Wired thermostats have power via the HVAC system; wireless depend on batteries or hubs.
Yes, but the replacement process varies by wired vs wireless.
What should I do if the HVAC system won't power on after replacement?
Check the breaker, confirm wiring connections, and consult the manual; if still no power, stop and seek help.
If there's no power after replacement, double-check the wiring and breaker, and seek help if needed.
Do I need to reset the system after install?
Follow the new thermostat's setup wizard; some systems require a system reset.
Yes, run the setup wizard and, if needed, reset the HVAC controls.
Watch Video
What to Remember
- Verify compatibility before replacement.
- Label wires and take photos to avoid miswiring.
- Power down before touching wiring to prevent shock.
- Test heating and cooling after installation.