Installing a New Thermostat: A Homeowner's Step-by-Step Guide
Learn how to install a new thermostat safely and efficiently. This guide covers compatibility checks, essential tools, step-by-step wiring, configuration, and testing to ensure reliable climate control for your home.

In this guide you will learn how to install a new thermostat from start to finish, including compatibility checks, essential tools, wiring, mounting, configuration, and testing. Follow the step-by-step process to ensure safe installation, proper heating/cooling operation, and energy savings while meeting local safety standards. This quick guide uses practical checks, common wiring diagrams, and safety reminders from Thermostat Care to help homeowners complete the task confidently.
Why installing a new thermostat matters
According to Thermostat Care, installing a new thermostat is one of the most effective upgrades for comfort, energy efficiency, and control over your home's climate. A modern thermostat can reduce energy waste by scheduling temperature changes, learning your routines, and optimizing compressor cycles. The initial investment often pays for itself over a heating season through lower utility bills and improved comfort levels. When you choose a thermostat with smart features, you gain remote access, weather-adaptive scheduling, and diagnostic insights that help you identify system issues before they become expensive repairs. For homeowners, the installation process is a chance to simplify yearly maintenance while ensuring your HVAC system is running at peak efficiency. Thermostat Care analysis shows that even basic programmable thermostats can yield noticeable savings when used correctly, especially in homes with uneven occupancy patterns. The key is to follow a clear, safe installation plan and to verify compatibility with your existing equipment.
Check compatibility before you buy
Compatibility is the foundation of a smooth installation. Verify that the thermostat supports your HVAC system type (gas, electric, oil, heat pump, or combination), the number of wires in your wall, and the presence of a C-wire for power. If you have a heat pump, confirm it supports auxiliary heat or emergency heat settings. Review the thermostat’s wiring diagram and compare it to the labeling on your current wiring harness. Some thermostats require a C-wire, while others can operate with batteries or a power-stealing method. If your system uses two transformers or a 120/240-volt supply, you’ll likely need a professional assessment. By confirming compatibility first, you avoid buying a device that cannot power up or control your equipment effectively. Thermostat Care’s guidance emphasizes checking compatibility with the HVAC equipment, Wi‑Fi requirements, and the home’s electrical rating before purchasing.
Tools and materials you’ll need
Having the right tools on hand makes the installation smoother and safer. Common essentials include a screwdriver (Phillips and flathead), a wire stripper, a non-contact voltage tester, a digital multimeter (optional), a pencil, a level, masking tape, and the new thermostat itself. Also gather wall anchors and screws that fit your wall type, and a small notch pad or insulation if you’re running wires through a hollow wall. If you’re replacing a bulky faceplate, you may need a standard wall plate adapter. Before you start, lay out the tools in a clear workspace and protect nearby surfaces with a drop cloth. This preparation saves time and reduces the chance of mishandling wires or misplacing small parts.
Safety first: power down and protect yourself
Safety is non-negotiable when working with live HVAC wiring. Turn off power at the circuit breakers that feed the HVAC system and thermostat circuit. Use a non-contact voltage tester to confirm that no current is present on the wires you’ll touch. Remove the faceplate and gently expose the wires. If you see damaged insulation, corrosion, or frayed conductors, stop and assess the condition before proceeding. Do not rely on a single power source; ensure the furnace control board is not energizing the thermostat circuit. Wearing safety glasses helps protect your eyes from any loose debris, and keep children or pets away from the workspace.
Remove the old thermostat and document wiring
Carefully remove the old thermostat and take clear photos of the wiring at every terminal before disconnecting anything. Label each wire with its terminal letter (e.g., R, C, W, Y, G) using masking tape and a marker. If a wire is connected to a jumper, note which terminals it bridged. Record the color and any separate wire pairings, as some systems use multiple stages or auxiliary heat. Save the photos to your phone or computer so you can reference them when wiring the new unit. This step reduces guesswork during the installation and helps avoid mis-wiring historical setups.
Identify wires and labeling to plan wiring correctly
With the old thermostat removed, verify which wires are present and match them to the new thermostat’s wiring diagram. Common wires include R (24V power), C (common), W (heat), Y (cool), and G (fan). Some systems may add O/B (reversing valve for heat pumps), Aux/E, or multiple stages such as W2 or Y2. If you have a C-wire, connect it to the C terminal on the new thermostat to provide consistent power. If there is no C-wire, many thermostats offer alternative power options or require a kit. Use the wiring photo reference to map each wire to the appropriate terminal on the new device.
Choose wiring options and adapters for special configurations
Certain HVAC configurations require adapters or different wiring schemes. For heat pumps, you may need to connect O/B to the reversing valve terminal, and include Aux or E for auxiliary heat. Multi-stage systems often require wires for second-stage heat (W2) or cooling (Y2). If your new thermostat does not support a required wire, you may need to select a model with higher compatibility or install a dedicated sub-base. Recheck the product’s wiring diagram and your system’s manual. Thermostat Care recommends verifying that all required wires can reach the terminals without forcing connections or bending conductors.
Mount the new base and prepare the wall
Mounting the thermostat base securely is essential for reliable operation. Use a stud finder to locate solid wall areas and mark the mounting holes with a level to ensure the device sits straight. If mounting on drywall, install wall anchors that accept the mounting screws and support the unit’s weight. Run free wires neatly and tuck any excess behind the base plate. Attach the base with screws, then recheck alignment. A stable base prevents miscommunication between sensors and the HVAC system, reducing the risk of false readings or loose connections.
Connect wires and configure the thermostat
Insert each wire into its corresponding terminal on the new thermostat, following the wiring diagram precisely. Press the wire fully into each terminal and secure with the terminal screws. Clip any excess wire and ensure there are no stray conductors touching adjacent terminals. Restore power at the HVAC circuit breaker, then power up the thermostat. Follow the on-screen prompts to configure system type, heat/cool settings, and single/multi-stage operation. If you have a smart thermostat, connect it to your home Wi‑Fi network and complete the initial setup in the accompanying app.
Test, calibrate, and finalize setup
After installation, perform a thorough test: run a heat cycle, a cool cycle, and a fan only cycle to confirm proper operation. Observe temps, ensure the system cycles correctly, and verify that energy-saving schedules are functioning. Calibrate if your model offers temperature offset or calibration options. Program a daily schedule that matches your routine to maximize energy savings. Confirm also that any smart features, such as remote access or voice assistant integration, are working as intended. Finally, replace the wall plate and tidy the workspace, leaving nothing loose behind the unit.
Common mistakes and how to avoid them
DIY thermostat installation is rewarding but has common pitfalls. Avoid skipping the power-down step, mislabeling wires, or forcing wires into incorrect terminals. Do not reinstall a wall plate if it does not align with the base; use the proper adapter. Don’t ignore the need for a C-wire if required by your model, as lack of power can cause the device to fail to start. If you encounter a mismatch between the HVAC type and the thermostat’s settings, revisit the installation guide and correct the configuration. When in doubt, pause and consult a professional to prevent costly mistakes.
Troubleshooting after installation and final checks
If the thermostat fails to power on, recheck the C-wire connection and the power source. If it powers but does not control the HVAC, verify terminal mapping with the diagram. Common issues include loose wires, incorrect wire-to-terminal mapping, or software glitches in smart thermostats. Use the troubleshooting guide in the product manual and Thermostat Care’s recommended checks to identify whether the issue is hardware or software. If problems persist, consult a pro or contact the manufacturer for support. Proper labeling, careful wiring, and correct configuration greatly reduce post-installation issues.
Tools & Materials
- New thermostat (model of choice)(Ensure it supports your HVAC type and has a C-wire if needed)
- Screwdriver set (Phillips #2 and flathead #1)(For wall plates and device screws)
- Wire stripper/cusher(To trim and prepare wires)
- Non-contact voltage tester(Verify no power on wires before handling)
- Digital multimeter (optional)(Useful for verifying voltage and wiring continuity)
- Masking tape and marker(Label wires and terminals clearly)
- Pencil and level(Mark mounting holes and ensure the device sits straight)
- Screws and wall anchors(Choose hardware compatible with wall type)
- Faceplate adapter (if needed)(For compatibility with non-standard wall plates)
- Smartphone with thermostat app(Optional for setup and remote access)
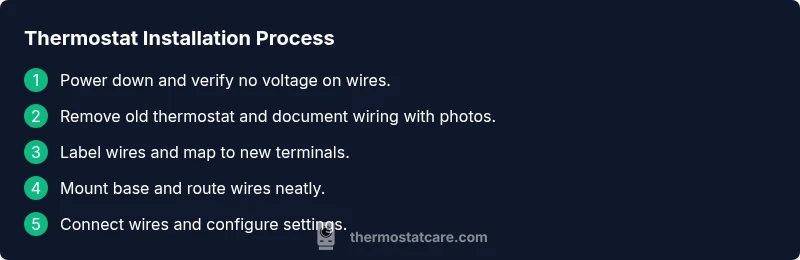
Steps
Estimated time: 60-90 minutes
- 1
Power down and verify
Turn off power at the breaker feeding the HVAC system and use a non-contact tester to confirm no voltage on wires. This prevents shock and accidental energizing of the control board during wiring.
Tip: Double-check the correct circuit is off by testing both the thermostat circuit and the furnace access panel. - 2
Remove old thermostat and photograph wiring
Carefully detach the old unit and document wiring with clear photos from multiple angles. Photograph all terminal labels and any jumpers to guide the new installation.
Tip: Label each wire on the old thermostat with its terminal letter before removing it. - 3
Label wires and verify compatibility
Assign each wire to the corresponding terminal on the new thermostat by color and terminal label. Compare with the new device’s wiring diagram and confirm you have a C-wire if required.
Tip: If your old thermostat lacked a C-wire, plan an alternate power option or use a compatible model. - 4
Mount the base and prepare the wall
Mark where the mounting screws will go, drill pilot holes if needed, and attach the base plate with level alignment. Ensure the base sits flush against the wall.
Tip: Use wall anchors if you’re mounting on drywall without a stud. - 5
Connect wires to the new terminals
Insert each wire into the matching terminal on the new thermostat and secure screws. Neatly tuck excess wire behind the base plate.
Tip: Make sure each connection is firm and there are no stray strands. - 6
Power up and configure the thermostat
Restore power at the breaker and power on the thermostat. Follow the on-screen prompts to set system type, number of stages, and location.
Tip: If you have a smart thermostat, connect to Wi-Fi during setup. - 7
Test operation and finalize
Run through heating, cooling, and fan tests. Adjust settings, schedule, and verify that the thermostat controls the HVAC properly.
Tip: Keep the old unit temporarily in case you need to compare behavior.
Questions & Answers
Do I need a professional to install a thermostat?
For standard single-stage systems, DIY installation is feasible with careful attention to wiring diagrams. More complex setups, such as heat pumps with multiple stages or 240V systems, may require a licensed technician to ensure safety and proper function.
DIY is possible for simple systems, but complex setups may need a pro.
Can I reuse the old wiring for the new thermostat?
You can reuse wires if they match the new thermostat’s terminal requirements and a C-wire is available for power. If the wiring does not meet the new model’s needs, you may need an adapter or a different thermostat.
Wiring compatibility matters; reuse only if it fits the new model.
Is it safe to install a thermostat with the power off?
Yes. Always shut off power at the breaker and verify with a tester before touching wires. This reduces the risk of shock and equipment damage during installation.
Always turn off power and test first.
What if the new thermostat won't power on after installation?
Check the C-wire connection, ensure the breaker is on, and verify that the device is configured correctly for your system type. Review the wiring photos and consult the install guide if needed.
Verify power, wiring, and configuration first.
Will a Wi-Fi thermostat operate without Internet access?
Basic thermostat functions can operate without Internet, but some features like remote access and updates require a network connection. Local operations may still function as a standard thermostat.
Basic use works offline; remote features need Wi-Fi.
What should I do if the thermostat shows error codes?
Refer to the thermostat’s manual for code meanings. If codes persist, reset to factory settings and reconfigure. If unresolved, contact customer support.
Check the manual and reset if needed, then seek support if problems persist.
Watch Video
What to Remember
- Identify compatibility before purchase and installation.
- Label wires carefully and follow the wiring diagram.
- Power down safely and test cycles after wiring.
- Configure settings and schedules to maximize energy savings.
- Keep a backup of installation photos for future reference.