How to Install a Thermostat in a House: A Step-by-Step Guide
Learn how to install a thermostat in a house with this comprehensive, house-wide guide. Safe planning, wiring basics, and hands-on steps for DIY homeowners, with practical tips from Thermostat Care.

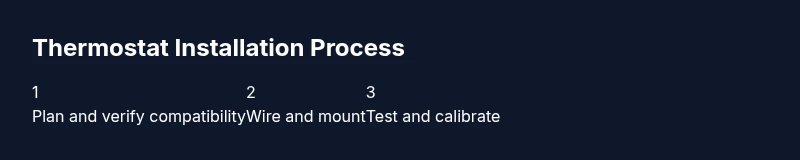
Today you’ll learn how to install a thermostat in a house from planning to testing. We’ll help you confirm compatibility, shut off power safely, mount the base, wire the new thermostat, and verify temperature control. This step-by-step approach minimizes risk and supports energy savings, with practical tips from Thermostat Care.
Planning and Compatibility
Before touching any wires, take stock of your current heating and cooling setup. Most homes use low-voltage control circuits for thermostats, but some old or specialty systems may operate differently. The planning phase aims to confirm that a given thermostat will work with your equipment and that you can safely power it during installation. Start by locating the furnace or air handler, noting the control voltage and any labels on the wiring terminal strip. Identify whether your system is a conventional forced-air setup or a heat pump, boiler, or radiant system. According to Thermostat Care, compatibility is centered on voltage and terminal layout rather than brand alone. If you’re unsure, consult the manual or a licensed HVAC professional. (This section lays the foundation for a safe, effective install.)
Tools, Materials, and Safety
Having the right tools and a clear plan reduces stress and mistakes. Gather items ahead of time and verify you can safely shut off power to the thermostat at both the breaker panel and the furnace if required. Use a sturdy ladder for wall-mounted units and good lighting to avoid mistakes. Safety first: never work on live wiring. The recommended kit includes a compatible thermostat, a screwdriver set, wire strippers, a non-contact voltage tester, electrical tape, and replacement wall screws. Take photos of the old wiring for reference. Thermostat Care emphasizes documenting connections to avoid guesswork when wiring the new device.
Choosing the Right Thermostat for Your System
Thermostats fall into several families: non-programmable, programmable, and smart. Non-programmable models are simple and affordable; programmable units allow weekly scheduling to match occupancy; smart thermostats connect to Wi-Fi for remote control and energy analytics. When choosing, check that the thermostat is compatible with your HVAC system type (gas, electric, heat pump) and supports a C-wire if you plan a high-performance model. If you have a multi-stage system or heat pump, verify the wiring diagram and possible compatibility issues. The Thermostat Care approach focuses on matching system needs with user-friendly features to maximize energy savings and comfort while avoiding incompatible configurations.
Wiring Basics and Common Configurations
Most residential thermostats use low-voltage 24 VAC circuits. Typical terminal designations include R (power), C (common), W (heat), Y (cool), and G (fan). Some systems for heat pumps use O/B for reversing valve control. If your old thermostat had only two wires, you may be limited in features unless you run a new wire or use a C-wire adapter. Always refer to the HVAC control board label to confirm terminal names. Photograph or sketch the wiring before removing anything so you can map connections accurately to the new thermostat. If wiring colors don’t match standard expectations, rely on the terminal designations rather than color alone.
Assessing Your HVAC System for C-Wire
The C-wire provides continuous power to many smart thermostats. Locate the C terminal on the furnace or air handler control board to confirm a C-wire is available. If a C-wire exists, you can connect it to the thermostat to power advanced features. If not, options include a power-stealing thermostat, a C-wire adapter, or choosing a model that runs on batteries or with two wires. This assessment helps you avoid a dead thermostat after installation. Thermostat Care recommends validating the presence of C-wire with the system manual or a quick check at the control board.
Mounting the Plate and Handling Wires
Mounting the base plate correctly is critical for a secure fit and accurate readings. Mark the mounting holes on the wall, drill pilot holes if needed, and use level to ensure the plate is square. Route wires through the wall opening neatly, leaving slack at the terminal points to avoid tension. Attach the plate with screws, then gently tuck wires into the back-to-back terminals according to your wiring plan. Make sure there are no stray strands that could short against the metal plate, and keep the interior of the wall clean to prevent wire damage.
Connecting Wires to the New Thermostat
With the plate mounted, connect each wire to its corresponding terminal on the new thermostat: R to R, W to W, Y to Y, G to G, and C to C if present. If you’re using a heat pump, connect O/B to the appropriate O/B terminal and use a jumper only if the model requires it. Do not force wires into terminals; if a wire is too short, consider reinsulating and extending safely. After wiring, recheck all connections and ensure there are no exposed conductors. Double-check the wire labels you created earlier to confirm accurate placement.
Powering and Initial Setup
Restore power to the thermostat at the circuit breaker if you had cut it, then power on the device to begin the setup. Many thermostats will prompt you to select language, time, and location. If you’re installing a smart thermostat, connect it to your home Wi-Fi and the app; this enables remote control, scheduling, and energy insights. If you’re using a battery-powered model, insert fresh batteries, then verify the device powers up correctly. Basic on-screen prompts will guide you through system type selection and thermostat naming.
Setup, Programming or App Pairing
For non-smart models, enter the appropriate program schedule to match your daily routine. For smart thermostats, open the companion app and follow the step-by-step pairing instructions to link to your Wi-Fi, HVAC system, and voice assistants if supported. Create a schedule that aligns with your occupancy, set preferred cooling and heating limits, and enable energy-saving features like eco- or adaptive recovery modes. If you have a heat pump, enter heat and cool setpoints and ensure the system type is correctly identified in the app or thermostat menus.
Testing the System: Heat, Cool, and Fan
Begin testing by setting the thermostat to heat and confirming warm air from the vents. Switch to cool and verify cold air delivery, then test the fan independently to ensure cycling works. Listen for unusual noises and check for any error codes on the display. Run through several cycles to confirm stable temperature readings and proper hysteresis. If the HVAC doesn’t respond as expected, recheck wiring and power, and consult the manual before deciding to call a professional.
Troubleshooting Common Issues and Final Checks
If the thermostat won’t power on, recheck the breaker and the connections at the terminal strip. If there’s no call for heat or cool, verify the wiring and confirm the thermostat is configured for your system type. If the thermostat shows inconsistent readings, consider calibrating the sensor location or replacing a faulty component. Finally, keep a maintenance log, check for firmware/app updates for smart models, and schedule regular inspections to prevent future issues. A careful, organized approach reduces the chance of miswiring and saves time in the long run.
Tools & Materials
- New thermostat (with mounting plate)(Ensure compatibility with your HVAC system (2-wire, 3-wire, C-wire).)
- Screwdriver set (Phillips #2 and flat-head)(Used to mount plate and remove old thermostat screws.)
- Wire stripper/cutter(Prepare wires for insertion and trim insulation as needed.)
- Non-contact voltage tester(Verify power is off before touching wires.)
- Electrical tape(Insulate exposed conductors and tidy connections.)
- Camera or paper notepad(Document wiring before removal for reference.)
Steps
Estimated time: 60-90 minutes
- 1
Power down and verify compatibility
Turn off power to the thermostat at the furnace control board and, if possible, at the circuit breaker. Confirm your HVAC type and ensure the chosen thermostat supports it. This prevents shocks and miswiring later.
Tip: Double-check the power is truly off at both the furnace and the breaker. - 2
Remove old thermostat and document wiring
Carefully remove the old unit from the wall plate. Take clear photos of the wiring and note terminal labels for reference when wiring the new thermostat.
Tip: Photos act as a safety net if wiring gets confusing. - 3
Label wires and prepare wires
Label each wire at its end corresponding to the terminal it connects to on the old thermostat. Use a small piece of tape and a marker for clarity.
Tip: If in doubt, donor labels help avoid cross-wiring. - 4
Mount base plate
Mark and drill mounting holes, then attach the thermostat base plate level to the wall. Route wiring through the plate opening and ensure a tidy interface with the wall.
Tip: A level ensures the display sits square and easy to read. - 5
Connect wires to the new thermostat
Connect wires to their matching terminals on the new unit (R to R, W to W, Y to Y, G to G, C to C if present). For heat pumps, connect O/B accordingly. Do not force wires into terminals.
Tip: If a wire is too short, do not improvise; extend safely or use a pigtail. - 6
Power and initial setup
Restore power at the breaker and power on the thermostat. Enter language, time, and location. If you have a smart model, connect to Wi-Fi and set up the app.
Tip: Keep the receipt and manual handy in case you need to adjust settings. - 7
Program or pair
For non-smart thermostats, program the daily schedule. For smart models, complete app pairing and system type setup.
Tip: Align programming with your daily routine to maximize savings. - 8
Test heat, cool, and fan
Test each mode to verify proper airflow and response. Observe for any error codes or unusual behavior.
Tip: If a mode fails, recheck wiring and confirm the system type is correct. - 9
Fine-tune and calibrate
Adjust setpoints and sensor calibrations to match room comfort. Calibrate as needed for accurate readings.
Tip: Small adjustments can significantly affect comfort and efficiency. - 10
Final checks and routine maintenance
Double-check all connections, secure the faceplate, and review energy-saving settings. Note maintenance reminders for future checks.
Tip: Create a simple maintenance log to track future updates.
Questions & Answers
Is a C-wire needed for modern thermostats?
Many modern thermostats require a C-wire for reliable power, especially smart models. If your system doesn’t have a C-wire, you may use a battery-powered model or a C-wire adapter. Always verify compatibility with your HVAC equipment and the thermostat manual.
A C-wire is often needed for modern smart thermostats; if you don’t have one, use a battery-powered model or an adapter, and check your HVAC compatibility.
Can I DIY install a thermostat?
Yes, many homeowners can install a basic thermostat with careful planning and following the manual. For complex setups, such as multi-stage systems or heat pumps with specialized wiring, consider professional assistance.
DIY is possible for simple setups; if you have a heat pump or multi-stage system, you may want a pro.
What about heat pump compatibility?
If you have a heat pump, ensure the thermostat supports O/B valve control and the appropriate stage settings. Incorrect wiring can lead to reversing valve issues or ineffective operation.
Heat pumps need a thermostat that supports O/B control and correct stage wiring.
Do I need to turn off power at the breaker?
Yes. Always switch off power to the thermostat at the furnace control board and the main breaker before starting. This prevents electric shock and protects control electronics.
Always power off at both the furnace and the breaker before starting.
How long does installation take?
Most simple installs take about 60 to 90 minutes, depending on wiring complexity and the presence of a C-wire. More complex setups may require additional time or professional help.
Expect roughly one to two hours for a standard install, longer if wiring is complex.
What safety precautions should I take?
Work in a dry area, use a grounded ladder, and do not touch live wires. If you see damaged insulation or scorch marks, stop and consult a professional.
Keep area dry, use a grounded ladder, and avoid touching exposed wires. If in doubt, call a pro.
Watch Video
What to Remember
- Turn off power before wiring any thermostat.
- Label wires and photograph current connections.
- Choose a thermostat compatible with your system and C-wire needs.
- Test all modes (heat, cool, fan) after install.
- Use the app or manual to optimize energy savings.