How to Change a Thermostat in Your House: A Step-by-Step Guide
Learn how to change a thermostat in house safely with practical, expert guidance. This guide covers compatibility, wiring, mounting, testing, and programming for reliable climate control.

In this guide you will learn how to change a thermostat in house safely and effectively. We'll cover selecting a compatible replacement, turning off power, removing the old thermostat, wiring the new unit, mounting it securely, and testing the system. You'll find tips for common mistakes and safety considerations from Thermostat Care.
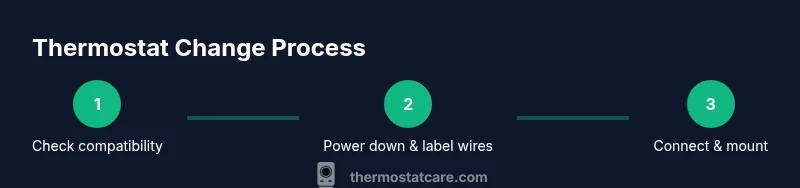
Step 1: Confirm compatibility and gather required model information
Before you touch any wires, confirm that the new thermostat will work with your heating and cooling system. Start by identifying your HVAC type: is it a conventional forced-air furnace with an electric air conditioner, a heat pump, or a boiler with radiant heat? Next, locate the current thermostat base and check the terminal labels. Most modern thermostats use standard terminals like R, Rc, W, Y, G, C, and O/B, but some brands use different designations. In addition to terminal labels, collect information from the equipment itself: furnace or air handler model, whether your system has a C-wire, and the presence of any power-stealing features. If you’re planning to change thermostat in house, this compatibility step saves time. The Thermostat Care team recommends creating a simple compatibility checklist: 1) is there a C-wire, 2) is the voltage 24V AC, 3) does the system support heat pump or conventional cooling, and 4) is there a separate dehumidifier control. If you’re unsure, consult the installation guide for your new model and verify compatibility with Thermostat Care resources. By choosing a compatible thermostat, you minimize installation issues and ensure reliable operation from day one.
Step 2: Safety first — power off and electrical basics
Safety is non negotiable when changing a thermostat. Start by turning off power to the thermostat at the main service panel or the dedicated HVAC disconnect near the outdoor unit. Verify there is no voltage present using a non-contact tester or multimeter set to AC. If you’re unsure about the electrical terms or how your system is wired, pause and consult the manufacturer’s instructions or Thermostat Care resources. This step helps prevent shorts, sparks, or damage to the control board. Remember: even low-voltage thermostats can pose a risk if wires are live during removal. A cautious approach protects you and your equipment.
Step 3: Identify wires and label them
Take a clear photo of the existing wiring configuration before touching any wires. Label each wire with the terminal letter it is connected to (R, W, Y, G, C, etc.) using painter’s tape or a wire label. If you’re unsure what a wire controls, trace it to the equipment or consult the wiring diagram. Some older systems use uncommon terminals like AUX or E; note these in your labels and check the new thermostat’s compatibility. Keep the labels on intact wires as you prepare the new base. This careful labeling reduces mistakes during transfer and helps you map wires to the correct terminals on the new device.
Step 4: Remove mounting plate and old thermostat
Carefully remove the thermostat from the wall by prying off the front cover and loosening the mounting screws. Gently detach the wiring from the old base, keeping track of which wire goes where. If a wire is stubborn, use the screwdriver to loosen the terminal screw rather than tugging on the wire itself. Place the old thermostat and screws in a designated spot for later reuse if needed. Check the wall box for any signs of damage or loose plaster; if the box is loose, you may need a broader mounting solution or a new wall plate. This step prepares a clean, safe surface for the new base.
Step 5: Prepare the new thermostat base
Inspect the new thermostat’s backplate to confirm it includes the same terminal layout or an adapter for the existing wiring. If there is a C-wire required, ensure the terminal is present and accessible. Mounting holes should align with the wall box; use the included screws and anchors if necessary. If you need to extend a wire or strip insulation, use proper wire strippers and cut to clean, square ends. A neat, level base ensures a secure fit and reliable contact for the terminal screws. This preparation reduces miswiring risks and helps you achieve a clean, professional-looking installation.
Step 6: Connect wires to the new thermostat
Attach each labeled wire to its corresponding terminal on the new base according to the manufacturer’s wiring diagram. Tighten terminal screws firmly but avoid over-tightening, which can damage conductors. If your new thermostat uses a different terminal naming, consult the wiring conversion table in the manual. For smart thermostats that require a C-wire, confirm the C-wire is connected and properly seated. After wiring, gently tug each wire to ensure it is secure and won’t pull out when the faceplate is reattached. This step is the core of a reliable, properly functioning thermostat.
Step 7: Mount the new thermostat and close the faceplate
Carefully align the new thermostat backplate with the wall box and press it flat against the surface. Reinsert and tighten the mounting screws, ensuring the device sits level. Attach the front faceplate or cover according to the model’s instructions. If your unit includes a gasket or seal, reapply it to maintain a clean, professional finish and to reduce drafts around the edge. A secure, neatly mounted thermostat reduces vibration noise and ensures long-term stability. This step also helps protect the internal electronics from dust and moisture.
Step 8: Configure settings and connect to Wi-Fi (if smart)
Power up the system and begin the configuration process. If you’re installing a programmable or smart thermostat, use the on-device setup wizard or the companion app to select your heat source, system type (gas, electric, heat pump, boiler), and preferred language. Connect the thermostat to your home Wi-Fi network if required, and sign into any associated accounts for remote control and scheduling. Calibrate the temperature offset if the reading seems off by a degree or two. This configuration ensures the thermostat communicates correctly with your HVAC equipment and provides the features you expect from a modern thermostat. For many homes, this step also unlocks energy-saving routines and remote access.
Step 9: Test operation across cooling and heating modes
With power restored, test the thermostat by setting heat, cool, and fan modes to verify proper operation. Listen for the furnace and outdoor condenser cycling on appropriate calls, and watch the thermostat display confirm mode changes. Run a few cycles to confirm the system responds promptly and that the temperature reading tracks accurately. If you see errors or the system won’t respond, recheck wiring labels, terminal connections, and the compatibility notes from the manufacturer. This final test confirms a successful change of thermostat in house and helps catch wiring mistakes before regular use.
Tools & Materials
- Phillips head screwdriver #2(Essential for most thermostat screws)
- Flathead screwdriver(Useful for stubborn terminals or prying the cover)
- Wire stripper(Prepare wires and trim ends cleanly)
- Voltage tester or multimeter(Confirm power is off and verify 24V system)
- Labeling tape or sticky notes(Label wires by terminal as you disconnect)
- Screws and anchors for wall mounting(Should match the wall material)
- New thermostat in box(Ensure model compatibility with your HVAC)
- Electrical tape(Bundle wires and secure exposed ends if needed)
- Camera or smartphone(Take a photo of the wiring before removal)
- Level or small spirit level(Keep the thermostat square on the wall)
- Manual for new thermostat(Keep handy for wiring diagram and setup steps)
Steps
Estimated time: 90-120 minutes
- 1
Verify compatibility
Confirm the new thermostat supports your HVAC type and has the required terminals. Check for a C-wire if using a smart model, and note any compatibility caveats.
Tip: Follow Thermostat Care compatibility guidelines to prevent rework. - 2
Power down safely
Turn off power at the breaker or disconnect near the outdoor unit. Use a tester to confirm no voltage is present before touching wires.
Tip: Never assume the power is off—verify with a tester. - 3
Label and document wires
Label each wire with its terminal using tape. Take a photo for reference, especially if the terminal labeling is worn.
Tip: Labeling reduces mistakes during transfer. - 4
Remove old thermostat
Detach the faceplate, unscrew the base, and gently release wires. Keep screws handy for reinstalling the new unit.
Tip: Work slowly to avoid damaging wall or wires. - 5
Prepare new base
Inspect the backplate for compatibility and mounting holes. Install mounting hardware and ensure the plate sits flush against the wall.
Tip: Align holes before tightening screws. - 6
Connect wires to new thermostat
Attach each wire to its corresponding terminal as per the wiring diagram. Ensure a firm connection without pinching conductors.
Tip: Double-check the C-wire connection if using a smart thermostat. - 7
Mount and seal
Attach the thermostat, reattach the faceplate, and seal any gaps. Use a level to ensure straight alignment.
Tip: A straight install prevents wear on the mounting screws. - 8
Configure settings
Power on and follow the setup wizard. Input system type, location, and network details where applicable.
Tip: Update firmware if prompted for improved stability. - 9
Test the system
Test heat, cool, and fan modes. Confirm temperature readings match actual room temperature and adjust if needed.
Tip: Run several cycles to ensure consistent performance.
Questions & Answers
Do I need to hire an HVAC technician to change a thermostat?
For most standard residential systems, homeowners can safely replace a thermostat by following manufacturer instructions and basic wiring principles. If you have a heat pump with complex controls or an unfamiliar wiring setup, consider professional assistance.
For many homes, homeowners can replace a thermostat themselves, but seek a pro if you have a heat pump or uncertain wiring.
Can I install a thermostat without a C-wire?
Some thermostats can operate without a C-wire, especially battery-powered models, but many smart thermostats require a C-wire for reliable power. Check the new unit’s documentation and assess if a C-wire is available or if an adapter is needed.
Some models work without a C-wire, but most smart thermostats need one for reliable power.
What should I do if the thermostat doesn’t power on after installation?
First, recheck the wire connections and confirm the breaker is on. Verify the C-wire is properly connected if using a smart thermostat. If the problem persists, consult the manual or Thermostat Care resources for troubleshooting steps.
If it won’t power on, double-check wiring and the breaker, then consult the manual for troubleshooting.
Is it safe to do this myself, or could I risk damaging the HVAC system?
When following standard safety steps—power off, label wires, and use the correct base—DIY replacement is generally safe for most homes. If you feel unsure at any point, stop and seek professional guidance.
DIY is usually safe if you follow steps and shut off power; stop if you’re unsure.
Will changing the thermostat affect my furnace warranty?
Replacing a thermostat with a non-adjacent device can sometimes affect warranties if the installation leads to system faults. Always review your equipment warranty terms and document the installation.
Warranties vary; check terms and document the installation when you replace a thermostat.
Watch Video
What to Remember
- Verify compatibility before starting installation.
- Power down and label wires for accurate transfer.
- Test heating and cooling to confirm proper operation.
- Program and customize settings for energy efficiency.