Thermostat Change Guide: A Practical Step-by-Step Approach
Learn how to safely perform a thermostat change, assess when replacement is needed, choose a compatible model, and install it with confidence. This comprehensive guide covers wiring, safety, testing, and programming for energy efficiency and comfort.

By the end of this guide, you’ll determine whether a thermostat change is needed, choose a compatible model, and complete the replacement safely. You’ll learn how to evaluate compatibility, plan the install, and test performance to preserve comfort and energy efficiency across seasons. This approach works for most residential heating and cooling systems.
Why a Thermostat Change Matters
According to Thermostat Care, a thermostat change isn't just a hardware swap; it's a chance to improve comfort, cut energy waste, and ensure safe, reliable control of your HVAC system. If your thermostat reads temperature inaccurately, loses battery power frequently, or fails to respond to commands, a replacement may be warranted. Start by diagnosing symptoms rather than guessing. For example, if the display flickers, or the unit frequently reboots, you’re observing signs of aging electronics or a failing sensor. The goal is to restore precise sensing, predictable operation, and an intuitive user experience that fits your home routine. When planning a thermostat change, consider whether a simple programmable model suffices or if a smart thermostat with Wi‑Fi, app control, and voice compatibility better matches your lifestyle. People often underestimate how much the thermostat influences overall comfort because it governs when and how long the system runs. A well-chosen thermostat aligns with your schedules, outside temperatures, and energy goals, translating millisystems into steady temperatures and reliable performance year-round. In short, investing in a thoughtful thermostat change pays dividends in comfort and efficiency.
Assessing Your Need: Repair or Change
Before you buy a new thermostat, differentiate between a repairable issue and a full replacement. Battery-powered models may fail due to dead batteries or sensor drift; in older units, sensor calibration can drift, causing gradual temperature errors. If most of the problems occur after a reset or power cycle, you may be dealing with a firmware fault or wiring fault that a repair technician can fix. However, if the current unit is more than 10-15 years old, if it cannot be supported by modern HVAC controls, or if it lacks energy-saving features, a thermostat change often offers more value. Thermostat Care analysis notes that many homeowners achieve smoother performance and energy savings by upgrading to a programmable or smart thermostat designed for newer control algorithms. Consider your home’s heating and cooling equipment: if you have a heat pump, two-stage cooling, or a multi-stage furnace, you’ll want a model that supports those features. Also assess whether you want remote access and smartphone control. Even with a replacement, you should plan for a seamless transition that minimizes downtime and keeps your comfort uninterrupted.
Understanding Thermostat Types and Compatibility
Thermostats come in several families, each with strengths and tradeoffs. A basic programmable thermostat offers daily/weekly schedules that reduce runtime, while a non-programmable model may suit simple routines. Smart thermostats add Wi‑Fi, adaptive scheduling, energy reports, and integration with other smart devices. When choosing a thermostat change, verify compatibility with your HVAC equipment: voltage (24V common in most homes vs. line voltage for baseboard heat), wiring options (C-wire availability), and whether your furnace, boiler, or heat pump requires a specific sensor or terminal layout. If you own a conventional gas or electric furnace, a 24V thermostat with standard terminals is typically enough. For heat pumps, you may need heat-cool dual stage support and O/B reversing valve control. In all cases, check the compatibility list from the thermostat manufacturer and confirm that your current wiring can accommodate the new device. In addition, consider room-by-room sensing, display readability, and how easy it is to set schedules. The goal is a model that fits your home’s hardware and your daily routine without complicating maintenance.
Wiring Basics and the C-Wire Check
Wiring is the heart of a successful thermostat change. Start by turning off power to the thermostat at the breaker to avoid shocks. Use a non-contact voltage tester to confirm that the circuit is de-energized before you touch anything. Remove the old thermostat cover and take a clear photo of the backplate wiring from multiple angles; this becomes a valuable reference if wiring labels come off. Identify each wire by color and function, using the label system that came with the thermostat, or place colored painter’s tape on each conductor as you detach it. Many modern thermostats require a C‑wire (common) to power the electronics; if your current setup lacks a C-wire, you’ll need to add one or choose a model that works without it (though performance may vary). As you prepare to connect the new base, verify the terminal layout for your system type (gas furnace, heat pump, or electric baseboard) and ensure you have the correct screws and wire caps. A careful wiring plan saves troubleshooting time and reduces the risk of mis-commands after install.
Safety Preparations Before You Start
Safety first. Turn off the power at both the thermostat and the HVAC disconnect switch when possible, and shut off the corresponding circuit breaker to minimize the chance of an arc flash or shock. If you have a gas furnace or boiler, avoid opening control panels beyond the thermostat connections; leave internal controls to a licensed pro. Wear insulated gloves if you must handle exposed conductors and avoid working in wet conditions. Keep the work area clear of liquids, pets, and clutter. If you’re uncomfortable with electrical work or if your system uses high voltage wiring, halt the project and consult a licensed electrician or HVAC technician. After you complete the install, verify all connections, replace the wall plate, and test the system in both heating and cooling modes to confirm safe, reliable operation before leaving the room.
Planning Your Thermostat Change: Steps to Prepare
Before you begin, assemble the right tools and plan a calm session. Gather a screwdriver, non‑contact voltage tester, wire labels, a new thermostat, and any required mounting hardware. Read the new device’s installation guide and verify it matches your HVAC system specifications. Photograph the old wiring (as noted) and label each conductor before removal so you can recreate the setup precisely. If you’re upgrading to a smart thermostat, ensure your home Wi‑Fi is ready and that your router is within range of the thermostat. Confirm whether the new model requires a C‑wire and, if so, plan how to route one if it’s missing. Finally, set realistic timing goals and clear any conflicting activities to avoid rushing the job. A well-planned thermostat change minimizes stress and ensures you finish with a fully functional, user-friendly control.
Common Mistakes and How to Avoid Them
Common mistakes during a thermostat change include rushing to remove wires without labeling, mixing up terminals, or using the wrong wire color for a function. Misunderstanding the terminal layout leads to incorrect heating or cooling control, which may damage the HVAC system or cause safety concerns. Forgetting to turn off power or failing to re-enable it after installation can leave the system unresponsive. Another frequent error is choosing a thermostat that isn’t compatible with the equipment, resulting in poor performance or incomplete features. To avoid these pitfalls, take time to label each wire, double‑check the wiring diagram, and cross‑verify with the manufacturer’s compatibility chart. If you’re ever unsure, pause and consult the installation manual or a professional. Keep the original wall plate and purchase a new one if needed so the wiring remains neat and accessible. The result is a safe, reliable change that you can trust year after year.
Post-Install Tips for Comfort and Efficiency
After a thermostat change, spend a few minutes programming and testing the device. Start with the basic daily schedule and then enable any energy-saving features like adaptive recovery or occupancy-based cooling if available. Use the thermostat’s test mode to run through a complete cycle and observe that the HVAC responds promptly to temperature changes in both heating and cooling modes. If you’ve installed a smart thermostat, connect it to your home network, download the companion app, and enable notifications for system reminders and firmware updates. Review energy reports to identify patterns in usage and adjust schedules accordingly. Keep a log of any settings you tweak so you can revert changes if needed. Finally, remember that a successful thermostat change isn’t a one-time event; it’s an ongoing optimization—seasonal adjustments and occasional recalibration can keep your home comfortable and efficient for years to come.
Tools & Materials
- Screwdriver set (flat-head and Phillips)(Phillips #2 and flat-head drivers; include various sizes)
- Non-contact voltage tester(Verify power is off at thermostat and HVAC disconnect)
- New thermostat(Ensure model supports your system and fits the mounting plate)
- Wiring labels / painter’s tape(Label wires before removal)
- Wire caps or connectors(Secure wire ends after detaching)
- Masking tape / sticky notes(Extra labeling and notes)
- Mounting screws and backplate(Included with new thermostat; if not, source compatible screws)
- Phone or tablet with thermostat app (optional)(For smart thermostats setup and testing)
- Notepad and pen(Record wiring and settings)
- Multimeter (optional)(Advanced voltage checks if needed)
- Step ladder (if wall height is high)(Safe access to thermostat location)
- Manual for new thermostat(Cross-check wiring diagram and compatibility)
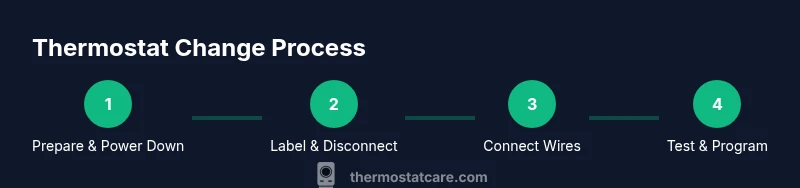
Steps
Estimated time: 60-90 minutes
- 1
Power down and prepare
Turn off power to the thermostat at the HVAC disconnect and at the breaker. Use a non-contact tester to confirm no voltage present before touching any wires. This prevents shocks and equipment damage as you begin the replacement.
Tip: If you’re unsure about any step, pause and consult the device manual or a professional. - 2
Remove old cover and photograph wiring
Carefully remove the thermostat faceplate. Take multiple clear photos of the wiring from different angles and note which wires connect to which terminals. Photos act as a precise reference if wiring labels fade or come off during the swap.
Tip: Label wires as you detach them to avoid mix-ups during reassembly. - 3
Label wires and check compatibility
Use labels to mark each conductor by function (R, C, W, Y, G, etc.). Compare current wiring with the new model’s wiring diagram to confirm compatibility with your HVAC system. If a C-wire is missing, decide whether to add one or choose a model that can operate without it.
Tip: Cross-check whether your system is single-stage or multi-stage and ensure the new thermostat supports it. - 4
Disconnect and remove the old base
Detach the old base from the wall, keeping wires exposed. Do not trim wires yet; you’ll need the full length for the new base. If a wall plate is damaged, replace it with a new one to ensure a clean fit.
Tip: Keep screws organized and note where each screw came from to avoid misplacement. - 5
Install the new base and connect wires
Mount the new thermostat base on the wall, then connect each conductor to the corresponding terminal according to the new device’s wiring diagram. Ensure every connection is snug and free of copper fraying. If your model requires a C-wire, connect it and verify it’s secure.
Tip: Double-check that all exposed conductors are inserted fully and that no bare wire is touching the mounting plate. - 6
Attach trim, restore power, and test
Attach the faceplate, restore power at the breaker, and run a quick test in both heating and cooling modes. If the device has a companion app, pair it and run a basic system check. Observe responding signals and confirm accurate temperature readings.
Tip: If the system doesn’t respond, re-check wire placement and power connections before contacting support. - 7
Program and verify
Set up daily schedules and any energy-saving features. Monitor performance over a full cycle to ensure temperatures reach the target and systems cycle as expected. Adjust settings as needed to optimize comfort and efficiency.
Tip: Save a baseline program and keep a log of adjustments for future reference.
Questions & Answers
Do I need a professional to perform a thermostat change?
For most basic replacements on standard 24V systems, a confident DIYer can do it with care. If you have a gas furnace, baseboard heat, or high-voltage wiring, consider hiring a licensed professional.
For standard 24V systems, DIY is usually fine; for gas or high-voltage setups, consult a pro.
What essential tools should I have?
You’ll need a screwdriver set, a non-contact voltage tester, wire labels, a new thermostat, and mounting hardware. A multimeter is optional for advanced checks.
Screwdrivers, tester, labels, thermostat, and hardware are essential.
Can any thermostat replace my current model?
No—compatibility depends on system voltage, wiring (C-wire availability), and HVAC type. Always verify with the manufacturer’s compatibility list before purchasing.
Compatibility matters; check voltage, wiring, and system type first.
How long does a thermostat change typically take?
Most installations take 30 to 90 minutes, depending on wiring and whether you’re upgrading to a smart model with app setup.
Usually between half an hour and an hour and a half.
Will upgrading save energy?
Smart or programmable thermostats can reduce energy usage by aligning heating and cooling with your schedule, but savings depend on settings and usage patterns.
Yes, smart thermostats often save energy when programmed well.
What if the new thermostat won’t power on after installation?
Double-check the power supply and wiring, verify the C-wire if required, and re-test. If issues persist, consult the manufacturer’s support or a professional.
If it won’t power on, re-check wiring and power; seek help if needed.
Watch Video
What to Remember
- Check compatibility before purchasing a new thermostat.
- Label wires and preserve photos for reference.
- Test in both heating and cooling to confirm proper operation.
- Program for energy efficiency and seasonal comfort.
- If unsure, consult a professional to avoid safety risks.