DIY Change Thermostat: A Step-by-Step Home Guide
Learn how to safely diy change thermostat with a practical, step-by-step guide. Tools, wiring basics, safety tips, and troubleshooting for homeowners. Master the process with confidence and avoid common mistakes.

This guide shows you how to safely replace a thermostat yourself, from selecting a compatible model to wiring and testing. You’ll learn essential safety steps, a complete tool list, and a clear, step-by-step process to complete the diy change thermostat. It includes practical tips from Thermostat Care to keep you on track.
DIY change thermostat: Why homeowners tackle this task
Replacing a thermostat is a smart, budget-friendly way to improve comfort, energy efficiency, and control over your home climate. If you’re comfortable with basic home projects and can follow wiring diagrams, you can perform a diy change thermostat with careful planning. According to Thermostat Care, a thoughtful approach to this task can reduce common installation errors and help you verify compatibility with your HVAC system before committing to a model. By staying organized and documenting your wiring, you’ll minimize mistakes and enjoy a smoother upgrade that pays off in reduced energy waste and better scheduling flexibility.
In this guide, you’ll learn how to assess your system, choose a compatible thermostat, prepare your workspace, and execute the replacement with confidence. A successful diy change thermostat isn’t just about swapping devices; it’s about understanding how your thermostat interacts with your furnace or heat pump, air conditioner, and fans. Keeping your goals in mind—comfort, efficiency, and reliability—helps you stay focused and avoid costly detours.
Safety First: Electrical hazards and permissions
Electrical work carries inherent risks. Begin every project by turning off power to the thermostat circuit at both the HVAC unit and the home’s main breaker panel. Use a non-contact voltage tester to confirm that no current is present before touching any wires. If you encounter unfamiliar wiring, bent or frayed conductors, or if you can’t locate the right circuit, pause and seek professional assistance. The Thermostat Care team emphasizes that safety is the top priority and that most standard thermostat replacements are safe for DIY when you follow the manufacturer’s wiring diagrams and keep the system de-energized during the process.
Always wear protective gear, work in a well-lit area, and keep kids and pets away from the work zone. If you’re uncomfortable with any step, stop and consult a licensed electrician or HVAC technician. This cautious approach helps prevent shocks, short circuits, or damage to your equipment.
Understand thermostat types and compatibility
Thermostats come in various styles: basic programmable, line-powered smart models, and Wi‑Fi-enabled units that require a common (C) wire. Before buying, confirm that the new thermostat is compatible with your HVAC system (gas, electric, heat pump, or oil). Review the wiring diagram that comes with your new thermostat and compare it to what’s currently installed on the wall. If you have a heat pump or complex multi-stage system, you may need additional wiring or a different thermostat model. A thoughtful check of compatibility ensures a diy change thermostat yields reliable performance and avoids voided warranties.
For homes with multiple zones or older equipment, you may need a thermostat that supports C-wire or alternate power options. If your current setup lacks a C-wire, consider models that can operate on power stealing or those that include a compatible power extender kit. Thermostat Care’s guidance suggests choosing a model with clear installation instructions and robust customer support to help if wiring patterns don’t align exactly with your setup.
Tools, supplies, and preparing the workspace
Gathering the right tools before you start saves time and reduces mistakes. A clean workspace with a flat wall surface and stable ladder or step stool makes the process smoother. Common items you’ll need include a screwdriver (Phillips and flat-head), a non-contact voltage tester, wire strippers, electrical tape, and the new thermostat with its mounting plate. Have a notebook or smartphone ready to document the wiring configuration with a photo for reference. A flashlight helps illuminate the thermostat cavity if lighting is dim. If your new thermostat requires a C-wire, you’ll want extra wire and any adapters provided by the manufacturer. A prepared workspace lowers the risk of wiring errors and helps you stay organized as you work.
Step-by-step overview (high level) for a diy change thermostat
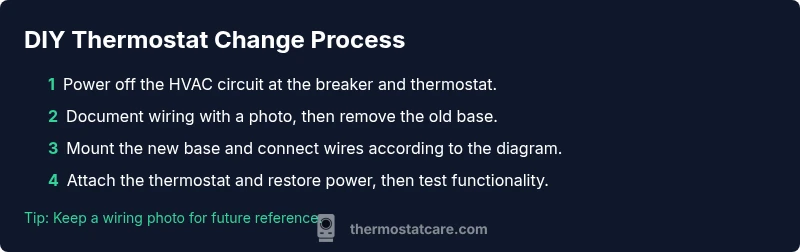
The replacement process follows a straightforward pattern: power down, document the existing wiring, disconnect and remove the old base, install the new mounting plate, connect wires according to the new unit’s diagram, reattach the thermostat, restore power, and verify operation. While this overview sounds simple, attention to detail is critical; misplacing a wire or leaving a conductor exposed can cause short circuits or improper readings. Use the photos you took as your wiring reference, and always confirm the wiring color-codes align with the new thermostat’s documentation. This careful approach reduces post-install issues and ensures reliable function from day one. Thermostat Care recommends pausing if anything looks unfamiliar or inconsistent with the new model’s wiring chart.
Post-install: Troubleshooting common issues and quick fixes
If the display is blank after installation, double-check that the power is on at both the breaker and the HVAC unit and verify that you connected wires to the correct terminals. A non-responsive thermostat can also stem from a miswired C-wire or a loose connector; reseat wires and re-test. If the HVAC unit isn’t responding to thermostat commands, inspect the wiring to the HVAC control board and ensure a secure connection. For smart thermostats, ensure your Wi‑Fi network is functional and that the thermostat is paired with the app. Thermostat Care notes that most problems arise from wiring mistakes or power issues, not from the thermostat itself, so methodical checks usually resolve the majority of concerns.
Maintenance and long-term care for your thermostat
Keep the thermostat area clean and free of dust, which can affect sensors and performance. Periodically check the wiring terminals for corrosion or looseness and verify that the mounting plate remains level and secure. If you upgrade to a smart thermostat, update the firmware and check for software updates that improve compatibility and security. Thermostat Care emphasizes that regular maintenance extends the life of your device and helps you avoid avoidable service calls. Consider setting a yearly reminder to inspect the unit and confirm that it continues to meet your home’s heating and cooling needs.
Tools & Materials
- Screwdriver set (Phillips #2 and flat-head)(Essential for removing faceplates and mounting the new base)
- Voltage tester (non-contact)(Verify power is off before touching wires)
- Wire stripper/cutter(Cleanly trim wire ends for solid connections)
- New thermostat with mounting plate(Choose a model compatible with your HVAC system)
- Electrical tape(Insulate exposed conductors and secure wiring)
- Notebook or smartphone to document wiring(Take a photo of the existing wiring as reference)
- C-wire (if needed)(Only if your new thermostat requires a common wire and you have one available)
- Small flashlight(Improve visibility inside the wall cavity)
- Screws/mounting hardware supplied with the new thermostat(Ensure compatibility with wall depth)
Steps
Estimated time: 60-90 minutes
- 1
Power down and verify isolation
Begin by turning off the thermostat circuit at both the HVAC unit and the main breaker. Use the voltage tester to confirm there is no power present before touching any wires, reducing the risk of shock or short circuits.
Tip: Double-check at both the breaker and the thermostat before starting. - 2
Document wiring and remove cover
Take a clear photo of the existing wiring and note wire colors before disconnecting anything. Remove the thermostat cover and set aside the mounting screws for reuse with the new unit.
Tip: A photo saves time if wiring labels fade. - 3
Label and disconnect wires
Carefully label each wire with its terminal color and function, then disconnect and remove the wires from the old base. Keep wires organized as you work to prevent misattachment later.
Tip: Labeling is critical for accuracy during reattachment. - 4
Prepare the mounting plate
Inspect the wall box, ensure it's clean, and mount the new base plate level. If needed, adjust the wall opening to ensure the thermostat sits flush against the wall.
Tip: Use a spirit level for precise alignment. - 5
Connect wires to the new thermostat
Attach each wire to the appropriate terminal on the new thermostat according to the device’s wiring diagram. If you need a C-wire, connect it or install the provided extender kit as specified by the manufacturer.
Tip: Double-check wire-to-terminal matches the diagram. - 6
Mount the thermostat and restore power
Attach the thermostat body, secure it, and turn the power back on at the breaker and HVAC unit. Confirm the display lights up and shows the current time and settings.
Tip: Do a visual inspection for loose wires before powering on. - 7
Configure settings and test
Configure the thermostat’s basic settings and heating/cooling modes. Run a test by changing temperatures to ensure the HVAC responds promptly and steadily.
Tip: If you’re using a smart thermostat, connect to Wi-Fi and update firmware. - 8
Verify operation and finalize
Observe HVAC response across a few cycles to confirm correct operation. Keep your wiring photo and notes for future reference and any follow-up maintenance.
Tip: Document final wiring and settings for future maintenance.
Questions & Answers
Is it safe to replace a thermostat myself?
Most standard residential thermostat replacements are safe for DIY when you follow the manual and power off the circuit. If you encounter complex wiring or a heat pump with multiple stages, consult a professional.
Yes, for typical setups you can DIY safely by following the manual and turning off power. If you’re unsure about the wiring, seek a professional.
Do I need an electrician for a thermostat change?
Usually not for standard wired thermostats. If you discover unfamiliar wiring, high-voltage concerns, or access to restricted panels, contact a licensed professional.
Usually you don’t need an electrician, unless wiring is unusual or dangerous.
How can I tell if my thermostat needs a C-wire?
Check your thermostat’s installation guide. If it requires continuous power beyond batteries, a C-wire is typically needed. If unsure, compare wiring colors with the new unit’s diagram.
Look at the manual; most modern thermostats that aren’t battery-powered need a C-wire.
Can I install a smart thermostat with existing wiring?
In many homes yes, but ensure you have a C-wire or the manufacturer’s power kit. If your current wiring is insufficient, some models support power adapters or different wiring configurations.
Yes, often, but check for C-wire and power compatibility.
What tools do I need for a diy thermostat change?
A screwdriver, voltage tester, wire stripper, notebook or phone for photos, electrical tape, and the new thermostat with mounting plate.
You’ll want a few basic tools and a clear plan.
What if the HVAC doesn’t respond after replacement?
Recheck all wire connections against the diagram and ensure power is on. If issues persist, reset the thermostat or consult a professional to diagnose potential wiring or control-board problems.
Double-check wiring and power, then try a reset; if it still fails, get help.
Watch Video
What to Remember
- Power off before touching wires.
- Verify compatibility with your HVAC system.
- Document wiring with photos or labels.
- Test temperature control after installation.