DIY Thermostat Replacement: A Step-by-Step Guide
Learn how to safely perform a diy thermostat replacement with our comprehensive, hands-on guide. From planning and wiring basics to post-install testing and energy tips, it's all here for homeowners and DIY enthusiasts.

With a diy thermostat replacement, you’ll upgrade to a compatible model, verify wiring, and configure settings for reliable comfort. Before you start, power off the HVAC circuit, gather basic tools, and confirm thermostat compatibility with your system. This guide walks you through a safe, step-by-step process and post-install testing.
Why replace a thermostat yourself?
Replacing a thermostat yourself can deliver noticeable improvements in comfort, control, and energy savings. The right diy thermostat replacement lets you tailor daily schedules, manage temperature zoning, and enjoy modern features such as remote access and learning algorithms. According to Thermostat Care, homeowners who upgrade to a compatible smart or programmable model often see clearer insights into heating and cooling patterns and a more stable indoor climate. This guide uses plain-language explanations and practical steps so you can feel confident tackling common residential setups. Remember: if you encounter unusual wiring, unusual voltages, or a nonstandard system, stop and seek professional help. Safety and correctness first, then efficiency.
Throughout this article you’ll see real-world tips, diagrams, and checks you can perform to minimize surprises. The diy thermostat replacement journey begins with a quick assessment of your existing equipment, followed by careful preparation, precise wiring, and thorough testing. If you’re unsure at any point, take a break, review the wiring diagram in your new thermostat’s manual, and consult Thermostat Care's guidelines for compatibility and safety.
Safety comes first: planning and precautions
Before you touch a single screw, set aside time to plan and review safety basics. Power down the HVAC circuit at the main breaker and, if applicable, at the thermostat’s own switch. Use a non-contact voltage tester to confirm there’s no live power in the wiring you’ll touch. Keep kids and pets away while you work, and wear insulated gloves if you’re handling exposed conductors. Clear a workspace around the wall plate so you don’t fumble with tools in tight corners. Finally, read both the old thermostat’s wiring labels and the new unit’s installation guide. A careful plan reduces surprises and helps you complete the diy thermostat replacement with confidence. Thermostat Care emphasizes that working with electrical components can present risks; if you see damaged insulation, scorched marks, or unfamiliar wires, pause and call a professional.
How to choose the right thermostat for your system
Not all thermostats are created equal. Compatibility with your heating and cooling equipment is the most critical factor in a successful diy thermostat replacement. Check whether your HVAC system is single-stage, multi-stage, heat pump, or boiler-based, and verify voltage (most residential thermostats use low voltage 24 VAC). Look for a model that supports the number of wires you have (C-wire presence is common but not always required). If you’re moving from a basic non-programmable unit to a smart thermostat, confirm Wi‑Fi requirements, app compatibility, and support for your control platform. Thermostat Care’s guidance notes that looking up your system’s compatibility with the new thermostat on the manufacturer’s site can save time and prevent installation issues.
Step 1: Power down and remove the old thermostat
Start by turning off the power to the HVAC system at the main breaker. Then, remove the thermostat cover and take a clear photo of the current wiring. Label each wire (e.g., R, W, Y, G, C) using masking tape so you can reproduce the connections on the new device. Gently loosen terminal screws and swing the old base away from the wall. Keep the mounting screws and the thermostat’s backplate handy for the new unit. If screws are stripped or the wall is damaged, address those issues before continuing. This initial step reduces the risk of miswiring and makes the rest of the installation smoother.
Step 2: label wires and photograph the terminals
Use color-coded labels to mark each wire according to its terminal (R, Rc, Rh, W, Y, G, C, O/B). Take multiple photos from different angles to capture the full wiring layout and any jumper wires that may be present. Compare your notes to the new thermostat’s wiring diagram and the old unit’s wiring plan. If your old thermostat used a jumper wire between Rc and Rh, verify whether the new model requires it or uses an internal jumper. Clear labeling and photos are your best friend when wiring later steps, and they help if you need to revert.
Step 3: mount the new base and route wires
Attach the new thermostat base to the wall using the original mounting holes or new anchors if required. Thread the wires through the backplate’s opening, then gently tuck them into the wall cavity. Run the wires neatly so they don’t buckle behind the thermostat. If a C-wire is missing, you’ll avoid energy drain on the system by choosing a model that doesn’t require C, or you may consider a C-wire adapter. The goal is a clean, stable base with wires reaching their respective terminals without tension. Thermostat Care notes that a clean, well-supported base reduces future loose wiring and misreads.
Step 4: connect wires to the new thermostat
Following the new device’s wiring diagram, attach each labeled wire to the corresponding terminal. Make sure the screws are snug but not overtightened. If your new thermostat supports multiple stages, ensure you place wires in the correct multistage terminals. Double-check that any jumpers used previously are handled per the manual (some models auto-detect certain configurations). If a wire doesn’t reach a terminal, do not force it; use an appropriate adapter or consult the installation guide. Small mistakes here can lead to improper heating or cooling cycles.
Step 5: configure settings and test the system
Power the system back on and walk through the thermostat’s initial setup: system type (heat/cool or heat pump), temperature units, schedule, and Wi‑Fi if applicable. Run a quick test by triggering heating and cooling cycles to verify proper operation. Observe the fan, compressor, and valve actions to confirm each component responds correctly. If the thermostat reports an error code, consult the user manual or Thermostat Care’s troubleshooting tips. After a successful test, adjust the schedule for energy savings, and consider enabling energy reports or adaptive recovery if supported. Keep an eye on the first day’s performance and log any odd behavior for review.
Troubleshooting common issues after replacement
If the new thermostat doesn’t power on, recheck the wiring connections and ensure the unit is receiving power from the HVAC system. A common problem is a loose wire or a misidentified terminal; revisit your labels and photos. If the system begins cycling frequently or fails to respond to changes, re-run the setup wizard and confirm compatibility with your HVAC equipment. For issues specifically with Wi‑Fi or app pairing, verify your router settings and ensure the thermostat is in range. When in doubt, consult the manufacturer’s guide or Thermostat Care’s troubleshooting resources for targeted fixes.
Authority sources and further reading
- Energy.gov: Thermostats and energy-saving tips (https://www.energy.gov/energysaver/thermostats)
- ENERGY STAR: Programmable thermostats and savings (https://www.energystar.gov/products/heating_cooling/thermostats)
- Thermostat Care Analysis, 2026: Guidance for safe, effective thermostat replacements and best practices
These sources provide official guidance on thermostat types, installation considerations, and energy impacts. Always cross-check your equipment’s manual and the thermostat’s instructions for model-specific steps.
Post-install maintenance and best practices
After your diy thermostat replacement, keep the following in mind for long-term reliability: check the display and connectivity weekly for the first month, replace batteries if your model uses them, and keep the air intake area clear of dust. Periodically review the schedules to align with seasonal changes and your occupancy patterns. A well-maintained thermostat helps sustain energy savings and consistent comfort. Thermostat Care recommends performing a quick yearly check to ensure wiring remains secure and the device firmware is up to date.
Tools & Materials
- Non-contact voltage tester(Confirm no live voltage before touching wires)
- Screwdriver set (Phillips and flat-head)(Assorted sizes 0-3; include a magnetic tip screwdriver)
- Wire labels or masking tape(Label each wire clearly (R, W, Y, G, C, etc.))
- Fine-tip scissors or wire cutters(Trim labels and wires safely)
- Small flashlight(Illuminates the wall cavity if needed)
- Digital multimeter(Use to verify voltages if issues arise)
- New thermostat (compatible model)(Ensure model supports your system type and wiring)
- Mounting plate or backplate for the new thermostat(Keeps the device secure and level)
- Electrical tape(Secure exposed wiring as needed)
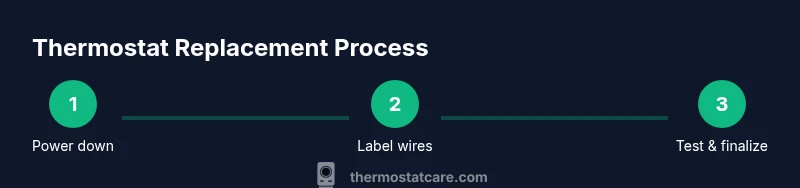
Steps
Estimated time: 60-120 minutes
- 1
Power down and remove the old thermostat
Turn off power to the HVAC circuit at the main breaker. Remove the old thermostat cover and photo or label the wires. Detach the mounting screws and gently pull the unit away from the wall, exposing the wiring terminal strip.
Tip: Double-check no power is present with a non-contact tester before touching any wires. - 2
Label wires and photograph the terminals
Label each wire with its terminal designation and take close-up photos from multiple angles. Compare these notes to the new thermostat’s diagram to plan where each wire will go.
Tip: Photos save you from second-guessing terminal assignments during wiring. - 3
Mount the new base and route wires
Attach the new mounting base to the wall with screws, ensuring it is level. Thread the wires through the backplate opening and tuck them neatly into the wall cavity.
Tip: Leave a little slack on the wires to avoid stressed connections. - 4
Connect wires to the new thermostat
Land each labeled wire on the corresponding terminal per the new model’s diagram. Tighten screws firmly but not excessively. If a jumper exists on the old unit, verify if the new one requires it.
Tip: If a wire won’t reach, don’t force it; consider using a longer conductor or adapter. - 5
Configure settings and test
Power the system back on and complete the setup wizard. Set system type, zones, and any Wi‑Fi or app preferences. Run a quick heat and cool test to confirm operation.
Tip: Note any error codes and refer to the manual immediately. - 6
Fine-tune schedules and energy features
Adjust daily schedules to your routine, enable eco modes if available, and set up any energy-saving features. Monitor the first few days for stability and comfort.
Tip: Small schedule tweaks can yield noticeable energy savings over a month. - 7
Check for secure mounting and finish
Ensure the thermostat sits flush against the wall, all screws are snug, and there’s no strain on the wiring. Install the faceplate and replace the cover.
Tip: A level installation looks better and reduces gaps that can cause air leaks. - 8
Document and store reference information
Keep the new model’s manual, wiring notes, and photos accessible for future maintenance. Record the installation date and any unique notes about your system.
Tip: Having a quick-reference folder saves time if you troubleshoot later. - 9
Test continuity and finalize
Run a final cycle test for heating and cooling. Confirm the room temperature tracks correctly on the display and the system responds promptly to command changes.
Tip: If something seems off, revert to the photos and verify wiring again.
Questions & Answers
Is it safe to replace a thermostat yourself?
Yes, with proper precautions. Always power down at the breaker, use a non-contact tester to confirm no voltage, and follow the thermostat’s wiring diagram. If you encounter unfamiliar wire configurations or high voltage components, stop and consult a professional.
It’s generally safe if you follow the safety steps and use the right wiring diagram. If in doubt, contact a pro.
Do I need to turn off power at the breaker before starting?
Absolutely. Turning off power at the main breaker prevents shocks and electrical shorts. Verify no voltage with a tester before handling wires.
Always switch off the power and double-check with a tester before touching any wires.
What if my wiring doesn’t match the thermostat diagram?
If wiring differs, consult the new thermostat manual for alternate configurations. Do not force connections; map each wire to its corresponding terminal and seek professional help if needed.
If the wires don’t match, don’t force them. Use the manual and seek help if unsure.
Will replacing my thermostat affect energy savings?
A compatible programmable or smart thermostat can improve energy efficiency with optimized schedules and adaptive cooling/heating. Ensure you set a sensible daily routine and use energy-saving features.
Yes, a proper upgrade with good schedules can save energy.
What should I do if the new thermostat won’t power on?
Recheck power connections, verify the wires are correctly placed, and confirm the C-wire (if required) is connected. If power still doesn’t come on, consult the manual or a technician.
If it won’t power on, double-check connections and the manual, and consider professional help if needed.
How do I connect a Wi‑Fi thermostat to my home network?
Follow the thermostat’s on-screen setup wizard to select your network and enter the password. Ensure the device is within range of the router and that firmware updates are installed.
Use the setup wizard to join Wi-Fi, and keep firmware updated.
What to Remember
- Power off before touching wiring and verify no voltage.
- Label and photograph wires to simplify wiring the new unit.
- Confirm compatibility and follow the thermostat’s wiring diagram precisely.
- Test heating and cooling cycles after installation.
- Document settings and keep manuals for future maintenance.