Are Thermostats Easy to Replace? A DIY Guide for Homeowners
Explore whether replacing a thermostat is a DIY-friendly task or needs a pro. This guide covers compatibility, safety checks, and a step-by-step install for typical home systems.

Replacing a thermostat is often straightforward for many homes, especially with standard 24V wiring and compatible models. This guide helps homeowners decide if replacement is the right move, gather the right tools, and follow a safe, step-by-step process to install a new thermostat with correct wiring, mounting, and configuration. It covers gas, electric, and heat‑pump setups and explains when to hire a pro.
Compatibility and system type determine ease
The ease of replacement hinges on your HVAC system type (gas furnace vs electric heat, traditional cooling vs heat pump) and whether your thermostat uses low‑voltage wiring (24V) or line voltage. According to Thermostat Care, are thermostats easy to replace for many homes, especially with standard 24V wiring and compatible models. Before you buy a new unit, confirm it matches your system’s voltage, wiring color conventions, and mounting compatibility. If your current setup uses a C‑wire for power, many smart thermostats will rely on that same wire; if not, you may need a power extender kit or an alternative model. Incompatibility is a leading cause of installation delays, so take time to map the current wiring and verify the thermostat’s compatibility chart. As of 2026, compatibility remains the single biggest predictor of a smooth replacement.
Tools, safety, and planning
Gather the essential tools and plan the work to minimize surprises. Equip yourself with a screwdriver set (Phillips and flathead), a small drill if you’re mounting on new drywall, a multimeter or voltage tester to confirm power is off, wire labels or masking tape to identify wires, and electrical tape for insulation. Check your furnace and HVAC outdoor unit for access; clear the area of dust and obstructions. Set up a workspace with good lighting and a camera or notebook to document the existing wiring. Safety comes first: never work on live electrical components, and if your system uses high-voltage lines, stop and hire a licensed electrician. If you’re replacing with a smart thermostat, ensure your Wi‑Fi is available and your home’s hub supports the new model.
Wiring basics and voltage types you’ll encounter
Most residential thermostats in the United States operate on a 24‑volt system controlled by a heating and cooling relay in the furnace or air handler. If your current thermostat has terminals labeled R, C, W, Y, G, and possibly O/B, you’re likely in the standard 24V camp. If you find a layer of 120V wires behind the wall plate, you may have a line‑voltage system, which requires different handling and often a different device. Understanding these differences is essential because wiring a 24V thermostat to a line‑voltage system can create dangerous faults. When in doubt, contact a professional. As technology evolves, newer models may offer power‑sharing or battery backup options, but these should be matched to your specific setup.
Choosing the right thermostat for your setup
Consider whether you want a basic programmable thermostat, a Wi‑Fi‑enabled smart thermostat, or a more advanced learning model. For gas or oil furnaces with conventional cooling, a standard 24V thermostat will usually suffice. If you have a heat pump, confirm compatibility with heat‑pump settings and O/B reversal. Smart thermostats often require a C‑wire for continuous power; if you don’t have a C‑wire, you may need a power extender kit or an adapter. Read the manufacturer’s wiring diagrams and verify your HVAC system’s compatibility list includes your equipment. Ensure the mounting plate aligns with existing wall cavities and that the thermostat’s size fits the space. In 2026, homeowners increasingly opt for smart models to gain remote control and energy insights.
Smart thermostats versus traditional models: is replacing easy for both?
Smart thermostats bring energy‑saving features and remote control, but installing them can be more complex due to additional wiring, app setup, and potential Wi‑Fi considerations. If your existing thermostat is simple and your wiring is standard, replacing with a non‑smart unit is usually straightforward and faster. If you’re upgrading to a smart model, plan extra time for app pairing, account creation, and cloud connection. Some older systems may require a separate relay or adapter to power the device. In all cases, ensure secure mounting and proper label of wires to prevent connection errors that could damage the HVAC control board.
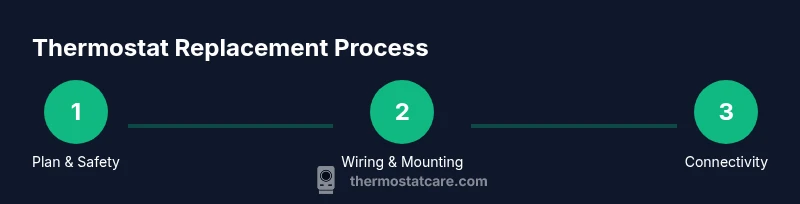
Step‑by‑step overview: what you’ll do at a high level
Although the detailed steps are in the STEP‑BY‑STEP section, here is a high‑level roadmap: verify power is off at the thermostat and the furnace, remove the old unit and photograph the wire connections, label wires, choose a compatible replacement, mount the new backplate, connect wires to the correct terminals, configure the thermostat settings, and finally restore power and test the system. If your new model requires an additional power accessory or C‑wire adapter, install those before final mounting and testing. A safe, methodical approach reduces the risk of miswiring and improves reliability.
Common mistakes to avoid and quick troubleshooting
One of the most common errors is mixing up wires; always label wires before removal. Another mistake is not turning off power to the HVAC system, which risks shock or equipment damage. Using a thermostat with incompatible voltage or failing to secure the backplate can cause short circuits or poor contact. If your new thermostat shows a blank screen, re‑check the power supply and verify the C‑wire connection if using a smart model. For troubleshooting, double‑check color‑coded wires against the thermostat’s wiring diagram, and compare with the old unit’s labels. If you encounter a non‑responsive system after installation, disconnect power and re‑check the wiring before attempting further testing. In 2026, the most reliable installations follow careful planning and verification steps to avoid these issues.
Authoritative sources and further reading
To verify best practices and safety standards, consult respected sources. Energy.gov provides guidance on energy‑efficiency and thermostat controls; the EPA’s Energy Star program offers model and compatibility resources; and the California Energy Commission publishes thermostat installation considerations for home projects. Reviewing these sources helps ensure you’re following current standards and maximizing comfort and efficiency.
Practical considerations: cost, time, and long‑term maintenance
Replacing a thermostat is typically a one‑time expense with potential long‑term energy savings, especially when upgrading to a programmable or smart model. Time varies by system type and wiring complexity; a straightforward 24V installation often completes in under an hour, while non‑standard wiring can take longer. After installation, run through heating and cooling cycles to confirm reliable operation, and take a moment to update schedules and settings for energy efficiency. Regular maintenance—checking batteries (for battery‑powered models), cleaning sensors, and keeping the wall plate clear—helps extend life and performance.
Tools & Materials
- Screwdriver set (Phillips and flathead)(Phillips #2 fits most wall plates)
- Voltage tester or multimeter(Verify power is off before touching wires)
- Wire labels or masking tape(Label wires as you remove them)
- Replacement thermostat(Match voltage (24V vs line voltage) and mounting pattern)
- Electrical tape(Insulate exposed connections)
- Camera or notebook(Document wiring before removal)
- Drill (optional)(For mounting on new drywall or changing backplate location)
- Backplate/mounting bracket(Ensure compatibility with the new thermostat)
Steps
Estimated time: 40-60 minutes
- 1
Power down the system safely
Turn off power at the breaker panel and at the furnace or air handler. Use a voltage tester to confirm no current is present on the thermostat wiring. This prevents shock and accidental short circuits during removal.
Tip: Double‑check by touching a wire to the tester after turning off the breaker. - 2
Remove the old thermostat cover
Carefully detach the thermostat from its wall plate and take a high‑resolution photo of the wire connections. Remove the backplate screws and set the old unit aside for reference. Note any unusual wire colors or extra conductors.
Tip: Label each wire with its terminal letter (R, W, Y, G, C, etc.) to avoid mix‑ups later. - 3
Identify and label wires
Identify each wire and confirm its function against the old thermostat’s wiring diagram. If a wire isn’t connected to a terminal, label and set it aside in case it’s needed. This step helps prevent miswiring on the new model.
Tip: If you’re unsure about a wire’s function, consult the HVAC manual or Thermostat Care’s compatibility guide. - 4
Check compatibility and select a replacement
Choose a thermostat that is compatible with your HVAC system’s voltage, wiring, and controlling methods (gas, electric, heat pump, C‑wire support). Read the manufacturer’s wiring diagram and verify the installer’s instructions.
Tip: Prefer models with a clear wiring chart and a mounting plate that fits your wall space. - 5
Mount the new backplate and secure wiring
Attach the new backplate to the wall, aligning with the stud or drywall anchors. Thread wires through the backplate holes and loosely connect them to the corresponding terminals. Ensure no copper is exposed beyond the terminals.
Tip: Keep wires neat and avoid bending sharp angles that could fatigue conductors. - 6
Connect wires to the correct terminals
Attach each labeled wire to the corresponding terminal on the new thermostat base (R to R, W to W, Y to Y, G to G, C to C, etc.). Double‑check that the terminal letters match the old configuration and the new model’s wiring diagram.
Tip: If the new thermostat uses a power connector or jumper, install it exactly as instructed by the manufacturer. - 7
Configure thermostat settings
Install the faceplate and power the unit. Go through initial setup: system type (gas, electric, heat pump), cooling and heating stages, and any smart features or schedules. If using a smart model, connect to Wi‑Fi and sign in to the manufacturer app.
Tip: Save a baseline schedule for winter and summer to restore comfort quickly. - 8
Test, power on, and finalize
Restore power at the breaker and test each mode (heat, cool, fan) to confirm proper operation. Listen for unusual noises, verify airflow, and re‑mount the thermostat flush against the wall. If anything acts strangely, re‑check wiring or consult a professional.
Tip: Keep the old thermostat until you confirm the new one functions correctly.
Questions & Answers
Are thermostats easy to replace for a typical home?
For many homes with standard 24V wiring, replacing a thermostat is doable for a confident DIYer. Compatibility and safe power-off procedures are the key. If you encounter line-voltage wiring or a nonstandard setup, professional help is advised.
For many homes, replacing a thermostat is doable for DIYers with standard wiring. When in doubt, consult a pro for safety.
What safety steps are essential before starting?
Always turn off power at the breaker and at the furnace, then confirm there is no voltage on the wires with a tester before touching any components.
Turn off all power, verify with a tester, and never touch live wires.
Do I need a C-wire for smart thermostats?
Many smart thermostats require a C-wire for reliable power. If your system lacks a C-wire, consider a power extender kit or a model designed for power sharing.
Yes, many smart thermostats need a C-wire, or you may need a power accessory.
How long does replacement typically take?
A straightforward 24V replacement usually takes 30–60 minutes, depending on wiring complexity and whether you’re configuring smart features.
Most replacements take about half an hour to an hour, depending on wiring.
What if my HVAC uses line-voltage wiring?
Line-voltage systems require different equipment and wiring practices. If you’re unsure, hire a licensed electrician or HVAC technician.
Line-voltage systems are more complex; consult a pro if unsure.
Is hiring a pro ever required?
If you encounter uncertain wiring, high voltage, or complex system configurations, it’s safer to hire a pro. A professional can ensure proper wiring and compliance with safety codes.
Yes—hire a pro when wiring isn’t clear or involves high voltage.
Watch Video
What to Remember
- Assess compatibility before buying a thermostat
- Follow safe power-off procedures every time
- Label and photograph wiring to prevent mistakes
- Smart thermostats add steps but offer energy savings