How Difficult Is Replacing a Thermostat? A DIY Guide
Discover how difficult it is to replace a thermostat, with practical steps, safety tips, and DIY vs. professional guidance from Thermostat Care for homeowners.

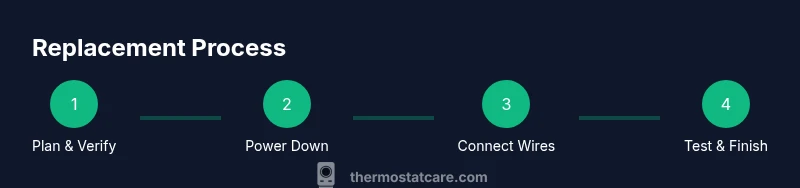
Replacing a thermostat is a common DIY task when upgrading or repairing a system. You’ll verify compatibility, power down the HVAC circuit, remove the old unit, install the new thermostat, and run a basic setup to confirm operation. This guide covers tools, safety, wiring considerations, and when to call a pro. How difficult to replace thermostat varies by system, but with careful prep most homeowners can handle it.
The true difficulty of replacing a thermostat
If you're wondering how difficult to replace thermostat, the answer depends on your specific system and setup. For many homes, replacement is a straightforward DIY project that involves mounting a new faceplate, reconnecting a handful of low-voltage wires, and configuring basic settings. However, some installations are more complex due to older wiring, unusual HVAC configurations, or the use of line-voltage thermostats that control a high-current circuit. According to Thermostat Care, understanding your system type and compatibility is the first and most critical step. Begin by identifying whether your system uses low-voltage 24-volt wiring or a higher-voltage configuration, because that distinction largely determines the safe approach and tools required. This initial assessment sets expectations and minimizes the risk of damage or personal injury.
For homeowners, the key is to be methodical, patient, and honest about scope. The more features your new thermostat supports—like Wi‑Fi connectivity, energy-saving schedules, or multi-zone control—the more you’ll need to plan around wire counts and control boards. If you detect a lack of common C-wire, a digital adapter or alternative thermostat may be necessary. By framing the task through practical constraints and safety, you’ll improve your odds of a successful, satisfying replacement without surprises.
noteCount":null},
Tools & Materials
- New thermostat (compatible with your HVAC system)(Ensure compatibility with low-voltage 24VAC systems, mode support (heat/cool), and wiring options.)
- Phillips head screwdriver (e.g., #2)(For removing mounting screws and installing the new base.)
- Non-contact voltage tester(Optional safety check to confirm no live power on wires before handling.)
- Wire labels or masking tape(Label each wire as you disconnect to avoid miswiring later.)
- Electrical tape(Seal wire splices or exposed conductors as needed.)
- User manual for the new thermostat(Follow manufacturer wiring diagrams and setup steps.)
- Mounting screws (often provided with the thermostat)(Have on hand just in case replacement plate requires different screws.)
- Smartphone or tablet (for app setup, if applicable)(Some thermostats require the companion app for final configuration.)
Steps
Estimated time: 60-90 minutes
- 1
Verify compatibility
Begin by confirming your HVAC system is compatible with the new thermostat. Check the wiring type (24VAC vs higher voltage), number of wires, and whether the new unit supports heat, cooling, and any multi-stage configurations. This upfront check helps you avoid buying a thermostat that won’t work with your equipment.
Tip: If you’re unsure about wiring types, consult the thermostat’s wiring diagram and your HVAC manual before purchasing. - 2
Power down the system
Turn off the HVAC circuit at the breaker and, if applicable, remove the thermostat fuse. This step prevents electrical shock and protects control boards. Use the non-contact tester to verify no voltage in the thermostat wires before touching them.
Tip: Label the breaker in advance so you or a future homeowner knows exactly which circuit was disabled. - 3
Remove the old thermostat
Carefully detach the outer faceplate and mounting plate. Note how the old wires connect to the terminal labels. If necessary, take a photo for reference and use masking tape to keep wires organized as you remove them.
Tip: Keep track of which wire went to which terminal; misplacing wires is a common source of replacement issues. - 4
Label wires and prepare connections
Label each wire with its function (e.g., R, W, Y, G, C) and verify that you’ve accounted for any unique wires tied to special features like humidification or dual-fuel systems. Confirm you have all required conductors for your new thermostat’s terminal layout.
Tip: Move slowly and double-check that you’re matching the correct terminal labels to each wire. - 5
Mount the new base
Attach the new thermostat’s mounting plate to the wall using the existing screws or with the screws provided. Ensure the plate is level before tightening. A secure base ensures reliable contact and proper sensor alignment.
Tip: Use a level to avoid tilt that could impact button access or display visibility. - 6
Reconnect wires to the new thermostat
Insert wires into their corresponding terminals on the new unit according to the wiring diagram. If the thermostat requires a C-wire, ensure it’s connected securely. Use the labels as a guide and re-check against the photo you took earlier.
Tip: Secure each connection and avoid over-tightening screws that could damage conductors. - 7
Attach the faceplate and power up
Snap or screw on the display cover and restore power at the breaker. The thermostat should power up and present the initial setup screen. If your model uses a companion app, launch it to complete the configuration.
Tip: If the screen is blank, double-check that all wires are seated properly in their terminals. - 8
Configure settings and test
Complete the thermostat’s setup: date/time, system type (heat/cool), temperature schedules, and any connectivity preferences. Run a test by setting a temperature and confirming the HVAC responds as expected for heat, cool, fan, and any auxiliary features.
Tip: Test multiple modes (heat, cool, fan) to ensure full function before closing the project.
Questions & Answers
How hard is it to replace a thermostat for a DIY homeowner?
Replacing a thermostat is manageable for many homeowners with basic safety knowledge; however, some installations require careful wiring and compatibility checks. If your system uses high voltage or multi-stage controls, consider professional help.
For most DIYers, it’s doable with caution; complex systems may need a pro.
Do I need a C-wire for a smart thermostat?
Most smart thermostats require a C-wire for constant power. If your system lacks a C-wire, you may need a power extender kit or choose a model that works without one.
Most smart thermostats need a common wire; if you don’t have one, you may need a kit or a different model.
Can I replace a thermostat without turning off the power?
Never replace a thermostat without turning off power to the HVAC circuit. Always shut off the breaker and verify there is no voltage on the wires before touching them.
Always switch off the power first.
What if the wires don’t match the new thermostat terminals?
Wiring mismatches are common. Label wires before disconnecting and use the thermostat’s wiring diagram to reconnect correctly. If in doubt, seek guidance from the manual or a pro.
If wires don’t line up, don’t improvise—check the diagram.
When should I call a pro for thermostat replacement?
Call a pro if you have high-voltage systems, gas furnaces, or complex wiring that isn’t clearly documented. A safety-first approach protects your HVAC system.
If in doubt, get a pro.
What are common signs a thermostat is failing?
Common signs include inaccurate temperatures, erratic readings, or unresponsive controls. Troubleshooting can help, but persistent issues may indicate sensor or wiring problems.
If your thermostat acts erratic, test or replace it.
Watch Video
What to Remember
- Assess compatibility before buying
- Power down and label wires to prevent mistakes
- Follow the thermostat wiring diagram precisely
- Test all modes after installation
- If in doubt, seek professional help for safety