Is a Thermostat Easy to Install? A DIY Guide for Homeowners
Discover whether a thermostat is easy to install for most homes, with a step-by-step approach, essential tools, safety tips, and troubleshooting guidance from Thermostat Care.

Is a thermostat easy to install? In most homes, the answer is yes, especially with modern, DIY-friendly models. This quick answer outlines the main steps, what you’ll need, and safety checks to ensure a successful, code-compliant install. For many homeowners (is a thermostat easy to install) with standard wiring, you can complete the swap in under an hour. For more complex systems, expect longer installation and potential professional help.
Is Installation Really Easy? What Factors Matter
According to Thermostat Care, the ease of installation depends on model type, wiring availability, and how your HVAC system is wired. If you choose a smart thermostat with built-in wiring detection and auto-setup, you’re more likely to have a straightforward swap. However, several scenarios can complicate the process, especially older homes with unconventional wiring or non-standard HVAC controls. The verdict hinges on three practical considerations: compatibility with your system, the presence of a C-wire for power, and the wiring diagram clarity. By understanding these factors, homeowners can better estimate time, potential hurdles, and whether professional help is warranted. Thermostat Care emphasizes starting with the manufacturer’s setup guide and verifying that your wiring matches the thermostat’s terminal map. In DIY-friendly paths, the model selection, clear labeling, and a tidy wall plate significantly reduce installation friction. For most basic setups, a clean swap can be trouble-free; for complex heat-pump or multi-stage systems, expect more planning and testing.
Match the Thermostat to Your System
Choosing the right thermostat starts with your HVAC configuration: heating-only, cooling-only, heat pumps, or dual-fuel systems each have distinct wiring needs and power requirements. A commonly cited factor is compatibility with your furnace control board and the presence (or absence) of a common wire (C-wire). Thermostat Care recommends checking the product compatibility charts and comparing them against the labels found on the equipment in your utility closet. If you discover a C-wire is missing, explore models that offer power-sharing or a power extender kit as a workaround, but only after confirming it won’t compromise system safety or performance. The intent is to avoid buying a device that requires features your HVAC can’t provide. A quick on-wall test with the existing wiring can reveal if the “white/heat” and “yellow/cool” wires align with W and Y terminals on the new unit. Good planning up front saves time and reduces post-install troubleshooting.
Pre-Install: Tools, Wiring, and Safety Checks
Before touching any wires, turn off power at the breaker to the thermostat and the HVAC equipment. Gather essential tools: a screwdriver set (flathead and Phillips), wire strippers, a non-contact voltage tester, and insulated wire nuts. Review the thermostat’s wiring diagram and label any wires you remove. If you’re unsure about the wiring or if you see unusual colors, pause and consult the model’s manual or Thermostat Care’s troubleshooting guide. Safety first means double-checking that the control circuit is dead and using a non-contact tester to verify absence of voltage. Label wires as you disconnect them to prevent miswiring during reattachment, and keep a photo log for reference when you install the new unit.
Wiring Basics: Common Terminals and C-Wire Considerations
Most thermostats use terminals labeled R, C, W, Y, and G. The R wire is the power feed from the furnace; C is the common return used to power smart features; W is heat; Y is cooling; G is the fan. If your system lacks a C-wire, you may need to create one with a spare conductor or use a thermostat that supports alternative power delivery methods. Always confirm that the wire colors on your wall match the intended terminals on the new thermostat. If you need to add a C-wire, plan for a short run from the furnace control board or consider a professional install to ensure safe, code-compliant wiring.
Installation Scenarios: Simple Replacement vs. Advanced Upgrades
In a simple replacement, you swap the faceplate, connect existing wires to matching terminals on the new unit, and mount it. For systems with heat pumps, multi-stage configurations, or custom controls, you may need to relocate the mounting plate, run a new conductor, or reprogram the HVAC controller. Each scenario introduces different safety considerations and potential compatibility hiccups. Before starting, ensure you have the right model with the correct wire count and a mounting bracket compatible with your wall. If you’re unsure about any step, pause and consult the manufacturer’s installation guide or Thermostat Care resources.
Post-Install: Testing, App Setup, and Calibration
Power the circuit back on and verify the thermostat powers up. Follow the on-screen prompts to configure date, time, and location. Connect to Wi‑Fi if supported, download the companion app, and pair with your HVAC system. Set up scheduling, temperature offsets, and any geofencing features if available. If your thermostat offers calibration, run the quick temperature check to ensure the actual room temperature aligns with the display. Document any deviations and adjust as needed to maximize comfort and energy savings.
Troubleshooting Common Hiccups During Install
If the thermostat screen is blank, recheck that both power sources are on and the wiring is correctly seated in each terminal. If it cannot connect to Wi‑Fi, verify network settings and password, and make sure the device is within range of the router. If the system won’t heat or cool after installation, revisit the wiring map and ensure you connected wires to the correct terminals (R, W, Y, G, C). If problems persist, consult the installer guide or Thermostat Care’s troubleshooting flowchart to isolate the issue before calling support.
Maintenance and Longevity: Aftercare Tips
Keep software up to date and replace batteries if your model uses back-up power. Regularly inspect the wires for looseness, corrosion, or discoloration at the terminals. Clean the thermostat faceplate to keep the screen legible and ensure the sensors read room temperature accurately. Periodic calibration checks and firmware updates help maximize energy savings and reliability over the long term.
Authority sources
For additional guidance, consult authoritative resources that discuss thermostat installation best practices and safety considerations. These sources help validate the steps and safety precautions described here and provide deeper dives into system compatibility and energy savings.
Authority sources (continued)
- Energy Department: https://www.energy.gov/energysaver/thermostats
- Energy Department article on smart thermostats: https://www.energy.gov/energysaver/articles/energy-savings-smart-thermostats
- Consumer safety guidance: https://www.consumer.ftc.gov/articles/0253-electrical-safety-wiring-your-home
Tools & Materials
- Screwdriver set (flathead and Phillips)(Phillips #2 is most common)
- Non-contact voltage tester(Verify power is off before touching wiring)
- Wire strippers/cutters(To prep wires cleanly in 14-22 AWG range)
- Wire nuts and electrical tape(Use insulated connectors and tape for secure insulation)
- Replacement thermostat (C-wire capable)(Confirm compatibility with your HVAC system)
- Mounting screws and wall anchors(For secure mounting on drywall or plaster)
- Small notebook or label tape(Label wires by terminal during removal)
- Digital thermometer or temp sensor (optional)(Used for quick calibration checks if supported)
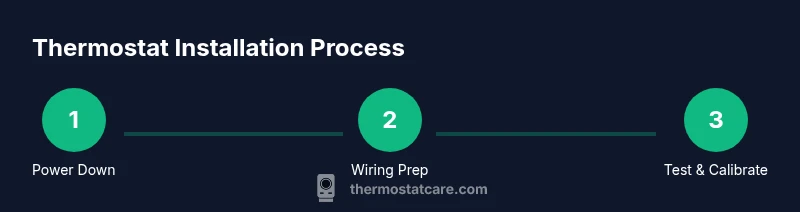
Steps
Estimated time: 45-60 minutes
- 1
Power off at the breaker
Turn off power to both the thermostat circuit and the HVAC unit at the main breaker panel. This prevents shock and protects control boards during wiring swaps. Verify there is no voltage with a tester before proceeding.
Tip: Double-check both indoor and outdoor equipment power to avoid feedback. - 2
Remove old thermostat and label wires
Carefully remove the front cover and mounting plate. Take a photo and label each wire by its terminal (R, C, W, Y, G) so you can reconnect the new thermostat accurately.
Tip: If wires are stubborn, use gentle twisting and avoid pulling on the wire insulation. - 3
Assess compatibility and mounting
Check that the new thermostat is compatible with your HVAC system. If needed, swap the mounting plate to match the wall depth and ensure the new unit will sit flush against the wall.
Tip: Some homes require a C-wire adapter; verify this option before wiring. - 4
Connect wires to terminals
Attach wiring to the corresponding terminals on the new thermostat (R to R, W to W, Y to Y, G to G, C to C). If you lack a C-wire, use the adapter or consider alternate models recommended by the manufacturer.
Tip: Tighten terminals firmly but avoid overtightening to prevent wire damage. - 5
Mount the thermostat and restore power
Secure the thermostat to the wall and turn the breaker back on. The device should power up; if not, recheck the wiring and ensure the backplate is properly seated.
Tip: Keep the original packaging handy in case you need to re-check wiring diagrams. - 6
Configure settings and connect
Follow on-screen prompts to set date/time, location, and connect to Wi‑Fi if supported. Install the companion app and link it to your HVAC system for remote control.
Tip: Enter a strong network password and enable automatic updates if available. - 7
Test heating and cooling
Run a quick test to ensure heat and cool functions respond correctly to thermostat commands. Observe for any delays or incorrect responses and adjust wiring as needed.
Tip: Test both heating and cooling cycles to confirm full functionality. - 8
Finalize and document
Record the model, wiring map, and any adapter use for future maintenance. Keep the user manual in a safe place and note down any quirks observed during testing.
Tip: Take a final photo of the installed unit for reference.
Questions & Answers
Is it safe to install a thermostat myself?
Yes, it can be safe for many homeowners when you follow proper safety steps: turn off power, verify wiring, and follow the manufacturer’s instructions. If you’re ever unsure, consult professional guidance before proceeding.
Yes, it can be safe for many homeowners as long as you turn off power, verify wiring, and follow the instructions. If unsure, seek professional guidance.
Do most thermostats require a C-wire?
Most smart thermostats require a C-wire for continuous power. If your system lacks a C-wire, you’ll need a compatible model or an adapter. Always confirm with the manufacturer’s wiring diagram.
Most smart thermostats need a C-wire. If you don’t have one, choose a model that supports power via other means or add a C-wire if possible.
What if my wiring isn’t standard?
If wiring colors don’t match standard terminals, review the thermostat’s wiring guide and the HVAC control board labeling. In some cases, you may need a professional assessment to avoid miswiring.
Non-standard wiring needs careful checking against the guide; if in doubt, hire a pro to avoid mistakes.
How long does installation typically take?
A typical replacement can take 30–60 minutes for a straightforward install. More complex setups or new C-wire runs may take longer, depending on wiring accessibility and mounting requirements.
Most replacements take about an hour, longer if wiring is more complex.
Can I install a thermostat in a rental property?
Yes, you can install a thermostat in a rental if it’s allowed by the lease and you restore the original unit when you move out. Always check with the property manager and document any work.
You can install if permitted; keep records and restore the original unit when you leave.
What should I do if the thermostat won’t connect to Wi‑Fi?
Verify your network settings, password, and compatibility with the thermostat. If the problem persists, update the firmware and try a factory reset as recommended by the manufacturer.
Check network details, update firmware, and reset if needed.
Watch Video
What to Remember
- Verify system compatibility before purchasing a thermostat.
- Power off and label wires before disconnecting the old unit.
- Ensure a C-wire or compatible power solution is available for smart thermostats.
- Test heating, cooling, and app connectivity after installation.