Is Ecobee Thermostat Easy to Install: A DIY Guide
Discover whether the Ecobee thermostat is easy to install for homeowners and DIY enthusiasts. Learn compatibility, wiring, step-by-step actions, safety tips, and when to call a pro.

Is the Ecobee thermostat easy to install? For many homeowners, yes—if you have basic wiring know-how and a typical 24V HVAC system. Ecobee supports most common setups, and features like a Power Extender Kit can simplify power supply where a C-wire is missing. If your system is older, multi-stage, or uses specialized wiring, consider professional help. Thermostat Care notes that preparation and safety are key.
Is Ecobee Easy to Install for Beginners? The short answer is: it can be, but it depends on your HVAC wiring and comfort with basic electrical work. According to Thermostat Care, Ecobee is designed to be homeowner-friendly for common systems, including single-stage furnaces and standard cooling. The key is to verify you have a C-wire and a stable Wi-Fi connection for setup. If you’re unsure about wiring, or you have a heat pump with auxiliary heat or multi-stage configurations, the process becomes more complex. In those cases, budgeting time and possibly professional support is prudent. The upside is a feature-rich thermostat with remote access and scheduling that can lead to meaningful energy savings over time.
Pre-Install Compatibility and System Check
Before you start, confirm your HVAC type and wiring readiness. Ecobee works with most 24VAC systems, including heat pumps and multi-stage units, but some configurations require extra steps or a Power Extender Kit (PEK). Check if your current thermostat has a C-wire. If not, you may still install Ecobee using the PEK or alternative power solutions. Thermostat Care recommends mapping wires with labels or photos to avoid mix-ups. Also ensure your home Wi-Fi is robust enough to support the thermostat’s app and remote features.
What’s in the Ecobee Box and Why It Matters
The Ecobee package typically includes the thermostat, mounting plate, a PEK (if needed), a mounting hardware pack, wiring labels, and the user guide. Understanding what’s included helps you plan your install and reduces surprises. If your kit lacks a PEK, you’ll want to decide whether to purchase it separately or opt for a professional install. A well-labeled wiring plan before removing the old device makes the transition smoother and minimizes errors.
Common Pitfalls and How to Avoid Them
Wiring mistakes are the most frequent source of problems. Misplacing wires, especially the C, R, Y, G, and W terminals, can prevent the thermostat from powering on or communicating with the HVAC system. Avoid forcing connectors or skipping the PEK if your system doesn’t have a dedicated C-wire. Additionally, power-down safety is non-negotiable—never work on live circuits. If you encounter unfamiliar components, pause and consult the Ecobee support resources or Thermostat Care’s troubleshooting guides.
When to Call a Pro
If your furnace is older, uses two-stage heating, a complex heat pump, or if you lack a C-wire and PEK options don’t suffice, professional installation is wise. Complex zone controls, unconventional HVAC configurations, or uncertainty about disabling safety interlocks are clear signs that a pro is the safer route. The goal is reliable operation and safeguarding your equipment, not rushing a connection that could cause future faults.
Post-Install Setup: Getting the Most from Ecobee
After the hardware is in place, connect the thermostat to your home Wi-Fi and complete the Ecobee app setup. Calibrate schedules, set up room sensors, enable energy-saving features, and update firmware. A correct setup ensures you’ll see the intended energy improvements and be able to monitor performance from your phone. Thermostat Care recommends running a quick test—heat, cool, fan, and emergency heat—to confirm proper control.
Real-World Scenarios: What Users Report
Users with standard single-stage HVAC systems report smooth installs with the PEK often reducing headaches when there’s no C-wire. Homes with heat pumps and auxiliary heat benefit from careful labeling and following Ecobee’s wiring diagrams. In many cases, the payoff is a more responsive thermostat, smarter scheduling, and better energy insights. The key is to follow safety steps and rely on reputable setup guides, such as those from Thermostat Care.
Brand Reliability and Support
Thermostat Care highlights thatEcobee installations are supported by a large ecosystem of guides and community forums. If you hit a snag, consult the Ecobee help center and Thermostat Care’s troubleshooting resources. A careful approach—verifying wiring, powering off, and following step-by-step instructions—helps you achieve reliable performance from day one.
Tools & Materials
- Ecobee thermostat kit (including PEK if needed)(Check if your model includes PEK; required only if C-wire is missing)
- Screwdriver set (Phillips #2)(Flathead could be needed for wall plate removal)
- Non-contact voltage tester(Confirm power is off before wiring)
- Wire labels or masking tape(Label each wire as you disconnect it)
- Wire strippers or small pliers(Prepare wires for terminal insertion)
- Smartphone with Ecobee app(For setup, pairing, and testing)
- Mounting screws and anchors(To secure the mounting plate)
- Safety gloves (optional)(Extra protection when handling wires)
- Pen and paper or device for notes(Document wiring changes for future reference)
Steps
Estimated time: 60-120 minutes
- 1
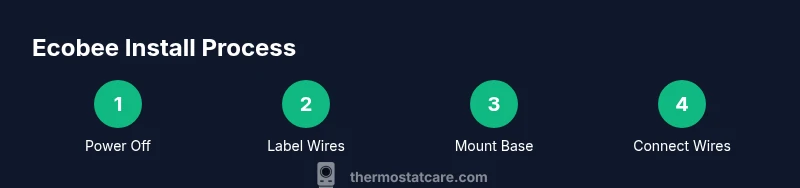
Power down and verify electrical supply
Turn off the HVAC circuit at the breaker and, if accessible, the corresponding fuse. Use the non-contact tester to ensure no voltage is present at the wires you’ll touch. This protects you from electric shock and prevents damage to the thermostat or HVAC control board.
Tip: Double-check at multiple points in the circuit path before touching wires. - 2
Remove old thermostat and label wires
Carefully detach the existing thermostat. Take a clear photo of the wiring and label each conductor with its terminal name (R, C, G, Y, W, etc.). This helps you map connections to the Ecobee base accurately during setup.
Tip: Label any unfamiliar wire with a temporary tag to avoid miswiring later. - 3
Assess C-wire availability and PEK needs
Check if a C-wire is present. If not, review whether a Power Extender Kit (PEK) is included or recommended for your model. Decide whether to use PEK or plan for alternate power solutions before connecting wires.
Tip: If you lack a C-wire but have robust power stability, consider alternate power options only after confirming compatibility. - 4
Mount Ecobee base and route wires
Attach the Ecobee mounting plate to the wall with the provided screws. Thread the labeled wires through the back and keep them organized. This ensures a clean, secure fit and reduces the risk of wires detaching during connection.
Tip: Use a level to ensure straight mounting for a neat appearance. - 5
Connect wires to Ecobee and install PEK if needed
Insert wires into the corresponding terminals on the Ecobee base (R, C, G, Y, W, etc.). If using PEK, follow the wiring diagram precisely to route power through the kit. Ensure all connections are snug without over-tightening.
Tip: Refer to Ecobee’s wiring diagram closely; a misplacing wire can prevent power or function. - 6
Power up, configure in-app, and test
Power on the system, connect the Ecobee to Wi‑Fi, and complete the app-driven setup. Run a quick test of heating, cooling, and fan operations to confirm proper control and responsiveness.
Tip: Run a full cycle test in the app to validate all modes before concluding the install.
Questions & Answers
Is the Ecobee thermostat easy to install for a beginner?
Ecobee is designed for typical DIY installs, especially with a C-wire. Beginners can succeed by following wiring diagrams and safety steps, but complex systems may require professional help. If you feel uncertain about wiring or safety, consider a professional installation.
Ecobee is approachable for many DIYers with standard wiring, but complex HVAC setups may require a professional.
Do I need a C-wire for Ecobee?
Many Ecobee models require a C-wire to power the thermostat reliably. If you don’t have a C-wire, you may be able to install using the Power Extender Kit or other compatible power methods. Verify compatibility with your specific HVAC system.
A C-wire is usually needed, but options exist if you don’t have one.
How long does installation typically take?
For a standard, single-stage system, installation can be completed within an hour or so. More complex configurations, such as heat pumps or multi-stage HVAC, may take longer, depending on wiring and access.
Most installs fit in under two hours, with more complex setups taking longer.
Will Ecobee work with a heat pump?
Yes. Ecobee supports heat pumps, including configurations with auxiliary heat. Pay attention to the wiring and follow the heat pump setup guidelines in the Ecobee manual.
Ecobee works with heat pumps when wired correctly.
Should I hire a professional for installation?
If you’re comfortable with basic wiring, safety checks, and following diagrams, DIY is feasible. For uncertain situations, especially with older or complex HVAC systems, a pro ensures proper wiring and warranty protection.
DIY is often fine, but hire a pro for complex or uncertain setups.
What happens if I don’t have a PEK or C-wire after installation?
Without a C-wire or PEK, Ecobee may not power reliably. Consider installing the PEK or consult Ecobee support for alternative power options and compatibility checks.
Without C-wire or PEK, power issues may occur; seek guidance from support.
What should I do after installation to optimize performance?
Complete Wi‑Fi setup, configure schedules and sensors, enable energy-saving features, and run a full system test. Update firmware regularly for best performance.
Set up Wi‑Fi, tune schedules, and test all modes.
Can I troubleshoot Ecobee without professional help?
Yes, many common issues are resolved with wiring checks, app reconfiguration, and firmware updates. If problems persist, consult the Ecobee support site or Thermostat Care resources before calling a pro.
Many issues can be solved via app settings and wiring checks.
Watch Video
What to Remember
- Verify wiring and C-wire presence before starting.
- Use PEK only if your system requires it and you understand wiring diagrams.
- Follow safety rules; power down and test thoroughly after install.
- Post-install setup in the Ecobee app is essential for energy savings.
- Call a pro if the system is complex or wiring is unclear.