Ecobee Thermostat Installation: A Step-by-Step Guide
Step-by-step guide for ecobee thermostat installation: compatibility checks, wiring basics, safety, app setup, and testing for comfort and energy savings.

Learn how to perform ecobee thermostat installation with a clear, step-by-step plan. Verify compatibility, gather tools, and follow wiring and setup instructions to enjoy smart controls, energy savings, and reliable comfort.
Ecobee thermostat installation planning for success
ecobee thermostat installation is a practical project for most homeowners, but success starts with planning. In this section we outline how to assess your system, confirm power availability, and map wiring requirements before you touch a screwdriver. A thoughtful plan reduces post-install surprises and speeds up app configuration, schedules, and learning algorithms. Thermostat Care emphasizes starting with a quick system check, then organizing your wires and tools so the actual install goes smoothly and safely. A well-planned install also helps you align energy-saving goals with your household routines, ensuring you get the most value from your new smart thermostat.
Compatibility and system assessment for ecobee installation
Before you begin, confirm that your HVAC system uses standard 24-volt control wiring, as ecobee relies on low-voltage signals to communicate with the furnace or air conditioner. Most single-stage, heat-pump, and multi-stage systems are supported, but some proprietary or legacy configurations may require adapters or additional steps. Take note of your existing thermostat wiring count, wire colors, and whether a C-wire exists. If your system lacks a C-wire, ecobee’s Power Extender Kit (PEK) can provide the necessary power path when installed per instructions. Verifying compatibility now saves time later and reduces the risk of ongoing power or communication issues.
Tools, materials, and safety essentials for a clean install
Equip yourself with the tools and safety gear needed to complete ecobee thermostat installation confidently. Essential items include a screwdriver (often Phillips #2), wire strippers, a non-contact voltage tester, painter’s tape or wire labels, and the ecobee PEK if a C-wire is unavailable. Have a ladder, a pencil for labeling, and a small flashlight for working behind the wall plate. Safety first: switch off the circuit breaker that powers the HVAC, then confirm there is no live voltage at the thermostat wires with a tester before touching anything. A tidy workspace and labeled wires prevent miswiring and misinterpretation during the swap.
Wiring basics and your PEK options
The ecobee base uses clearly labeled terminals (C, Rc, Rh, Y, G, W, O/B, among others). When wiring, connect each existing conductor to the corresponding terminal on the ecobee base. If your system has all the necessary wires including a C-wire, the install is straightforward. If not, install the PEK according to the ecobee manual to draw power through the existing conductors and then connect the wires to their matching terminals. Correct wiring is critical for reliable power, accurate sensing, and proper control of heat, cool, and fan.
App setup, Wi-Fi, and initial configuration
With wiring complete, power on the thermostat and follow the on-screen prompts to connect to Wi-Fi. Create or sign in to your Thermostat Care account and use the ecobee app to complete the setup wizard. The app will detect your system type, set temperature scales, and prompt you to configure home/away schedules. A successful Wi-Fi connection enables remote monitoring, software updates, and feature enrollment (like occupancy sensing and energy reports) which maximize savings and convenience.
Testing, calibration, and quick troubleshooting tips
After installation, run a quick cycle to test heat, cool, and fan functions. Verify that the thermostat responds to setpoints and that mode changes propagate to the HVAC equipment promptly. Check sensor readings and ensure the display reflects current temperatures accurately. If you encounter non-responsive controls, re-check wire connections, confirm PEK wiring if used, and verify the ecobee app shows the correct equipment type. This proactive testing helps catch issues early and reduces callback time.
Common install challenges and practical fixes
Even with careful planning, you may run into snags like a blank screen, unexpected error codes, or weak signal strength. If the screen is blank, recheck power supply and PEK wiring, then verify that the base is properly seated. If the HVAC doesn’t respond to commands, inspect G and Y wire connections and confirm that the system is configured for the right cooling/heating mode. For Wi-Fi problems, reboot the router, re-enter credentials, and consider repositioning the thermostat’s location for a stronger signal. Thermostat Care’s troubleshooting guide provides checks that solve the majority of post-install issues.
Next steps: optimization and ongoing care
With the install complete and tested, customize energy-saving features to suit your routine. Use smart scheduling, occupancy-based cooling, hold settings for weekdays and weekends, and eco-mode where appropriate. Regular app updates bring new features and security improvements, so check for firmware updates periodically. Keep a labeled wiring diagram as a reference for future upgrades or service calls, and review your thermostat’s energy reports to identify opportunities for further savings.
Tools & Materials
- Ecobee thermostat kit (base + PEK + mounting screws)(Ensure you have the latest PEK included; compatible with non-C-wire setups.)
- Screwdriver set (Phillips #2 common, flathead might be needed)(Used to secure the mounting plate and base.)
- Non-contact voltage tester(Confirm no live voltage before handling wires.)
- Wire strippers/cutters(Trim and prepare wires to about 1/4 inch for clean connections.)
- Wire labels or painter’s tape(Label each wire to map to the correct terminal on the ecobee base.)
- Electrical tape(Secure wire labels and insulate exposed conductors if needed.)
- Ladder or step stool(Helpful for reaching wall-mounted thermostats.)
Steps
Estimated time: 60-90 minutes
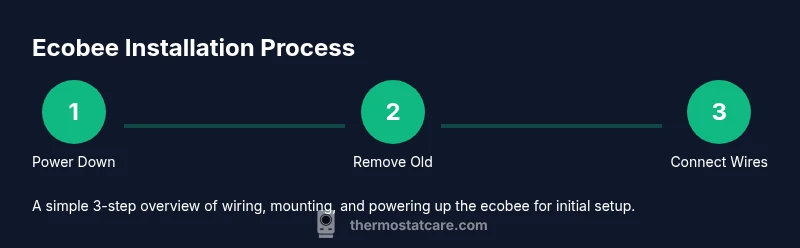
- 1
Power down the HVAC
Open the corresponding circuit breaker and switch off the HVAC power. Use a non-contact tester to confirm no voltage at the thermostat wires. This prevents shock and equipment damage during the swap.
Tip: Double-check the breakers for both heating and cooling circuits to avoid hidden feeds. - 2
Remove the existing thermostat
Detach the faceplate and mounting plate from the wall. Avoid yanking wires; gently pull the subbase to expose the wire connections. Take a quick photo of the current wiring for reference.
Tip: Label wires as you disconnect them to simplify mapping to the ecobee base. - 3
Label and inspect wires
Carefully label each wire (G, Y, W, R, C, etc.) and inspect insulation for damage. If a C-wire is missing, prepare to use the PEK and identify which conductor will carry common signal.
Tip: Keep wires organized by routing them through tape labels or a wire map on the wall. - 4
Prepare the ecobee base
If you’re using the PEK, install it per the ecobee instructions and then route the wires to the corresponding labeled terminals on the ecobee base.
Tip: Ensure the base is level before securing to the wall for a clean installation. - 5
Connect wires to the ecobee base
Insert each wire into the matching terminal (C to C, G to G, Y to Y, W to W, R to R, etc.). Press each wire in firmly and check there’s no loose copper.
Tip: If a wire barely reaches a terminal, trim slightly and re-strip to ensure solid contact. - 6
Mount the base and attach the display
Secure the ecobee base to the wall with the mounting screws, then snap on the display and ensure the touchscreen responds. Reconnect any interior connections and reattach the front plate.
Tip: Before placing the faceplate, verify the wires are clear of the display and won’t be pinched. - 7
Power up and configure in-app
Restore power to the HVAC and follow the on-screen setup prompts to connect to Wi-Fi and configure system type. Use the ecobee app to complete equipment detection and initial scheduling.
Tip: Choose energy-saving presets and enable remote monitoring to optimize performance. - 8
Test operation and calibration
Run a few cycles to test heating, cooling, and fan operation. Check for correct temperature readings and adjust sensor settings if needed. Review error codes in the app if issues arise.
Tip: If something seems off, recheck your wiring and PEK configuration and retry a test cycle.
Questions & Answers
Is ecobee installation DIY-friendly for most homeowners?
Yes, ecobee installation is designed for homeowners with basic wiring knowledge. Following the included PEK guidance and step-by-step prompts in the app typically allows a successful self-install. If you’re unsure about wiring or system type, seek professional help.
Most homeowners can install ecobee themselves with the PEK if needed. If wiring is unclear, consult a pro.
Do I need a C-wire for ecobee thermostat installation?
A C-wire is recommended for reliable power, but ecobee can operate with the Power Extender Kit if a C-wire is not present. Check your existing wiring and use PEK if necessary.
A C-wire is ideal, but PEK can work if you don’t have one.
What if my old thermostat has more wires than ecobee supports?
Most ecobee models support the standard set (R, C, G, Y, W, O/B). If you have extra wires, you can cap them safely or consult the manual to determine if they’re unused or for future features.
Extra wires may be unused; don’t connect them to ecobee without guidance.
Can ecobee control humidifiers or dehumidifiers?
Yes, ecobee can integrate with humidifiers/dehumidifiers that are connected to the HVAC system, but you may need additional wiring or a separate control relay depending on your setup.
Ecobee can manage humidifiers with proper wiring or relays.
How long does ecobee installation typically take?
Most installations take about an hour to an hour and a half, depending on wiring and whether the PEK is required. Plan for a comfortable window and follow the app prompts.
Plan roughly 60 to 90 minutes for a standard install.
What should I do if the ecobee won’t power on after installation?
Double-check main power to the HVAC and confirm the PEK wiring if used. Ensure the thermostat base is fully seated and the display is connected. If issues persist, consult Thermostat Care troubleshooting resources.
Check power, PEK wiring, and base seating; consult guidance if needed.
Watch Video
What to Remember
- Verify HVAC compatibility and C-wire availability before install.
- Label wires and map them to the ecobee base terminals exactly.
- Use PEK if there is no dedicated C-wire to prevent power problems.
- Test heating, cooling, and sensors after wiring to ensure correct operation.