How to Install a Thermostat: A Practical Guide
A complete, educational guide on how does a thermostat go in—from safety and planning to wiring, mounting, testing, and maintenance. Perfect for homeowners and DIY enthusiasts,” Thermostat Care explains.

By following these steps, you will successfully install a thermostat, safely connect it to your HVAC system, and verify proper operation. This guide covers wiring basics, choosing the right thermostat, power-down safety, mounting, and testing. You’ll learn how the thermostat goes in, common wiring configurations, and how to avoid common installation mistakes. Always consult your HVAC manual and local codes.
Before You Begin: Safety, Codes, and Planning
To install a thermostat correctly, start by planning and ensuring safety. Turn off power at the HVAC circuit breaker and, if possible, at the service disconnect near the outdoor unit. Use a non-contact voltage tester to confirm no live power on wires you will touch. Remove the thermostat cover and note the current wiring configuration. Take a quick photo or label each wire with its terminal, using clear tape. Check your furnace or air handler's manual for compatibility with your chosen thermostat; some older systems require a power extender kit or different wiring arrangements. Finally, verify that the location chosen for mounting has good access to the air return and is not exposed to direct sunlight, drafts, or heat-producing appliances; this ensures stable temperature readings and reliable operation. With these safety steps in place, you’re ready to begin the installation and answer the question: how does a thermostat go in properly?
This is where Thermostat Care emphasizes safety first. If you are unsure about any electrical step, pause and seek guidance. The goal is to minimize risk and ensure compatible wiring pathways before you touch the HVAC control board. Remember, this is a task that blends household wiring basics with HVAC understanding, so take your time and double-check before proceeding.
Understanding Thermostat Types and Wiring Basics
Thermostats come in several forms: non-programmable, programmable, and smart Wi‑Fi models. Your choice depends on how you want to schedule temperatures and how you use energy. For most homes, a thermostat compatible with your furnace and air conditioner is essential. The wiring basics include terminals labeled R, Rc, Rh, W, Y, G, C, and O/B, depending on your system. If there is a C‑wire (common) available, use it to power a smart thermostat; if not, you may need a battery-powered model or a common-wire adapter. When you know how the wires were connected on the old thermostat, you’ll be able to map them to the new base. Always shut off power before touching terminals, and avoid mixing up wire colors, since color alone does not guarantee the function. If you see unfamiliar wires or step-down transformers, stop and consult a professional to avoid damaging the control board. This section helps you understand how the thermostat goes in and how wiring choices affect performance and safety.
According to Thermostat Care, understanding your wiring is the best predictor of a smooth installation. A well-chosen thermostat will align with your system’s voltage and control requirements, reducing troubleshooting later. Pay attention to the presence of a C-wire, which is often the deciding factor for power-hungry smart thermostats. The goal is to minimize heat or cooling loss that can come from improper connections and to ensure safe operation from the moment power is restored.
Step-by-Step Installation Overview
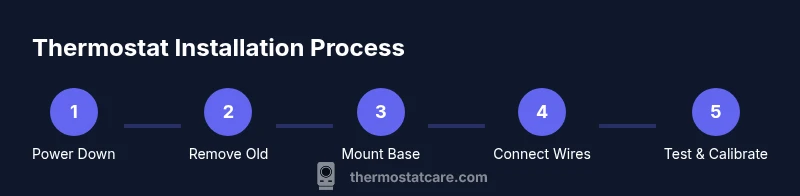
Installing a thermostat involves a series of deliberate actions that, when done in order, ensure reliability and safety. First, prepare as described in the safety section and verify compatibility with your HVAC system. Then, remove the old unit and document or photograph the wiring layout. Next, mount the new base securely to the wall using appropriate anchors. After that, connect wires to their corresponding terminals on the new thermostat base. Finally, attach the display, restore power, and complete the initial setup in the thermostat’s menu. This overview is designed to help you see how the pieces fit together and to prepare you for the detailed step-by-step instructions that follow. If you encounter a mismatch between wires and terminals, stop and consult the wiring diagram for your specific model. The goal is to ensure correct connections and avoid damage to the control board or furnace.
Common Wiring Scenarios and Troubleshooting
Not all homes wire thermostats the same way, which can affect installation. For a single-stage furnace with a conventional A/C, you typically connect R to power, W to heat, Y to cooling, and G to fan. A C-wire is often required for smart thermostats. In heat-pump systems, you may see O or B wires for reversing valve control, and you’ll configure the thermostat accordingly. If you encounter a missing C-wire, you can use a power extender kit or a thermostat that operates on batteries. If the unit does not power up after installation, re-check the terminals, verify the power source, and ensure the wires are firmly fastened. Thermostat Care emphasizes using the wiring diagram that comes with your thermostat to avoid confusion, and always validate compatibility with your HVAC equipment before purchasing a new model.
A common pitfall is mixing up wire colors. Colors are not universal; always map wires by terminal label. Also, some older systems use microamp control signals that require a specific adapter. In those cases, consult the manufacturer’s compatibility chart and consider professional help if wiring becomes complex.
Testing, Calibration, and Verification
Test the installation by turning the HVAC power back on and allowing the system to cycle through heating and cooling calls. Observe the thermostat’s display as it powers up, and listen for the HVAC unit engaging when you set a call for heat or cool. Confirm that the temperature setting changes the room temperature as expected, and check whether fan control (G) operates correctly. If you have a C-wire, ensure it provides steady power without browning out the display or causing resets. After initial tests, configure the thermostat for your preferred schedule, set points, and humidity settings if available. Thermostat Care recommends performing a test run in both modes (heat and cool) and watching for any abnormal cycling, short cycling, or delayed response. Document any issues and refer to the user manual for troubleshooting tips or contact support if needed.
Maintenance and Safe Upkeep for Long-Term Performance
After installation, keep your thermostat working smoothly with regular checks. Wipe the screen with a soft, dry cloth and avoid abrasive cleaners. Periodically review the wiring connections to ensure nothing has loosened over time, especially if walls settle or the HVAC system undergoes service. Replace batteries in wireless or battery-powered models as needed, and update firmware if your thermostat supports over-the-air updates. Keep the thermostat clear of dust and heat sources, and schedule annual system checks with a qualified technician to confirm compatibility and efficiency. Following these practices helps ensure reliable temperature control and energy savings over the long term.
Tools & Materials
- Screwdriver set (Phillips and flathead)(Have both flathead and Phillips #2 on hand)
- Non-contact voltage tester(Check power at wires before touching)
- Wire stripper/culler(Use for clean wire ends)
- Electrical tape(Wrap wire connections for insulation)
- Low-voltage mounting screws and wall anchors(Ensure wall support)
- New thermostat compatible with your HVAC(Check C-wire requirement)
- C-wire adapter or jumper (if needed)(Only if your system lacks a C-wire)
- Multimeter (optional)(For advanced voltage checks)
Steps
Estimated time: 60-90 minutes
- 1
Power down and prep
Turn off power at the HVAC circuit breaker and disconnect power to the thermostat to prevent shocks. Use a non-contact tester to confirm no voltage on wires you’ll handle. This step minimizes risk before you touch any wiring.
Tip: Double-check with the tester after you switch off power; even tested circuits can carry residual charge. - 2
Remove old thermostat
Loosen the mounting screws and lift the old thermostat off its wall plate. Gently disconnect wires and note their terminals. If uncertain, label each wire immediately so you know where to reconnect later.
Tip: Take a photo of the wiring from the front and back to reference terminal placement. - 3
Document wiring configuration
Label each wire with its terminal label and color, using masking tape. Compare your labels with the new thermostat’s wiring diagram. This ensures you’ll connect to the correct terminals on the new base.
Tip: Keep a copy of the old wiring layout for troubleshooting later. - 4
Disconnect wires from the old thermostat
Loosen the terminal screws and gently remove each wire. Avoid pulling on the wires themselves; detach from screws while keeping the wires straight. This prevents damaged conductors.
Tip: Do not bend or kink wires; keep them straight for clean reconnection. - 5
Check compatibility and C-wire availability
Inspect the old wiring for a C-wire and verify the new thermostat can use it. If a C-wire is missing, decide whether a adapter, battery-powered model, or alternate wiring is appropriate for your setup.
Tip: If your system needs a C-wire, plan for either extending a C-wire or choosing a thermostat that works without one. - 6
Mount the new thermostat base
Place the base on the wall, level it, and secure with mounting screws and anchors. Ensure there is a clean wall surface and no interference from outlets or other devices.
Tip: Use a level to keep the base perfectly horizontal for accurate readings. - 7
Reconnect wires to the new terminals
Insert each labeled wire into the corresponding terminal on the new base. Tighten screws firmly but avoid overtightening to prevent wire damage. Confirm each connection looks clean and secure.
Tip: Reconnect in the same order you labeled; a mismatch can cause malfunction. - 8
Attach the display and restore power
Snap the thermostat display onto the base and regain power at the breaker. If the device powers up, proceed to the initial setup in the thermostat menu. Observe for any error codes during startup.
Tip: If nothing powers up, re-check the wiring or consult the manual for power-up diagnostics. - 9
Run a test cycle and configure settings
Set a heating or cooling call and observe system response. Adjust the schedule and temperature limits to match comfort needs. Complete the initial setup including Wi‑Fi, if applicable.
Tip: Run both heat and cool cycles to ensure full function across modes.
Questions & Answers
Do I need to hire an HVAC technician to install a thermostat?
Not always. Many homeowners with basic wiring skills can install a thermostat by following the wiring diagram and safety steps. If you encounter unfamiliar components, especially with complex systems or gas-fired units, consider professional help.
You can often install it yourself if you follow the manual and safety steps; otherwise, contact an HVAC pro for complex setups.
What tools do I need to install a thermostat?
A screwdriver set, a non-contact voltage tester, wire stripper, electrical tape, and the new thermostat. Some installations may require a C-wire adapter.
Just a basic toolbox plus the new thermostat—most common setups fit this.
What if my thermostat won’t power on after installation?
Double-check the power supply at the breaker, verify all connections, and confirm the C-wire if required by your model. If the issue persists, revert to the old thermostat or seek professional assistance.
Make sure power is present and wiring is correct; if in doubt, call for help.
Can I install a smart thermostat with an old furnace?
Many smart thermostats work with older systems, but they often require a C-wire and a compatible HVAC control board. Check the thermostat’s compatibility list and if needed, upgrade wiring.
Most older systems can handle smart thermostats, but you may need extra wiring.
What safety warnings should I know?
Always turn off power at the breaker before touching wiring. Do not work on energized circuits, and keep flammable materials away from the work area.
Power off first and avoid dangerous surroundings.
How can I identify which wire is which?
Use the terminal labels on the old thermostat and annotate each wire with corresponding terminal names. A photograph helps with accurate mapping when wiring the new unit.
Label wires and save a photo to map them correctly.
How long does installation typically take?
Most installations take about 60 to 90 minutes, depending on system complexity and whether a C-wire or adapter is needed.
Plan for about an hour or so, more if wiring is complex.
Watch Video
What to Remember
- Power down before touching any wires to prevent shocks.
- Label and photograph wiring to ensure accurate reconnection.
- Verify thermostat compatibility and C-wire presence before purchase.
- Test heating and cooling after installation to confirm proper operation.