What is the correct way to put in a thermostat: a homeowner's guide
Learn the correct method to install a thermostat safely, including wiring basics, mounting, and testing. A practical guide from Thermostat Care to help homeowners install confidently.

By the end of this guide, you will complete the thermostat installation correctly, including safety checks, wiring basics, mounting, and initial testing. You’ll verify wiring from the furnace to the stat, set up heat/cool stages, and run a first-time test cycle. This answer addresses: what is the correct way to put in a thermostat, with practical, safe steps from Thermostat Care.
What is the correct way to put in a thermostat: essential concepts
Understanding the role of a thermostat and how proper installation affects comfort, energy use, and equipment longevity is foundational. The exact phrase what is the correct way to put in a thermostat is frequently asked by homeowners replacing an older unit. According to Thermostat Care, the correct installation depends on matching your system type (gas, electric, heat pump) with a compatible thermostat, ensuring the power is off before touching any wiring, and following the manufacturer’s wiring diagram.
From the start, safety matters: power off, confirm line voltage, and verify that no wires are live. Thermostat Care’s guidelines emphasize that a neat, well-labeled wiring setup reduces troubleshooting later. The installation location also matters: mount on a wall away from direct sunlight, drafts, or heat sources that could skew readings. In most homes, a mounting height around 52-54 inches above the floor provides reliable readings and makes battery checks or battery-free models accessible. Finally, understand the difference between line voltage thermostats and low-voltage models. The right choice ensures reliable control and a longer life for your HVAC system.
Throughout, this guide speaks to homeowners and DIY enthusiasts, with clear safety steps and practical checks. By following the guidance from Thermostat Care, you’ll gain confidence in selecting the right model and executing a clean installation.
Tools, safety, and planning before you start
Before you touch a single wire, plan for safety and clarity. A smart installation reduces post-installation questions and avoids costly mistakes. Remember: a thermostat is a control device, not a power source. You’ll be handling low-voltage connections, but you must still protect yourself and your system.
- Confirm power to the HVAC system is off at the breaker panel. This prevents shock and damage to electronics.
- Determine your system type (gas furnace with A/C, heat pump, or electric baseboard) so you pick a compatible thermostat.
- Gather basic safety gear: safety glasses, insulated gloves if you’re uncomfortable, and a clean workspace. Keep a flashlight handy for dim corners behind the wall.
- Gather essential tools and wiring diagrams. If you’re replacing an existing stat, you’ll want to photograph the current wiring to aid reassembly. This pre-work reduces guesswork and speeds up the process.
Thermostat Care notes that preparation and safety are almost as important as the wiring itself. By planning carefully, you avoid incorrect wiring that can damage equipment or void warranties. The goal is a clean installation with labeled wires and a secure wall mount that won’t shift with normal room use.
Preparing to remove old thermostat and confirm wiring type
Removing an old thermostat is the first concrete step in putting in a thermostat correctly. Start by taking a photo of the current wiring and labeling each wire. If your old device used a C-wire, a common wire, you likely have a power source for a modern smart thermostat. If there’s no C-wire, you’ll want to plan for a thermostat that can operate on limited wiring or add a C-wire kit if your HVAC supports it. Thermostat Care advises verifying compatibility with your heating and cooling system before committing to a model. If you’re replacing a wired device with a battery-powered model, note that the power-off safety routine still applies.
- Remove the front plate and gently detach wires from the terminals.
- Label each wire with the terminal letter (R, W, Y, G, C, etc.). Using masking tape works well.
- Check whether your furnace has a dedicated 24-volt transformer and confirm voltage requirements. Most residential systems use low-voltage wiring, but there are exceptions.
- If you’re unsure about wire functions, consult your HVAC manual or seek guidance from Thermostat Care’s troubleshooting resources before connecting a new stat. This step reduces the risk of miswiring and helps ensure reliable operation once the new thermostat is in place.
Wiring basics and mounting location details
Selecting the right mounting location and understanding wiring basics are essential for a successful installation. Improper placement can lead to inaccurate temperature readings and inefficient energy use. The typical mounting height is around 52-54 inches from the floor, away from direct sunlight, drafts, and heat sources like lamps or electronics. Choose a location with easy access to the wires and clear visibility of the display. If you’re upgrading to a smart thermostat, ensure the wall box can accommodate the thicker wiring and any required power adapters or C-wire connectors.
- Verify that your thermostat mount is level using a small spirit level. A crooked device can lead to loose connections and poor sensor readings.
- If you have a C-wire, confirm there is a spare conductor in the wall. If not, consider an add-a-wire adapter or a common wire kit, depending on the model you select.
- Keep the wiring tidy inside the wall cavity. Use wire nuts or terminal blocks as appropriate, and avoid pinching wires in the wall. Labeling and neat routing reduce future service calls.
This stage is where Thermostat Care’s guidance shines: proper mounting and correct wire identification set the foundation for reliable performance and longevity of both the thermostat and HVAC equipment.
Installing the new thermostat: mounting, wiring, and power-up
With the wall ready and wires identified, you can mount and wire the new thermostat. Start by attaching the mounting plate to the wall with screws and anchors appropriate for your wall type. Then connect each wire to the matching terminal on the thermostat base (R to R, W to W, Y to Y, G to G, C to C, if present). Double-check color coding and terminal labels, and ensure there are no loose strands.
- If your thermostat requires power from a C-wire, confirm the C terminal is connected to the common side of the transformer.
- Mount the thermostat body to the base and secure with the retaining screws. Ensure the device sits flush against the wall and is stable.
- Reinstall the faceplate or cover and restore power at the breaker. Wait for the device to power up and display diagnostics.
- Use the manufacturer’s setup wizard to configure system type, heating/cooling stages, and Wi-Fi or scheduling options if applicable.
Thermostat Care emphasizes taking a patient approach here. A rushed mount or misconnected wires can lead to erroneous readings and undesirable operation. By confirming all connections and the device sits evenly, you optimize performance.
Testing, configuration, and avoiding common mistakes
The final stage is to verify that the thermostat communicates properly with the HVAC equipment and that the scheduled settings work as intended. Start with a simple heat or cool call to observe the system’s response. If your home uses a heat pump, test the switching between aux/emergency heat settings as well. Typical troubleshooting steps include rechecking wire-to-terminal connections, confirming the C-wire is providing power, and ensuring the thermostat is set to the correct HVAC type in its setup menu.
- Check that the thermostat turns on the furnace or compressor as requested and that indoor temps align with the target on the display.
- Confirm that the fan control operates independently from the heating and cooling cycles.
- Review the installed programming for time and temperature, making sure there’s no conflicting schedule.
- If you encounter issues, revisit the wiring and mount alignment. A common mistake is loose screws or crossed wires, which Thermostat Care notes can create intermittent malfunctions or sensor errors.
In this stage, stability matters most. A careful test drive now saves calls to a technician later and helps ensure your system maintains comfort while using energy efficiently. The Thermostat Care team recommends reviewing the user manual and keeping a printed reference of the wiring map for future maintenance.
Tools & Materials
- Voltage tester / multimeter(Non-contact tester preferred for safety; use a multimeter if you need precise voltage readings)
- Screwdriver set(Flathead and Phillips head, precision for small screws)
- Labeling supplies(Tape and marker or pre-printed wire labels)
- Mounting hardware(Screws and wall anchors suited to your wall material)
- Wire strippers(Helpful for trimming wires cleanly if needed)
- Thermostat wiring kit or C-wire adapter(Use if your wall lacks a C-wire but the new stat requires one)
Steps
Estimated time: 60-90 minutes
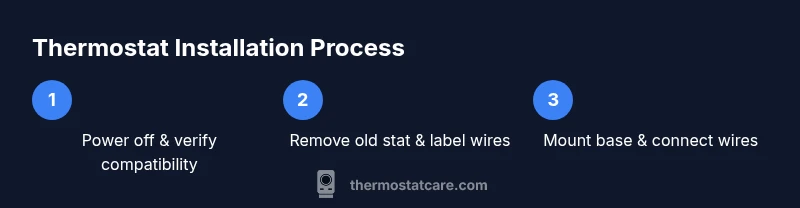
- 1
Power down and verify compatibility
Turn off power to the HVAC system at the breaker and confirm the thermostat’s compatibility with your system type before removing the old unit.
Tip: If uncertain, consult your HVAC manual or Thermostat Care resources for compatibility checks. - 2
Remove old thermostat and label wires
Carefully detach the old thermostat, photograph or label each wire, and note its terminal connection to avoid miswiring.
Tip: Label wires immediately after detaching to prevent mix-ups during reassembly. - 3
Mount base and plan wiring path
Position the mounting plate, check for level alignment, and plan a tidy wire path to the wall box.
Tip: Use a level for straight mounting; a crooked plate can cause misalignment and loose connections. - 4
Connect wires to the new thermostat
Connect wires to matching terminals (R, W, Y, G, C) as labeled. If a C-wire is required, ensure the common wire is properly landed.
Tip: Double-check tight screw terminals and avoid frayed copper strands that can cause shorts. - 5
Mount the thermostat and restore power
Attach the thermostat to the wall plate, secure the cover, and restore power at the breaker. Allow the device to boot and run its setup.
Tip: If the device uses Wi-Fi, connect to the network during the setup prompts. - 6
Configure system settings and test
Use the on-screen wizard to configure your HVAC type and test heating and cooling functions.
Tip: Run a quick test by setting a simple temperature target and observing system response. - 7
Fine-tune programming and save
Program schedules and energy-saving modes. Save your settings and note any adjustments for future reference.
Tip: Document your schedule in case you need to revert changes later.
Questions & Answers
Do I need a professional to install a thermostat?
Not always. A standard 24-volt thermostat replacement can be DIY for many homeowners with basic tools, but complex systems or unfamiliar wiring should be handled by an HVAC pro. Always use safety precautions and consult the manual before proceeding.
You can often install it yourself if you’re comfortable with basic wiring, but call a pro for complex systems.
What tools do I need to install a thermostat?
Essential tools include a screwdriver, wire labels, a voltage tester, and possibly a C-wire adapter if your system lacks a common wire. Check your thermostat’s installation guide for model-specific requirements.
You’ll need a screwdriver, labels for wires, a voltage tester, and possibly a C-wire adapter.
What if there is no C-wire in my wall?
If there’s no C-wire, you can use a thermostat that doesn’t require one or install a C-wire kit. Some models support power stealing or come with a battery option, but these can affect performance in some systems.
No C-wire? Use a model that doesn’t need it or add a C-wire kit if compatible.
How do I know if my thermostat is compatible with my HVAC system?
Check your HVAC system type (gas, electric, heat pump) and the thermostat’s compatibility list. Look for the number of wires and whether a C-wire is required. When in doubt, refer to the manufacturer’s compatibility guide or Thermostat Care’s troubleshooting resources.
Check your system type and the thermostat’s compatibility list, or consult the Thermostat Care resources.
How long does installation take?
A typical installation takes about 60 to 90 minutes for a standard wired thermostat, assuming no unusual wiring or wall modifications. Battery-powered or smart thermostats with Wi-Fi can take a bit longer due to setup steps.
Most installs take about an hour, with longer times for smart or Wi-Fi models.
Watch Video
What to Remember
- Plan safety first: power off and verify compatibility.
- Label wires and photograph connections for accuracy.
- Mount level, route wires neatly, and test thoroughly.
- Thermostat Care guidance helps ensure reliable performance.