Thermostat Replacement: A Homeowner's Step-by-Step Guide
Learn how to replace a thermostat with confidence. This comprehensive guide covers compatibility, wiring, mounting, configuring settings, and testing to ensure reliable climate control from selecting the right model to final testing and maintenance.

Learn how to replace a thermostat safely and correctly. This guide covers choosing a compatible model, wiring the new unit, mounting it on the wall, configuring essential settings, and testing the HVAC system to ensure reliable climate control. Always power down the circuit before starting, verify wire labels, and consult your furnace diagram.
What thermostat replacement means for your home
According to Thermostat Care, thermostat replacement is a practical DIY project for homeowners who want reliable climate control and energy savings. Most modern thermostats are designed to simplify the process, but successful replacement hinges on selecting a compatible model, understanding your HVAC system, and following safe wiring practices. You’ll know it’s time to replace when your current thermostat frequently loses power, reads inaccurately, or fails to connect to Wi‑Fi for smart features. A well-executed replacement can improve comfort, reduce energy waste, and extend equipment life by providing accurate temperature control and stable operation. Before you start, review your system type (gas or electric furnace, heat pump, or air handler), check wire availability (C-wire presence), and confirm that the new thermostat supports the same wiring plan. This planning phase reduces surprises during installation and helps you choose a unit that works with your existing HVAC equipment. Remember, gradual improvements in comfort begin with the right device and a careful, methodical approach.
How to choose the right thermostat for replacement
Choosing the right thermostat is more than picking a pretty display. You’ll need to match the device to your HVAC system, wiring, and your desired features. If you have a traditional forced-air system without a C-wire, consider non‑Wi‑Fi models or those that work on batteries. If you want advanced scheduling, energy reporting, or smart home integration, a Wi‑Fi or Zigbee‑enabled thermostat may be worth the extra effort to install a C-wire. Check compatibility with your furnace or boiler, heat pump mode (including backup heat), and any humidifier or zoning components. Consider energy‑saving features like adaptive recovery and learning algorithms, which help minimize temperature swings. The Thermostat Care analysis shows that choosing a model with clear wiring diagrams and robust app support reduces setup time and post-install issues. Finally, verify the unit’s warranty and compatibility with your home’s electrical load and wiring gauge.
When in doubt, consult the installation guide or contact customer support for a quick compatibility check before purchasing.
Safety and planning before you start
Safety comes first in any thermostat replacement. Begin by turning off the power at the HVAC circuit breaker and, if your system has service disconnects, switch those off as well. Use a non‑contact voltage tester to confirm that no power is present at the thermostat wiring. Prepare your workspace by clearing the wall area, removing dust, and ensuring you have a stable ladder or step stool if necessary. Gather all tools and the new thermostat’s mounting plate, screws, and wiring labels. Plan to photograph the wiring before removing anything so you have a reference for connecting the new unit. If you smell gas or hear unusual noises from the furnace, stop and contact a professional. Safety is not optional—double‑checking power and wiring prevents shocks and equipment damage and keeps you and your home secure.
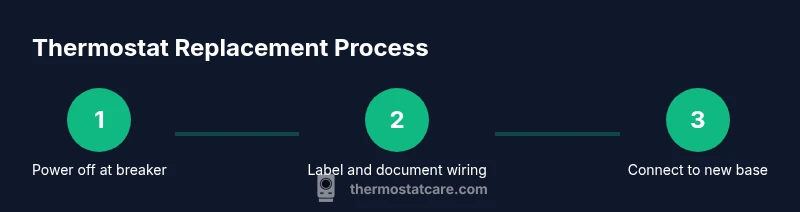
Step-by-step overview of the replacement process
A replacement involves several coordinated actions. Start with power isolation, verify no live wires, and document the existing wiring. Then remove the old thermostat and mount the new base securely. Connect wires to matching terminals on the new thermostat according to the wiring diagram, ensuring tight connections. Attach the display, restore power, and run a basic test to confirm heating and cooling respond correctly. If you’re installing a smart thermostat, complete the Wi‑Fi setup and update any on-device schedules. Finally, recheck temperature readings and calibrate as needed to achieve precise comfort. The key is to stay organized, keep track of each wire, and test frequently as you progress.
Wiring basics: terminals, colors, and configurations
Most thermostats use standard terminals labeled R, C, W, Y, G, and sometimes O/B for heat pumps. R is the power feed, C is the common return, W is heat, Y is cooling, G is the fan, and O/B controls heat pump reversing valves. Wire colors can vary, so never assume color equals terminal—always rely on the wiring diagram and the labels you added. Some homes may require a C-wire or a C-wire adapter to power smart thermostats reliably. If your furnace has a 24‑V control board, you’ll likely use a C-wire for consistency and to prevent dim displays or dropout during operation. With non‑smart thermostats, battery power can suffice, but modern models typically demand a solid 24‑V loop. When wiring, keep wire strands neat, trim excess length, and avoid loose strands that could short against metal plates.
Thermostat installation guides from reputable manufacturers emphasize matching the old terminal letters, not just the colors, to avoid miswiring. If you are unsure about any terminal or wire color, pause and consult the unit’s wiring diagram or seek professional support.
Common mistakes and how to avoid them
Mistakes are common in DIY thermostat replacement, but most can be avoided by careful planning. One frequent error is skipping the power shutdown and testing the wires with a voltage tester, which can lead to shocks or equipment damage. Another pitfall is mislabeling wires or assuming color codes, causing a reversed or cross-connected circuit. Using the wrong base or failing to secure the mounting plate can result in a wobbly device or poor sensor contact, affecting readings. Finally, neglecting to recalibrate after installation can leave you with inaccurate temps or wasted energy. Avoid these by labeling each wire, double-checking model compatibility, and following the wiring diagram step by step. Keep a photo record of the original wiring, and test each function before finalizing the wall plate. If the thermostat requires a C-wire, plan for the wiring upgrade before removing the old device.
After installation: testing and calibration for comfort and efficiency
Testing after installation is essential to confirm everything works as intended. Start by powering the system and verifying that the thermostat turns the heating and cooling on and off as commanded. Check that the temperature readings align with a known reference thermometer in the room. If you installed a smart thermostat, complete the network setup and enable any energy-saving features like adaptive scheduling. Calibrate the temperature sensor if the unit allows; small offsets can accumulate, affecting comfort and energy use. Finally, monitor for a few days to ensure the system responds reliably to manual and scheduled changes. Keeping a short log of readings helps identify discrepancies early and confirms that the replacement delivers the expected performance.
When to call a professional for thermostat replacement
While many homeowners can complete a thermostat replacement, certain situations warrant professional help. If your system uses a high‑voltage wiring approach, has a non-standard control board, or if you encounter a missing C-wire and cannot safely add one, a licensed technician is advisable. Similarly, if your furnace or air handler is unfamiliar or if you smell gas, call a pro immediately. If your new thermostat requires complex wiring configurations, or you’re unsure about compatibility with a heat pump, a professional can ensure optimal integration and warranty protection. Lastly, if the project involves retrofitting the wall cavity or manipulating HVAC wiring in tight spaces, hands-on professional support may save time and reduce risk.
Authority sources and further reading
For additional guidance and safety considerations, consult credible sources that discuss thermostat installation and energy efficiency:
- Energy.gov: Thermostats and energy savings guidelines (https://www.energy.gov/eere/buildings/articles/thermostats-and-energy-savings)
- ENERGY STAR: Thermostats product overview and installation tips (https://www.energystar.gov/products/heating_cooling/thermostats)
- CPSC consumer safety information and electrical safety basics (https://www.cpsc.gov/Safety-Education)
Tools & Materials
- New thermostat compatible with your HVAC system(Ensure the model supports your system type (gas, electric, heat pump) and has the required features (C-wire, Wi‑Fi, etc.).)
- Screwdriver set (Phillips and flathead)(Needed to mount the base and detach the old thermostat.)
- Non-contact voltage tester(Verify no live voltage before touching wiring.)
- Wire labels or painter’s tape(Label each wire before disconnecting it.)
- Photo documentation (camera or smartphone)(Capture wiring configuration for reference.)
- Wire nuts and electrical tape(Secure and insulate wire terminations.)
- Mounting plate and screws(To properly align and secure the new thermostat base.)
- Step ladder or sturdy stool(Safely reach the wall and device height.)
- Batteries (if the thermostat uses battery power)(Some models require AA/AAA or coin batteries.)
Steps
Estimated time: 60-90 minutes
- 1
Cut power to HVAC circuit
Go to your main electrical panel and switch off the circuit that powers the HVAC system. Use the voltage tester to confirm no voltage on the thermostat wires before touching them. This step prevents shocks and equipment damage.
Tip: Double-check the correct breaker; HVAC circuits can share spaces with other devices. - 2
Remove the old thermostat cover
Gently pry off the thermostat cover to expose the wiring and mounting screws. Keep the screws in a safe place for reattachment. Avoid forcing the cover if it feels stubborn.
Tip: Take care not to pull wires loose during removal. - 3
Photograph the wiring configuration
Use your camera to document the current wiring layout, including which wire goes to each terminal. Clear photos save time when wiring the new thermostat and reduce guesswork.
Tip: Capture multiple angles—front, side, and the back with the terminal markings visible. - 4
Label wires before disconnect
Label each wire with its terminal letter (R, C, W, Y, G, etc.) to ensure you reconnect correctly on the new device. If you can’t label, mark them with color-coded tape.
Tip: Label both wire ends you will disconnect to avoid confusion. - 5
Disconnect old thermostat from wall
Loosen mounting screws and carefully pull the thermostat body away from the wall. If wires resist, recheck the terminal connections before applying more force.
Tip: Keep track of each wire as you detach it to prevent mix-ups. - 6
Mount the new thermostat base
Place the new base on the wall and level it before tightening screws. A secure base ensures accurate temperature sensing and prevents wire movement.
Tip: Use a level to ensure the base sits perfectly straight. - 7
Connect wires to matching terminals
Attach each labeled wire to the corresponding terminal on the new thermostat based on your photos and labels. Ensure wire tips are tight and fully inserted.
Tip: Double-check the wiring diagram from the manual before finalizing connections. - 8
Attach display and restore power
Attach the thermostat display and turn the power back on at the breaker. Confirm that the unit powers up and displays the screen properly.
Tip: If the screen stays blank, recheck power connections and C-wire presence. - 9
Configure settings and perform a test
Follow the setup wizard to configure date, time, and system type. Run a test to verify heating and cooling respond to commands.
Tip: Test multiple scenarios (cooling, heating, fan) to ensure complete control. - 10
Wi‑Fi setup and calibration
If you installed a smart thermostat, connect it to Wi‑Fi and update firmware. Calibrate the temperature sensor if the option is available.
Tip: Keep the device within strong Wi‑Fi range to maintain a stable connection.
Questions & Answers
What is thermostat replacement?
Thermostat replacement involves removing an old thermostat and installing a new model that is compatible with your HVAC system. It typically improves reliability, comfort, and energy efficiency when done correctly.
Thermostat replacement means swapping out an old thermostat for a new one that works with your heating and cooling system to improve comfort and energy use.
Is thermostat replacement DIY-friendly?
Many homeowners can replace a thermostat themselves, provided they can safely handle basic wiring and follow the manufacturer’s instructions. If you’re unsure about wiring or system compatibility, consider hiring a professional.
You can usually do it yourself if you’re comfortable with basic wiring. When in doubt, get help from a professional.
How do I know if my thermostat is compatible with my HVAC system?
Check the thermostat’s compatibility list for your furnace or heat pump. Look for support for your system type, the C-wire requirement, and any Wi‑Fi features. If you have a multi‑stage system, confirm support for multiple stages.
Look for compatibility notes in the manual; make sure it works with your system’s type and stages.
Do smart thermostats require a C-wire?
Many smart thermostats need a C-wire to provide continuous power, but some models offer power stealing or battery options. If you don’t have a C-wire, you may need a compatible adapter or professional wiring upgrade.
Most smart thermostats need a C‑wire for reliable power, though some models work without it with limitations.
How long does replacement typically take?
A straightforward replacement usually takes about 60–90 minutes for a DIY installer, including wiring and setup. More complex setups with smart features or wall modifications may take longer.
About an hour to an hour and a half for a standard replacement, longer if you’re adding smart features.
What safety precautions should I follow?
Always cut power at the breaker before touching wiring, use a voltage tester, and avoid working in wet conditions. If you smell gas or sense a hazard, pause and call a professional.
Turn off power, test for voltage, and work in dry conditions. If unsure, seek professional help.
Watch Video
What to Remember
- Verify power is off before touching wiring
- Match wires to terminals using labels and photos
- Secure the mounting base for accurate sensor readings
- Configure and test all modes before finalizing
- Consider a smart thermostat only if your wiring supports it