AC Thermostat Replacement: A Homeowner's Step-by-Step Guide
Learn how to safely replace an AC thermostat with practical steps, essential tools, and wiring basics. Includes compatibility checks and post-install testing for efficient cooling.

This guide helps you perform an a c thermostat replacement safely and effectively. You’ll verify system compatibility, power down your HVAC, map wires, install a compatible thermostat, and test temperature control and cooling performance. By following these steps, homeowners can improve comfort, energy efficiency, and reliability. The Thermostat Care team notes that careful wiring and correct configuration are the biggest factors in a successful replacement.
Why replacing your AC thermostat matters
A well-functioning thermostat is the control center of your cooling system. An aging or malfunctioning unit can lead to uneven cooling, delayed responses, and wasted energy. If you’re planning a c thermostat replacement, you’re taking a practical step toward more precise temperature control and better efficiency. According to Thermostat Care, a proactive approach to replacement reduces comfort issues and helps your HVAC run more consistently across the day.
When you upgrade, you’ll often gain features such as programmable schedules, remote access, and smarter fault detection. A modern thermostat can adjust cooling cycles based on occupancy, weather, and your home’s insulation, which translates into fewer temperature swings and lower utility bills over time. However, the benefits depend on choosing a model that matches your system and wiring setup.
Before you buy, verify that your existing furnace or air handler uses a 24-volt control circuit and that the thermostat is compatible with your cooling equipment (central AC, heat pump, or packaged units). You’ll also want to decide between a programmable thermostat and a smart thermostat with Wi‑Fi connectivity. While a smart thermostat offers remote control and learning capabilities, not all homes will see meaningful savings if Wi‑Fi access is limited or if zoning is complex.
In addition to comfort and efficiency, a proper a c thermostat replacement can help with system diagnostics. Many newer thermostats provide energy usage data, fault codes, and maintenance reminders, which can guide routine servicing. The Thermostat Care team emphasizes planning your replacement with clear wiring maps and system-specific settings to avoid common pitfalls, such as miswired circuits or incorrect heat-cool configurations. A careful start sets the stage for a smooth, reliable cooling season.
Compatibility and choosing the right model
Compatibility is the foundation of a successful a c thermostat replacement. HVAC systems differ in the number of wires, the presence of heat pumps, and whether you have multiple zones. Start by inspecting the current wiring at the wall: do you see separate R/Rc/Rh terminals, or is there a single R? Are Y (cooling), G (fan), W (heat), and C (common) present? Many traditional thermostats rely on two wires, but a modern smart thermostat may demand a dedicated C-wire for reliable power.
Check the thermostat’s compatibility list for your equipment type. If you have a heat pump, confirm that the model supports heat pump cooling and auxiliary heat, and note whether you’ll need a changeover relay. If your system uses multiple stages, confirm the thermostat supports 2-stage cooling and 1-stage heating, or 2-stage heating if your system calls for it. Finally, decide between a programmable thermostat or a Wi‑Fi-enabled smart model. While both can lower energy use, smart models offer scheduling, occupancy learning, and app-based control that can maximize efficiency in the right home.
Wiring considerations also matter for the C-wire. If your current setup lacks a C-wire, you may need to upgrade your wiring or use a compatibility adapter. If you’re unsure, consult your HVAC manual or call a professional. The bottom line is to ensure the thermostat you choose is compatible with your furnace and air conditioner’s control signals, voltage, and power source.
Safety and preparation before you begin
Safety first: cutting corners here can damage equipment or cause injury. Power down the circuit at the breaker and turn off the thermostat’s power from the furnace control board if possible. Use a non-contact voltage tester to confirm there is no live current before touching wires. Remove the thermostat cover and set it aside where you won’t lose it. Take a moment to snap a photo of the existing wiring and label each wire with its function. This extra step will save you time when wiring the new device.
Clear the workspace, remove the cover plate if needed, and loosen the mounting screws without forcing. If you’re replacing a bulky unit into a tight space, use a step stool and ensure you can comfortably reach all wires without overreaching.
Wiring basics you should know
Most houses use a standard 24‑volt control system for the thermostat. The common wires are R (24V hot), C (common), Y (compressor), G (fan), and W (heat). Some setups have Rc and Rh bridged, but many modern thermostats handle a single R. If your thermostat supports dual power sources, you may need to bridge Rc and Rh, or choose a model that uses a single R with internal power routing. Do not assume color codes; wire colors can vary by installer. Instead, rely on the wire labels or the photo you took earlier.
When connecting the new thermostat, attach each wire to the corresponding terminal on the new base. If you’re missing a wire, don’t guess—leave the terminal empty unless the model explicitly supports a power-sharing option. Tighten terminal screws securely, but avoid overtightening, which can damage the terminal. If the new thermostat requires a C-wire and yours does not have one, you may need to run a dedicated wire or use a compatible adapter.
Installation steps at a glance
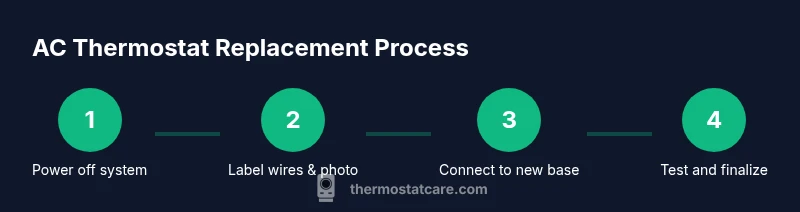
Note: The STEP-BY-STEP section provides precise actions with timing; here is a high-level overview to orient you before you begin.
- Power down and verify safety. 2) Document existing connections. 3) Remove old thermostat and base. 4) Prepare the wall and mount the new base. 5) Attach wires to the correct terminals. 6) Attach the faceplate and install batteries if needed. 7) Power on, program, and test.
Thermostat Care's verdict
The Thermostat Care team recommends choosing a model that matches your system’s wiring and power needs, performing careful wiring and testing, and using a C-wire when possible for stability. For those seeking energy savings, consider a Wi‑Fi or smart thermostat with compatible features and a reliable app, but only if your home supports it. If in doubt, consult a professional.
Authority sources and reading
This section lists authoritative sources to support the guidance in this article. For homeowners and DIY enthusiasts, credible information can help verify compatibility, wiring practices, and safe installation:
- Energy.gov: Energysaver thermostats guidance (https://www.energy.gov/energysaver/thermostats)
- ASHRAE: Standards and best practices (https://www.ashrae.org)
- NIST: Thermostats and energy efficiency (https://www.nist.gov)
- For additional perspectives, you can also review manufacturer manuals for your specific thermostat model.
Tools & Materials
- Compatible thermostat (24V heating/cooling system)(Ensure model supports your system type (single-stage vs multi-stage; heat pump).)
- Non-contact voltage tester(Verify there is no live current before touching wires.)
- Screwdrivers (Phillips and flat-head)(Have a small precision set for terminal screws.)
- Wire labels or masking tape(Label each wire’s function before disconnecting.)
- Wire stripper/cutter(Trim wires cleanly to ensure solid terminal contact.)
- Replacement faceplate/backplate(Keep the wall outlet flush with the wall and aligned.)
- Digital multimeter(Optional: test voltage at terminals if you’re unsure.)
- Step stool or ladder(Use for high-placed thermostats to avoid overreaching.)
- C-wire adapter (if needed)(Use only if your new thermostat requires a C-wire and none is present.)
Steps
Estimated time: 60-90 minutes
- 1
Power down and verify safety
Turn off power at the breaker for the HVAC system and, if accessible, at the furnace control. Use a non-contact tester to confirm no current is present before touching wires.
Tip: Always test for voltage before starting work to prevent shocks. - 2
Document current wiring
Take clear photos from multiple angles of the existing connections. Label each wire with its function to aid the new installation.
Tip: A labeled wire map reduces guesswork during reassembly. - 3
Remove the old thermostat
Carefully unscrew the mounting plate and lift the thermostat from the wall. Do not yank the wires; keep them organized and accessible.
Tip: If wires are sticky, gently loosen clamps to avoid wire damage. - 4
Map wires to the new base
Match each labeled wire to the corresponding terminal on the new thermostat base. Double-check the R and C connections before wiring.
Tip: If you’re missing a wire, skip that terminal unless the model requires it. - 5
Mount the new base
Position the base, level it, and secure it with screws. Make sure the wall is clean and the base sits flush against the surface.
Tip: Avoid overtightening screws to prevent cracking the wall plate. - 6
Reconnect power and configure settings
Attach the wires to the terminals on the new unit, restore power, and begin with basic temperature settings. If your model supports Wi‑Fi, follow the on-screen setup steps.
Tip: Enter your location for accurate weather-based adjustments when available. - 7
Test system and finalize
Run cooling and heating modes to ensure the system responds correctly. Observe whether the thermostat engages the compressor and fan appropriately.
Tip: Make incremental adjustments and watch for any unusual behavior.
Questions & Answers
Do I need a professional to replace an AC thermostat?
For straightforward, single-stage systems with standard wiring, a capable homeowner can perform the replacement. If you have a heat pump, multiple stages, or unfamiliar wiring, consider consulting a professional.
For straightforward systems, a confident homeowner can replace the thermostat. For heat pumps or complex wiring, seek a professional.
What should I do if the thermostat display is blank after installation?
First check that power is restored and the device has fresh batteries if required. If power is present but the display remains blank, recheck wiring or try a reset per the manufacturer’s instructions.
If the display is blank after installation, ensure power is on and batteries are fresh; recheck wiring if needed.
Can I reuse my old wires with a new thermostat?
Yes, as long as the wires match the terminals on the new thermostat and the C-wire is present if required. If a needed wire is missing, you may need to add one or use a compatible adapter.
You can reuse wires if they fit the new thermostat and you have the required C-wire; otherwise, add or adapt as needed.
How do I know if the thermostat is compatible with my AC?
Consult the thermostat’s compatibility list and the HVAC unit’s manual. Ensure the system operates on the same voltage (typically 24V) and that the model supports your cooling type (central AC, heat pump, etc.).
Check the model’s compatibility list and your HVAC manual to ensure 24V operation and proper cooling support.
What is the best thermostat for energy savings?
A Wi‑Fi or smart thermostat with occupancy sensing and efficient scheduling can save energy, but only if your home supports its features and you actively use them.
Smart thermostats with good scheduling and occupancy features can save energy if your home supports them.
Watch Video
What to Remember
- Power down before touching wires
- Choose a compatible thermostat with proper wiring
- Label wires and photograph connections
- Test and verify performance after installation