Installing a Honeywell Thermostat: A Practical Guide
A complete, safety-first guide to installing a Honeywell thermostat, with wiring basics, setup steps, and troubleshooting tips for homeowners and DIY enthusiasts.

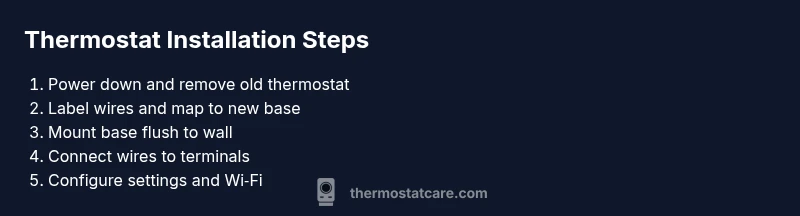
By following these steps, you will successfully install a Honeywell thermostat, verify compatibility, and connect it to your HVAC system and Wi‑Fi. Start by turning off power, removing the old unit, wiring the new thermostat to the correct terminals, and configuring settings before testing temperature control. This covers safety checks, wiring basics, and setup for typical HVAC configurations.
Why Installing a Honeywell Thermostat Matters
According to Thermostat Care, installing honeywell thermostat correctly is a smart investment for comfort, energy efficiency, and long-term home automation. A well-mounted, properly wired thermostat reduces heat and cooling fluctuations, ensures accurate readings, and provides reliable control of HVAC equipment. For many homeowners, Honeywell models offer proven reliability, robust app ecosystems, and compatibility with a wide range of systems, from single-stage furnaces to multi-stage heat pumps. In practice, the installation sets the stage for features like adaptive schedules, geofencing, and remote diagnostics that can drive meaningful energy savings over time. Because Honeywell devices emphasize standard wiring conventions and clear labeling, the risk of miswiring drops significantly when you follow the manufacturer’s wiring diagrams and safety guidelines. This is not just a DIY project; it is a small upgrade that can simplify maintenance tasks, reduce energy waste, and improve comfort in every room. The Thermostat Care team finds that homeowners who plan the installation, verify compatibility with their HVAC equipment, and respect power-disconnect procedures report smoother setups and fewer post-install hiccups. If you have older ductwork or unconventional systems, plan extra time for compatibility checks, potential wire adaptors, and adjustments to control sequences to prevent unexpected cooling or heating cycles.
Key Features and Compatibility
Honeywell thermostats bring a versatile feature set designed for a range of HVAC configurations. Look for models with adaptive scheduling, smart home integration, remote access, and energy-tracking dashboards. The Thermostat Care team notes that most Honeywell units support common wiring schemes (R, C, W, Y, G) and provide clear on-screen prompts to guide you through the setup. Before you buy, confirm your system type (single-stage, multi-stage, heat pump, or humidified systems) and check the compatibility list for your chosen model. If you rely on a forced-air furnace, a conventional split system, or a heat pump with auxiliary heat, pick a Honeywell model that explicitly lists compatibility with those configurations. Wireless connectivity, app-based control, and compatibility with voice assistants add convenience. Remember that some older homes use nonstandard wire colors or a C-wire that isn’t immediately obvious; use labeling guidance from the manufacturer and your own notes to map wires correctly. Consistency between the HVAC control board and thermostat input reduces miscommunication and improves performance. For best results, duplicate the matching process on paper or a photo so you can verify wiring before final assembly.
Based on Thermostat Care analysis, aligning features to your daily routines and home network enhances reliability and reduces setup errors during installation.
Safety and Preparation
Safety comes first in any thermostat installation. Begin by turning off power at the circuit breaker and, if possible, at the furnace or air handler disconnect. Use a non-contact voltage tester to verify there is no voltage present on the wires you will touch. Gather your tools and materials in advance to minimize live wiring exposure. Work on a dry, level surface and avoid mounting on loose or crumbling drywall. If you live in a multi-story home, consider having a helper to hold components while you work. After turning off power, wait a few minutes for capacitors to discharge, especially in systems with longer wire runs. Keep metal jewelry away from terminals and use insulated tools. If you’re uncertain about any step, pause and consult the Honeywell installation guide or a licensed technician. The Thermostat Care team emphasizes that safety shortens the overall installation time and prevents damage to the HVAC system.
Understanding Wiring and Terminology
Wiring a Honeywell thermostat correctly relies on recognizing common terminal labels (R, C, W, Y, G, sometimes O/B for heat pumps). R is the 24-volt power supply; C is the common wire that powers many smart units; W controls heat; Y controls cooling; G controls the fan. In heat-pump configurations, you may see O or B representing reversing valve operation. If your existing thermostat used a battery and no C-wire, you may still operate a basic model, but many smart thermostats require C to maintain stable power. When labeling wires, label each conductor according to the terminal it’s connected to and preserve the original color associations only as a guide. Take a photo of the back of the old unit and the wiring before disconnecting anything; this reference helps during the mounting and wiring steps. If a wire is loose or not clearly labeled, it’s safer to pause and re-check the wiring diagram before proceeding.
Authority Sources
Competent installation relies on best practices endorsed by leading energy and standards organizations. For further reading on thermostats, see:
- https://www.energy.gov/energysaver/thermostats
- https://energystar.gov/products/heating_cooling/thermostats
- https://nist.gov/topics/electrical-safety (general electrical-safety guidance for DIY work)
Common Pitfalls and How to Avoid Them
Common mistakes include skipping power disconnection, mislabeling wires, ignoring compatibility requirements, and failing to secure the base plate flush against the wall. To avoid these, double-check the wiring plan, use the original backplate as a reference, and ensure the mounting surface is clean and level. If you encounter a blinking screen after power restoration, verify that all wires are seated properly and that the power supply is delivering 24 volts to the R terminal. Take your time to confirm that the new thermostat is compatible with your HVAC system and that the app configuration aligns with your device platform. By anticipating these issues, you can reduce the need for post-install corrections and ensure a stable, efficient system.
What to Do After Installation
After mounting and wiring the thermostat, configure the device in its initial setup: date/time, system type (heat/cool, single-stage or multi-stage), and any preferred preferences such as language and units. Connect the thermostat to your home Wi-Fi and install the companion app to enable remote control and firmware updates. Run a quick test by switching modes (heat, cool, auto) and observing the temperature response on the display. If you use a heat pump, verify reversing valve operation and auxiliary heat behavior. Document your wiring map for future reference, and schedule periodic checks to ensure firmware is up to date and the sensor readings remain accurate.
Tools & Materials
- Screwdriver set (Phillips and flat-head)(Phillips #2 typically fits most thermostat mounting screws)
- Voltage tester / non-contact tester(Verify power is off before touching wires)
- Wire stripper/cusher(Trim and prepare wires neatly)
- Labeling supplies (masking tape, marker)(Label wires clearly before removal)
- Pencil and level(Mark and align mounting holes for flush installation)
- Mounting screws and wall anchors(Use appropriate anchors for drywall or masonry)
- Honeywell thermostat model with C-wire support(Confirm model compatibility with your HVAC system)
- Smartphone or tablet for app setup(Optional for Wi-Fi configuration and remote access)
Steps
Estimated time: 60-90 minutes
- 1
Power down and safety check
Switch off power at the main breaker and at the HVAC disconnect. Confirm there is no voltage using a voltage tester. This prevents electric shock and protects control circuitry during removal of the old thermostat.
Tip: If you’re unsure about the breaker, label the circuit and test with a non-contact tester before touching wires. - 2
Remove the old thermostat
Carefully remove the thermostat faceplate and mounting screws. Take a high-resolution photo of the wiring before you disconnect anything. Save the screws and mounting plate for the new unit if possible.
Tip: Keep the old wires attached until you’ve mapped them to the new base to avoid mis-wiring. - 3
Label and map wires
Label each wire with its terminal (R, C, W, Y, G, etc.) using masking tape. If a wire isn’t clearly labeled, trace it back to the furnace control board or consult the wiring diagram. This mapping helps prevent mistakes when you connect the new thermostat.
Tip: If you’re unsure about a wire, stop and verify with the diagram instead of assuming color codes. - 4
Verify compatibility and plan wiring
Double-check that your Honeywell model supports your system type (single-stage, multi-stage, heat pump, etc.). Review the wiring plan against your labeled wires and confirm you have a C-wire if the model requires it.
Tip: Use the manufacturer’s compatibility guide and note any extra accessories needed for features like heat pumps. - 5
Mount the base plate
Position the base plate on the wall and ensure it’s level. Mark the screw locations, drill pilot holes if necessary, and insert anchors. Secure the plate so it sits flush against the wall.
Tip: A level helps prevent drafts and inaccurate readings caused by a tilted unit. - 6
Connect wires to terminals
Insert each labeled conductor into the matching terminal on the new thermostat base. Ensure the connection is snug and the wire is fully inserted without fraying. Do not force wires that resist seating.
Tip: If a terminal is marginal, re-strip the wire to remove damaged insulation and reinsert. - 7
Attach the thermostat body and power up
Attach the thermostat body to the base plate and reinsert screws. Restore power at the breaker and watch for the thermostat display to light up. If there’s no display, recheck wiring and power connections.
Tip: If the screen stays dark, re-check the R and C connections first. - 8
Configure settings and connect to Wi‑Fi
Walk through the on-screen setup: date/time, system type, temperature units, and Wi‑Fi network. Install the companion app if available and log in to enable remote access and firmware updates.
Tip: Use a 2.4 GHz network if your router supports it; some devices struggle on 5 GHz alone. - 9
Test heating and cooling cycles
Set the thermostat to heat, cool, and auto modes to verify the system responds correctly. Check for consistent temperature readings and verify any auxiliary heat or reversing valve operation if you have a heat pump.
Tip: Observe the system for a full cycle to ensure stability before finalizing the setup. - 10
Document and finalize
Capture a final photo of the wiring map and note the model and firmware version. Store this information with your home maintenance records for future reference.
Tip: Keep a spare label kit handy for future changes.
Questions & Answers
Do I need a C-wire for a Honeywell thermostat?
Many Honeywell smart thermostats require a C-wire for reliable power, but some models can operate with batteries or a power extender kit. Check your model’s specifications and your HVAC wiring before proceeding.
Most Honeywell smart models need a C-wire for reliable power; if you don’t have one, use a model that supports batteries or a power extender kit.
Can I install a Honeywell thermostat myself?
If you’re comfortable with basic electrical work and follow the installation guide step-by-step, you can install it yourself. If you encounter unfamiliar wiring or complex heat pump configurations, consider professional assistance.
Yes, many homeowners install it themselves if you follow the manual and stay within your comfort zone.
What tools do I need for installation?
Common tools include a screwdriver set, voltage tester, wire strippers, labeling supplies, and a level. Having mounting screws and wall anchors is also important for a secure install.
You’ll typically need a screwdriver, a tester, wire strippers, labels, and a level.
How do I connect Wi-Fi to the Honeywell thermostat?
Use the thermostat’s setup wizard or the companion app to connect to your home network. Most models use a 2.4 GHz network for reliable communication.
Use the on-device setup or app to connect to your home Wi-Fi, usually on a 2.4 GHz network.
What if the thermostat screen is blank after install?
A blank screen usually means power or wiring issues. Double-check the R and C connections and confirm a powered circuit at the breaker before troubleshooting further.
If the screen stays blank, verify power and wiring first, then recheck the connections.
How do I know my Honeywell model is compatible with my HVAC?
Consult the model’s compatibility list and your furnace/AC specifications. Look for terms like single-stage, multi-stage, and heat pump support to ensure proper operation.
Check the model’s compatibility guide to confirm it supports your HVAC type.
Watch Video
What to Remember
- Plan wiring and compatibility before you start
- Safety first: disconnect power and verify no voltage
- Label wires clearly to prevent miswiring
- Test heating and cooling cycles after installation