Install Thermostat: A Practical Step-by-Step Guide
Learn how to install a thermostat safely and correctly. This guide covers model selection, wiring basics, mounting, and initial setup for reliable comfort and energy savings.

You will learn how to install a thermostat safely and correctly, covering model selection, turning off power, wiring basics, mounting, and initial setup. This quick guide outlines essential preparation, common compatibility checks, and straightforward steps to get your HVAC system running with enhanced comfort and energy efficiency. According to Thermostat Care, you’ll also find practical safety tips for DIY installers.
Why installing a thermostat matters for home comfort and energy savings
Upgrading to a modern thermostat is one of the most cost-effective DIY improvements a homeowner can make. A properly installed device can adapt to your schedule, reduce wasted energy, and improve comfort by maintaining consistent temperatures. The Thermostat Care team notes that the right thermostat configuration can lower energy usage when paired with smart scheduling and occupancy features. Before you begin, define your goals: do you want simple control, smart features, or advanced energy reports? This section explains the why behind the install and sets realistic expectations. By understanding how a thermostat interacts with your furnace or heat pump, you unlock features such as adaptive recovery, hold modes, and remote control via mobile apps. If you rent or live in a multi-unit building, check for wiring constraints or building policies. As a DIYer, you’ll gain not only comfort improvements but also confidence in maintaining your system. Safety matters: never work on live circuits and always power down the HVAC system before touching wires. This foundation helps you approach the project with clarity and confidence.
Understanding thermostat compatibility and types
Thermostats come in several families, and choosing the right one starts with your HVAC system. Most homes use low-voltage systems with a junction box behind the wall plate; line-voltage thermostats are used in some older buildings. A modern digital or smart thermostat typically requires a C-wire for reliable power, though some battery-powered models work without one. Heat pumps, gas furnaces, and electric furnaces each have wiring conventions (G for fan, Y for cooling, W for heat, R for power, C for common, and O/B for heat pump reversing). Before buying, verify compatibility with your equipment and the thermostat’s mounting base. If you have an older system with unusual wiring, you may need a compatibility adapter. Always label wires before disconnecting and consider taking a photo for reference. In short, confirm the HVAC type, confirm voltage, and ensure the thermostat’s compatibility matrix aligns with your wiring.
Planning before you buy: features to prioritize
To maximize returns, plan features that align with your goals. If you want remote access and energy reports, look for a Wi‑Fi enabled model with a companion app. If you prefer simple on/off control, a programmable or non- Wi‑Fi model may suffice. Consider compatibility with voice assistants (Alexa, Google Assistant) and whether the thermostat supports geofencing, occupancy sensing, and learning algorithms. Check the wiring requirements and whether the unit supports your current C-wire setup. Also evaluate the display size, button layout, and software updates. Budget for installation complexity and professional service if needed. Thermostat Care analysis suggests that homeowners who optimize scheduling in smart thermostats tend to see more consistent comfort and noticeable energy savings.
Tools, safety, and prepping the wall
Begin with safety: cut power to the HVAC system at the main breaker to prevent shocks. Gather essential tools and materials so you’re not hunting mid-task. Prepare labels for each wire, a notebook to record the old wiring configuration, and a camera to capture before/after wiring. Remove any faceplate screws and inspect the wall for damage or loose wiring. If you’re installing in a plaster wall or behind a painted surface, you may need a small drill or drywall patch. Keep a clear workspace; a tidy area reduces mistakes and helps you reassemble components correctly. If you’re unsure about wire color conventions, pause and consult the thermostat’s wiring diagram or Thermostat Care resources.
Wiring basics: C-wire, G, Y, W, and O/B specifics
Wiring is the heart of a successful installation. Typical low-voltage thermostats use R (power), C (common), G (fan), Y (compressor), and W (heat). Heat-pump configurations use O/B for reversing valves. If your old thermostat works without a C-wire, you may still be able to install a smart thermostat that can operate on batteries or power stealing. When labeling wires, note their terminal letters and colors. Use the wiring diagram from the thermostat manufacturer and cross-check with your HVAC equipment manual. If you’re missing an essential wire, a C-wire adapter or a professional install may be necessary. Always double-check that each wire is firmly connected and that there are no stray strands; loose connections are a frequent source of problems.
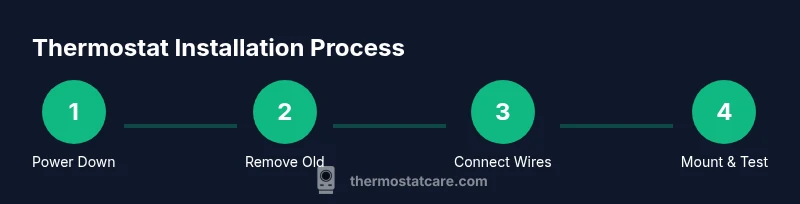
Step-by-step overview to install a thermostat
A standard install follows a consistent sequence: power down the HVAC, remove the old thermostat, label wires, mount the new base, connect wires to the appropriate terminals, attach the faceplate, restore power, and configure the device. If your system is a heat pump or has a specialized configuration, follow the specific terminal mapping in the thermostat manual. For Wi‑Fi models, complete the setup in the companion app and connect to your home network. If you encounter a mismatch, recheck the wire-to-terminal mapping and ensure the power supply is stable. The outline below gives you a framework to plan the actual wiring steps.
Mounting the thermostat base and making connections
Attach the mounting plate level and flush against the wall; use the provided screws and anchors if needed. Thread the labeled wires through the base’s wiring hole and connect them to the corresponding terminals. Tighten screws securely, ensuring no insulation is under the terminal clamp. Recheck wire lengths to prevent tension, then snap the display or faceplate into place. This step benefits from a second set of eyes; if possible, have a buddy compare the wiring to the diagram while you tighten screws.
Setup, calibration, and zone-specific considerations
Power the unit back on and complete the initial setup prompts: language, temperature units, system type (gas/oil/electric/heat pump), and fan behavior. If you have a heat pump or multi-stage system, enable existing modes and configure O/B reversing valves. Calibrate temperature readings if the thermostat offers a calibration option; use an external thermometer near the thermostat for reference. Some homes benefit from setting a conservative hold or schedule to ease acclimation. For households with multiple zones, ensure zoning controls are synchronized and that each zone is properly wired to its respective thermostat.
Troubleshooting common issues post-installation
If the screen powers on but commands don’t respond, re-check the wiring and power source. If the device won’t connect to Wi‑Fi, verify your router settings and enter the correct password. An unresponsive touchscreen or lagging performance can indicate a weak or unstable power supply; consider a C-wire solution if the thermostat is battery-powered. If the HVAC system runs constantly or fails to heat/cool, revisit the terminal mapping and confirm the thermostat’s system type setting matches your equipment. When in doubt, consult Thermostat Care resources or contact a professional for a safety-first assessment.
Tools & Materials
- New thermostat (with mounting plate)(Choose a model compatible with your HVAC system and home network (if smart).)
- Screwdriver set (Phillips #2 and flathead)(Needed to remove old device and secure the new base.)
- Non-contact voltage tester(Verify power is off before touching wires.)
- Wire stripper/cuncher(Prepare wires cleanly and trim to appropriate length.)
- Label tape or wire labels(Label wires to map them to new terminals.)
- Electrical tape(Seal exposed conductors and protect exposed wire ends.)
- Notebook or photo device(Document original wiring before removal.)
- Wi‑Fi network access (SSID/password) or mobile hotspot(Required for smart thermostats with Wi‑Fi.)
- HVAC system manual(Helpful for cross-checking wiring and system type.)
Steps
Estimated time: 60-90 minutes
- 1
Power down HVAC
Turn off the breaker feeding the HVAC system and confirm no power is present with a tester. This reduces the risk of shock or equipment damage during wiring.
Tip: If you’re unsure which breaker controls the HVAC, switch off the main panel and test the system after the power cut. - 2
Remove old thermostat
Carefully unscrew the wall plate and pull the thermostat from the wall to expose wiring. Take note of any jumpers or special configurations.
Tip: Keep screws in a labeled container so you don’t lose them later. - 3
Label wires
Label each wire according to its terminal (R, C, G, Y, W, O/B). A photo can help you map wires accurately to the new base.
Tip: If a wire is unconnected, mark it as 'not used' to avoid confusion later. - 4
Mount the new base
Position the mounting plate level and attach with screws. Ensure the plate sits flush against the wall before wiring.
Tip: Use a small level for precision; misalignment can affect display and operation. - 5
Connect wires to the new base
Insert each wire into the corresponding terminal on the new thermostat base. Tighten terminals securely without crushing the wire.
Tip: Double-check that no stray strands touch adjacent terminals. - 6
Attach faceplate and power up
Snap the display onto the base and restore power at the breaker. Wait for the thermostat to boot and begin initial setup.
Tip: If the screen stays blank, recheck the wire connections and ensure power is restored. - 7
Configure system settings
Set your system type (gas/oil/electric/heat pump), temperature units, and preferred scheduling. If equipped, connect to Wi‑Fi and register for updates.
Tip: Aim to complete basic settings before running tests for comfort consistency. - 8
Test HVAC operation
Run a quick cooling and heating cycle to verify operation. Confirm that fans engage and temperature readings respond to adjustments.
Tip: If you encounter incorrect mode behavior, re-check the O/B and system type mappings.
Questions & Answers
Do I need to hire an electrician to install a thermostat?
Most residential thermostat installations are safe for DIY if you follow safety steps and use proper wiring. Complex systems or unfamiliar wiring may require a licensed professional.
Most homeowners can install a thermostat themselves if they follow safety steps, but call a professional for complex systems.
Do I need a C-wire for my thermostat?
Many smart thermostats require a C-wire for consistent power. If your current wiring lacks C, you can use a common adaptor or select a model that works on power stealing, depending on the HVAC system.
A C-wire is common for smart thermostats; if you lack one, consider adapters or a model that supports power stealing.
Will installing a thermostat save money?
Yes, particularly when you enable scheduling and occupancy-based features. Savings vary by climate, usage patterns, and how well the device is configured.
Smart thermostats can reduce energy use when properly configured, though savings depend on climate and habits.
Can I install a programmable thermostat myself?
Yes, many programmable thermostats are designed for DIY installation. Follow the wiring diagram closely, verify compatibility, and use labels/photos to map connections.
Yes, many programmable thermostats are DIY-friendly if you follow the wiring diagram carefully.
What should I do if I have a heat pump?
Heat pump systems use specialized terminals (like O/B). Ensure the thermostat supports heat pumps and map O/B correctly to avoid reversing valve issues.
Heat pumps need correct O/B wiring; verify thermostat compatibility with your system.
What if my wires don’t match the new thermostat terminals?
Reconnect by referencing the old wiring labels and the new thermostat’s terminal diagram. If a wire has no corresponding terminal, it may be unused and can be capped safely.
If wires don’t line up, revert to the labeling you made and consult the manual for the right terminal mapping.
Watch Video
What to Remember
- Identify your HVAC type before choosing a thermostat.
- Label wires and photograph connections for reliable mapping.
- Power down before handling wiring to avoid shocks.
- Test both heat and cool cycles after installation.
- Thermostat Care recommends documenting your setup for future maintenance.