New Thermostat Installation: A Practical Home Guide
A comprehensive, safety-first guide to installing a new thermostat. Learn compatibility checks, wiring basics, mounting tips, and testing to ensure reliable comfort and energy savings.

This guide will help you install a new thermostat safely and accurately. You’ll verify compatibility, power down the HVAC system, connect wires, mount the unit, and test the setup. The process is presented as clear steps with practical tips to avoid common mistakes and ensure reliable comfort control in your home.
Why a Proper Installation Matters
A new thermostat installation sets the foundation for accurate readings, comfortable climate control, and energy efficiency. When a thermostat is not installed correctly, you may experience temperature swings, delayed responses, and inefficient operation. A precise setup reduces these problems and helps your equipment run as designed. For new thermostat installation, the goal is to create a stable, accurate control interface and a clean, durable wall mount that lasts for years. The Thermostat Care team emphasizes careful planning, correct wiring, and proper mounting to prevent common issues and ensure long-term reliability. Taking a methodical approach now yields fewer service calls, better comfort, and real energy savings over time.
Compatibility Checks and Preparation
Before touching any wires, confirm that the thermostat will work with your specific HVAC system. Identify whether your system is a conventional forced-air furnace, a heat pump, or something more specialized, and note the voltage (most home thermostats use 24V AC). Check whether your existing wiring includes a C-wire for power and whether the thermostat supports the number of stages your system requires. Read the thermostat's documentation and the furnace/air handler label to verify compatibility. If you plan to use smart features, confirm Wi-Fi requirements and whether you need a bridge or hub. The Thermostat Care analysis, 2026, shows that compatibility checks are commonly overlooked, leading to misconfigurations. To avoid this, inventory components, photograph wiring, and decide in advance which model maps cleanly to your terminals.
Safety First: Power Down and Handling
Electrical work around HVAC equipment can be hazardous. Start by powering down the thermostat circuit at the main breaker, then shut off the corresponding HVAC disconnect near the outdoor unit or air handler. If you’re unsure which breaker controls the thermostat, turn off power at the service panel and test for voltage with a non-contact tester before touching any wires. Use insulated tools and keep a clear workspace. Do not rely on guesswork when you see unfamiliar wire colors or unusual terminals. After disconnecting power, pause to confirm that no voltage remains on the conductors you’ll handle. This minimizes the risk of electric shock and protects sensitive control electronics.
Wiring Essentials and Configurations
Most residential thermostats use standard low-voltage wires, commonly labeled R, RC, RH, C, W, Y, and G. Before you remove the old thermostat, review the wire colors and terminal markings on both the old device and the new one. If you see separate RC and RH terminals, a jumper is typically not required for single-transformer systems, but some models expect a bridged connection. Label each wire as you disconnect it and note the terminal it came from. When wiring the new unit, follow the manufacturer’s diagram exactly. If your system is a heat pump, you may need O/B for reversing valve control and AUX/E for auxiliary heat. If you don’t have a C-wire, consider a C-wire adapter or a thermostat that can run on power stealing or batteries. The goal is to provide a stable, correctly mapped path for power and signals.
Pro Tip: If you’re unsure about wire colors, take a photo before removing any wires so you can re-create the original configuration if needed.
Mounting, Placement, and Aesthetics
Choose a location that avoids direct sunlight, drafts, and moisture. Install the thermostat on an interior wall at roughly chest height for easy viewing. Keep it away from heat sources like lamps or electronics that could skew readings. Use a level to ensure the base sits evenly, and secure it with the correct mounting screws into a stud if possible. If you’re replacing an existing device, reuse the wall box if it’s in good condition and the depth allows the new mounting plate. For cable routing, use clean, unobstructed paths and label wires to simplify future maintenance. A well-placed thermostat improves both reliability and aesthetics, so plan your layout carefully before drilling or punching new holes.
Programming and Connecting to Smart-Home Systems
Power up the thermostat and follow the on-screen setup wizard. If you’re pairing with Wi-Fi, enter your network credentials, choose a strong password, and set up a basic schedule. Many thermostats offer integration with smart assistants, mobile apps, and energy-tracking features; confirm compatibility and privacy settings before enabling those features. Spend a few minutes customizing daily schedules and temperature holds. If your system supports learning algorithms, check how quickly the device adapts to your routines. Document the thermostat’s location in your smart home app so you can easily manage firmware updates or troubleshooting.
Testing, Validation, and Troubleshooting
With power restored, test basic operations: heat, cool, fan, and auto modes. Observe whether the temperature on the display tracks room temperature within an acceptable margin, typically within a degree or two. Listen for normal system noises and verify that HVAC cycles on and off as expected. If readings are off, re-check wire connections against the thermostat’s labeling. A misrouted wire can cause incorrect heating or cooling signals. For smart thermostats, ensure the device is on the correct Wi-Fi network and that the app shows a healthy connection. Document issues and adjust settings as required for reliable operation.
Common Pitfalls and Quick Fixes
- Failing to verify compatibility before purchase can lead to a nonfunctional system. - Forgetting to label wires causes miswiring and incorrect terminals. - Rushing through the setup and skipping the test cycle can hide problems. - Ignoring power-off procedures risks shock and equipment damage. - Assuming a C-wire exists when it does not—consider adapters or professional wiring. - Mounting without a solid stud or proper wall anchor can lead to loose connections or rattling over time.
What Happens After Installation: Maintenance and Next Steps
After you install, keep the manual handy for future reference and note any firmware updates. Regularly check the display for readability and clean the screen and vents to maintain visibility. Review energy reports and adjust schedules to optimize comfort and savings. Consider a yearly check to ensure continuing compatibility with future smart-home updates and to catch wear or looseness early.
Tools & Materials
- Screwdriver set (Phillips and flathead)(For removing old device and mounting bracket)
- Voltage tester (non-contact or multimeter)(Verify no voltage before handling wires)
- Wire labels or masking tape(Label wires to terminals during removal)
- New thermostat kit (base, wall plate, screws)(What came with the new thermostat)
- Mounting bracket (if not included)(Ensure it fits your wall box depth)
- Wall patch or spackle (if needed)(For cosmetic repairs after removal)
- Level(Keep display straight)
- Non-conductive thermal tape or electrical tape(Insulate exposed conductors if needed)
- Wire stripper/cusher(Prepare ends to accept terminals)
- Pencil or marker(Mark positions and wire mapping)
- C-wire adapter (if needed)(For models without a dedicated C-wire)
- Smartphone or computer(Configure Wi-Fi and app)
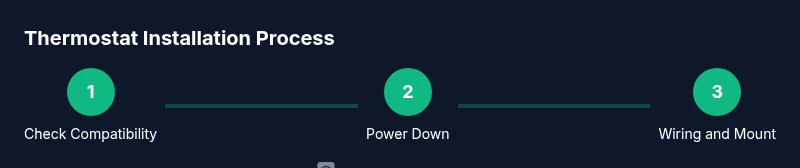
Steps
Estimated time: 60-120 minutes
- 1
Check compatibility and plan layout
Review your HVAC system type and 24V power requirement. Confirm that the chosen thermostat supports your system stages and any features you want, such as smart connectivity or a C-wire compatibility. Plan where the device will mount and which wires will map to which terminals.
Tip: Take a photo of the existing wiring before removing anything to serve as a reference. - 2
Power down the system and verify no voltage
Switch off the thermostat circuit at the main panel and the HVAC disconnect. Use a voltage tester to confirm there is no live current on the wires you’ll touch. This step protects you and the control board from damage.
Tip: Double-check both the breaker and disconnect switch for true de-energization. - 3
Remove the old thermostat and document wires
Gently remove the front panel and backplate. Label each wire with its terminal name and take a clear photo of the wiring. This creates a reliable map for transferring wires to the new thermostat.
Tip: Do not yank wires; loosen screws carefully to prevent strand breakage. - 4
Map wires to destinations and prepare cables
Connect labels to wires and compare with the new thermostat’s wiring diagram. If a C-wire is missing, decide whether to use an adapter or run a new conductor. Trim any frayed strands and ensure clean, unbroken wires.
Tip: If you’re unsure about a wire’s function, pause and re-check the old image before proceeding. - 5
Mount the base and secure the wall box
Attach the mounting plate to the wall box. Use a level to ensure it’s straight, then anchor it to a stud if possible. If you must use a wall anchor, verify the wall type and screw length to avoid loosening over time.
Tip: Check that there are no hidden wires behind the wall before drilling new holes. - 6
Connect wires to the new thermostat terminals
Insert each wire into its corresponding terminal according to the wiring diagram. Tighten screws firmly but avoid over-tightening. If your model requires a jumper between RC and RH, install it as specified.
Tip: Keep wire lengths short and neat to reduce stress on terminals. - 7
Attach the front plate and restore power
Snap or screw on the thermostat’s faceplate. Restore power at the breaker and follow the on-screen setup. If the device prompts for a C-wire, confirm it’s connected or use an adapter.
Tip: Have the thermostat app installed on your phone ready for pairing. - 8
Configure basics and network settings
Enter location, time, and language preferences. Connect to Wi-Fi if your model supports online features, using your 2.4 GHz network. Update firmware if prompted to ensure security and compatibility.
Tip: Use a strong, unique password for the thermostat’s app account. - 9
Run a test cycle and adjust
Set a test heater and cooling call to confirm proper function, and observe the response time and cycling. Adjust wiring or settings if temperatures don’t align with room readings.
Tip: Document final wiring map and note any unusual readings for future reference.
Questions & Answers
Do I need a professional to install a new thermostat?
Many homeowners can install a basic thermostat with 24V systems, but if your wiring is unusual or you lack a C-wire, consider professional help. A pro can ensure compatibility and prevent costly mistakes.
If your system uses standard 24-volt wiring, you can DIY. For heat pumps, two-stage systems, or uncertain wiring, a professional is advised.
How do I know my thermostat is compatible with my HVAC system?
Check your HVAC type, voltage (usually 24V), and the number of stages. Verify that the thermostat supports these features in its documentation, and cross-check labels on the furnace or air handler.
Look at the furnace label and the thermostat manual to confirm compatibility with your system.
What if I don’t have a C-wire?
Use a C-wire adapter or choose a thermostat that can operate on power stealing or batteries. If you want reliable power, running a dedicated C-wire by a professional is the best long-term solution.
A C-wire adapter can work, but you may want to run a dedicated C-wire for stability.
Can I install a thermostat while the air handler is powered?
No. Always power down at the breaker and the HVAC disconnect first. Working with live wiring risks electric shock and damage to components.
Shut everything off and verify de-energization before you start.
Why won’t my thermostat connect to Wi-Fi after installation?
Check that you are using a 2.4 GHz network if required, confirm the password, and ensure firmware updates. Restarting the router and the thermostat can resolve many connection problems.
Make sure you’re on the right network and password is correct, then retry the connection.
How long does installation usually take?
Typical installs take about an hour or two, depending on system complexity. If you encounter unusual wiring or multi-stage HVAC, plan for more time and care.
Most people finish in about an hour or two, but complex systems take longer.
Watch Video
What to Remember
- Verify compatibility before purchasing a thermostat.
- Label wires and map terminals to avoid miswiring.
- Power down fully and test after installation to ensure safe operation.
- Plane for Wi-Fi setup if using a smart thermostat.